Friday, December 30, 2011

Goals for 2012....Bo Bunny!

I'm notorious for trying to remember my schedules instead of taking the time to write them down.  I haven't missed a deadline yet, but I've come to close for comfort lately!   So when Bo Bunny asked the design team girls to do a layout about our goals for 2012, at the top of my list I had to put make WRITTEN schedules! lol!  Among some of the other things I listed was to make more time for family and perhaps take some long weekends.  We let our past summer go being too busy with work to take some time off and enjoy the beautiful weather, this year I want that to change.   I used the Bo Bunny Welcome Home collection to make up this page.  Here are a few close-ups of the page...


The large white bloom is one from the Bo Bunny Olivia collection, I used a little bit of green ink on the end of a Q-tip to tint the center of the flower.
Supplies:
Patterned Paper: Welcome Home; Porch Swing, WH Dot, WH Dreams, WH Keys
Cardstock: Double dot Clover
Chipboard: Welcome Home, Et Cetera
Trinkets: Welcome Home
Blooms: Oliva (tinted with green ink in the center)
Stickers: Welcome Home Combo Stickers
Bo Bunny buttons
Butterfly: Gabrielle
Hinge: Dusty Attic Designs 

Wednesday, December 28, 2011

Bo Bunny Mini-Albums...Gotta LOVE them!!

I have to admit, even though I have a number of the gorgeous Bo Bunny mini albums in my stash, this is my first time making up my own album with one! I primarily do 12 x 12 layouts but I finally got around to trying out an album! And let me tell you, not only are these pre-designed albums beautiful to look at even before you begin embellishing it to make it your own....but they are so easy to work with!

I decided to use the Timepiece mini album for my first crack at this. Here is a little behind the scenes as to what is going on at my house at the moment....we are renovating our kitchen, tearing out cabinets and counters, redoing floors..so you can imagine the mess I'm in at the moment. So how can I manage a mini-album in the middle of all this?.....Easy! The pre-printed backgrounds on the Bo Bunny mini albums make it a snap! Seriously! I started yesterday evening around 4:00 PM and was done the whole thing by 11:00 PM! What really helps is to have a few of the coordinating papers and embellishments on hand. Then it's just a little bit of cutting and glueing and you've got yourself a wonderful album! Here is a pic of my 'Family' album with the cover straight on view....
I began by adding the chipborad title to the first layer of the album, then I added some blooms on the transparent clock design that goes on top of the front piece. Here is a photo of the first two pieces...

Then I simply took each page, added a little patterned paper (TIP: Noteworthy is an excellent package of small die-cut papers that beautifully embellishes the album). Here are the pages I made up showing photos of my parents, my husbands parents, my dear husband & myself, and at the end, I did a 'Then & Now' 2 pager of my daughters...


Supplies:


Timepiece mini-album
Patterned Papers: Timepiece: Numbers, Cut-outs, Dot
6x6 Paper Pad; Timepiece
Chipboard: Timepiece, Et Cetera (Title), Enchanted
Jewels: Timepiece
Trinkets: SnowFall,
Stickers: Timepiece
Noteworthy: Timepiece
Other:  Dusty Attic Chipboard (Chicken Wire, Skeleton Clock frames)

I'm a wee bit late posting this project as I did it for the Bo Bunny blog for the 22nd,  my kitchen makeover has me hopping....but it's getting there...the cabinets are now in and the floors are next! :)

Saturday, December 17, 2011

Websters Pages, Cameo's & Tags (and a link to a freebie)...

I'm just in the middle of a kitchen renovation, but I took a little break to play with my Websters Pages goodies.   I thought it would be fun to play with tags so I made up a tag and did a little step by step that has been posted over at the Websters Pages Blog  if you'd like to have a look.  I then used the tag as an embellishment on a layout.  For the above layout I used the die cut sheet from the Western Romance collection.  I trimmed off a few inches of the left side of the page and moved it to the right side to create the tabs for my corset lacing design.  Just add eyelets and lace-up.  Here are a few close-ups of the page....

I used the Websters Pages Silhouettes (Cameo) to dress up the tag, along with some of the beautiful trims that go with the Winter Fairytale collection (lace & feather trim).  The Cameo is mounted on one of the wonderful new Cameo Sliders by Dusty Attic

The blooms are from Michaels Craft Store from their store brand blooms. The pearl strand I bought off the roll from a local fabric store.  The corner chip board embellishment is another piece from Dusty Attic from the Sweet Pea frame collection (below)
If you'd like to check out my little step by step on how to make the tag and see what beautiful FREEBIE Websters Pages is giving out (shown below) be sure to check out this link Websters Pages Blog


Friday, December 9, 2011

Bo Bunny's Layout Challenge! ~ CIRCLES!

My fellow team-mate and dear friend Mireille Divjak got to choose the challenge for the layout challenge this month and her pick was to use circles in your design!  I wanted to use some of the new collections so I went with the new 'Enchanted' collection from Bo Bunny (I love this collection because it is like an open canvas, ready for paints, inks and other mediums to dress them up!)....but for me, when I think circles, I think of 'Timepiece', so I combined these collections for this layout. 

And speaking of timepiece, I immediately thought of the Dusty Attic's Skeleton clock frames to embellish this page (another circle design!).  I took this photo of Chloe when we were at a local Apple festival last month, we were relaxing, taking a break and just watching the crowds walk by.  I see this photo and realize how quickly my little girl is becoming a young lady, I can't believe she is 13 already....where did the years go?
Here are a few close-ups of my page...
The large pink bloom is just a flower from an inexpensive hairband.  The clocks were cut from a Bo Bunny Patterened paper from the Timepiece collection (I just added some Platinum Stickles to dress them up a bit, and attached them with foam pop-dots)
I used a couple of different sizes of the Dusty Attic Skeleton clocks, painted them with some gold paint and dry brushed some turquoise paint on them. 
The pretty black flourish design is from the Bo Bunny 'Enchanted' Chipboard collection. 
TIP:  I like to use these versatile black & white papers in the 'Enchanted' collection by adding just a dash of color (for example using some bright pretty double dot cardstock with the page) ....or like in this case, I used some brown and tan chalk ink to give the page a 'vintage' look.  I added a little mauvey pink chalk ink in a few places coming out behind my photo to add a little more subtle color.  You can adhere the chalk ink with either a make-up sponge for a subtle effect or use the Tim Holtz alcohol ink applicator/and pad to apply the colors (working from the outside edges in).

Bo Bunny Supplies used for this page:
Patterned Paper: Enchanted- Moments, Love; Timpiece-TickToc,
6x6 Paper Pad: Timepiece, Welcome Home
Chipboard: Enchanted
Brads: Timepiece, SnowFall
Jewels: Enchanted
Title Alpha Stickers: SnowFall

Other Supplies:
Dusty Attic Chipboard: Skeleton Clock Faces
Flower: Prima, no-name hairband flower
Stickles: Platinum
Chalk Ink: Studio g, Colorbox
Cheesecloth

Would you like to play along in this challenge?  Scrapping circles is fun!  Scrap a layout with any BO Bunny collection featuring circles and link to this blog post Bo Bunny Layout Challenge by December 21st and you'll be eligable to win a beautiful Bo Bunny prize!

THanks for stopping by again! Love hearing from all of you! xx

Wednesday, December 7, 2011

Exciting News!!! Websters Pages is having a Design Team Search!!!!

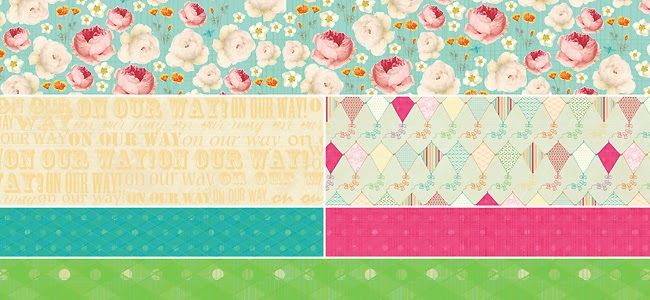
Have you all seen the sneak peeks of Websters Pages newest collection (to be released early January)?  Brandin has been hard at work designing a beautiful collection for a pre CHA release!....
As always, her collections have the gorgeous colors and beautiful botanicals and nostalgic images we've come to know and love in Websters Pages collections.  But now Websters Pages has branched out to include those scrappers that enjoy the 'Clean & Simple' style of scrapping.  Each of the collections will now include a 'B' side that will be a coordinating solid!.....Now WP is no longer just for the fussy/busy style scrappers, ...clean and simple style scrappers will also enjoy these collections!

Here is the exciting part!!  To go along with this new direction, Websters Pages has put a Design Team Call out to those of you who love the Clean & Simple style of scrapping!!  Does Clean & Simple describe your style of scrapping?  Then this is the call for you!!  Take it from me, Websters Pages is a wonderful design team to be on, my past year of being on this team has been such a pleasure!  Our beautiful designer and head of the WP company, Brandin O'Neill, is as sweet as she is gorgeous (and we've all seen pic's of her!....could she be any cuter??  And she's so down to earth too!)  And the rest of the design team is so sweet and supportive of each other, Anabelle the DT leader and Courtney Walsh our marketing guru are all so helpful and kind!

We need a group of designers who know how to make simple shine! If that sounds like you, read on…we’ll tell you how to apply!  Here are the Deets! (details from Brandins blog)

What we’re looking for:

Scrapbookers, papercrafters and card makers who:
1. LOVE Webster’s Pages
2. Will help promote Webster’s Pages through their work, as well as through social media including a personal blog, InspireMe, Facebook & Twitter.
3. Love to share their ideas to help inspire others to create beautiful and simple projects.

International designers are welcome to apply.

Specific requirements and compensation details are provided upon invitation to the team. However we would like to mention that regular creation of projects and online participation are requirements for this team, and compensation is provided through a generous amount of product as well as monetary compensation for hard copy published items and trade show/advertising assignments. The term will be until the end of 2012.

Please note that Webster’s Pages Design Team members will be limited to being on no more than 3 paper manufacturing teams total.

To apply send an email to wpdt@websterspages.com with the following information:

•Provide a one or two paragraph biographical statement telling us a little bit about you and your scrapbook experience including any publication history, design team experience, teaching experience (in stores and/or online), etc.

•Explain in one paragraph why you would be a great addition to the Webster’s Pages design team.

•Include a link to any online galleries you participate on (please include your user name and make sure that online galleries do not have a login requirement) and your blog (if you have one).

•Attach a scan or photograph of 3 layouts or projects that you feel best represent your style. Images must be no larger than 600x600 px. Using Webster’s Pages is always welcome but not required.

•Please include your name, address, phone number and email address. Confirmation emails will NOT be sent. Notifications will be made by email or telephone in January.

•Applications must be received by December 31st.

At Webster’s Pages, we value our Design Team. They are an extension of our family, and we have a very harmonious group. We continue to grow and expand and we’d love to share our excitement with you. If you have any questions on applying, please send an email to wpdt@websterspages.com with subject QUESTION.

We can’t wait to see what you come up with! Good luck and Happy Creating!

Monday, December 5, 2011

Webster's Pages & CardMaps! Plus more Home Decor!

Did you know that the ever popular PageMaps site also does CardMaps?  That was news to me!  How cool is that!  This month, Becky at Page/CardMaps sent each of the Webster's Pages design team girls a card sketch to work with.....here is the one she sent me....
I used Websters Pages Winter Fairytales and Winter Wings papers along with Bloomers (Pink), Winter Trims, WP alpha's and Dazzle Me Gems for this layout.  If you would like to see more of the CardMaps for December along with beautiful cards made with them by my fellow DT members, you can find them HERE.

I made up another fun little project this month using more of the beautiful WP Western Romance papers and a new fun design from Dusty Attic (Devine Diva's) to make up this fun light switch conver....
Here is a quick little step by step on how to make this cover (I took pic's of my project as I went along...

 Cut patterned paper approx. 1/2 inch extra around the switch plate.  (You can find these switch plates at the hardward store for around .19 cents each.)


Now that you've attached your paper cover to your light switch, go ahead and embellish!  The sky's the limit!  Websters Pages has ton's of wonderful coordinating embellishments to to with all of their collections!

And before I sign off for today, I have one more fun FREE goodie to share with you all today!!  A few months back I shared a link with you all for some beautiful digi photo frames that were a free download from the Websters Pages Digi site.....well, they've done it again!  They have come out with a gorgeous collection of tags to download for free at this link FREE HOLIDAY TAGS .....just check out this stunning tag...one of my favourites of the collection!....
Thank-you Webster's Pages for all the beautiful Freebies you keep sharing with us!  I loved the photo frames and these tags are just adorable!  (Just download to your computer and print out on firm cardstock, cut out and use for your gifts!).

LinkWithin

Related Posts with Thumbnails