Pages

Wednesday, January 28, 2015

It's All About Friends! {Dusty Attic and Maja Design}

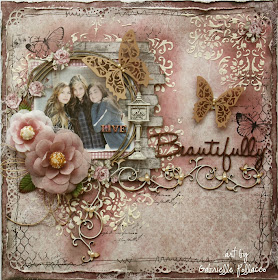
Scrapbook page by Gabrielle Pollacco using Dusty Attic chipboard and Maja Design papers

So today I want to talk with you about friends!  I've made many many online friends over the years, and so many in the scrapbook industry, girls on my design teams, friends on FB, my Youtube subscribers, blog followers and more.  I get lots of emails with questions, kind words on my work and some of you are even so kind as to send me sweet gifts!  On today's layout I used a package of Prima blooms that were sent to me from one of my sweet friends, Kimberly (from Hawaii), thanks so much Kimberly for your thoughtful gift, the blooms were a perfect match to the Maja papers I'm using today!!  So, in the spirit of friendship, I thought I would also make my page about friends as well. This is a pic I took of my 2 daughters with my oldest daughters BFF. They have been friends since they were about 3 years old and are still going strong.

  Nyhavn-P 

For this page I used the cool pinks and deep plum/wine color papers from the NEW Maja Design Limited Edition 'Nyhavn' collection....with a couple bits and pieces of some of the other Maja collections as well.  I love that this collection lends itself to so many different looks!  I used 'Veteran Ships' the deep plum/rose color paper as matting for my background paper which is 'Strolling Along the Canal'.  I did a little inking with Tim Holtz Victorian Velvet distress ink and a little stamping with a Martha Stewart Butterfly stamp and some Bo Bunny 'Distress Textures' and 'It Is Written' stamps.

  Live_Beautifully_Gabrielle_Pollacco_06 

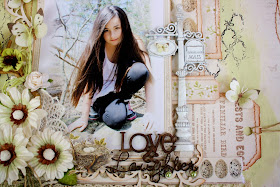
Here is a close-up of the pretty fabric blooms sent to my by my sweet friend.  I used some Tim Holtz Victorian Velvet stain in the centers of these flowers to give them more depth and bring in the rich plum/rose in the background papers.  As and extra accent, I fussy cut some pink roses from the No.VI paper from the Vintage Autumn Basics Collection.

  Live_Beautifully_Gabrielle_Pollacco_04 

After inking I added some texture with some of my home made texture paste and a Prima flourish stencil, which incidentally was also a gift from a sweet friend (thanks Janene!).

  Live_Beautifully_Gabrielle_Pollacco_03

The chipboard pieces are of course, from Dusty Attic, 'Live Beautifully' title, (I just LOVE these new title sets, the script writing adds such a lovely touch to a page), 'Sweet Pea Border' and 'String Frame Set'.

I kept the String Frame chippie natural as I wanted it to resemble hemp twine.  The Sweet Pea Border I painted white with a dusting of brown chalk ink (Ingvild Bolme) and the title chippie, I inked with more of the TH Victorian Velvet ink....for the 'Live' part I added some 'Diamond' Stickles to make the title pop out from the photo more.

  Live_Beautifully_Gabrielle_Pollacco_07

I matted my photo with 'Raspberry Cupcake' paper from the Maja 'Coffee In the Arbour' collection.  And I matted that with another paper from the Nyhvn collection, the one that looks like weathered wood called 'Sitting At the Dock'.

  Live_Beautifully_Gabrielle_Pollacco_05

The metal mailbox is a Prima Shabby Chic trinket, and those intricate looking butterfly embellishments are some pieces I pulled out of some of my old stash from years ago.  They are Tattered Angels Glimmer Glass.  I'd been hoarding those, and then realized, whats the point in having them, if I don't use them! LOL!

Dusty Attic Chipboard used in this Project:
~ Live Beautifully Chipboard Title
~ Sweet Pea Border
~ String Frame Set

Maja Design Products used in this project:  Nyhavn (Strolling Along the Canal, Veteran Ships-bs, Sitting At the Dock), Vintage Autumn Basics (No.VI), Coffee In the Arbor (Raspberry Cupcakes).

Thanks so much for stopping by my blog today, and thank-you to all the dear friends that follow my blog and my work, your kind comments are always appreciated, they make my day! xo

Saturday, January 24, 2015

A Little Winter Scrapping {Bo Bunny - Altitude}

Scrapbook page by Gabrielle Pollacco for the Bo Bunny Design Team using their Altitude collection papers and embellishments

I hope everyone is having a great weekend!  I just thought I'd share my latest page I made using the Bo Bunny Altitude collection!  I took this pic of my oldest daughter when we were up at my brothers lake house, just before she went out with the boys (and her cousin) to do some ice fishing. Me, I'm not so much a cold lover, but I do love warming up with a nice hot cup of coffee or cocoa!

Of course I had to use the Bo Bunny Altitude collection to scrap this photo, it has all the fun 'snowy' elements you'd want to scrap a winter photo! I also used Bo Bunny's stickable stencils to add some color and design to the edges of my background paper.

Scrapbook page by Gabrielle Pollacco for the Bo Bunny Design Team using their Altitude collection papers and embellishments

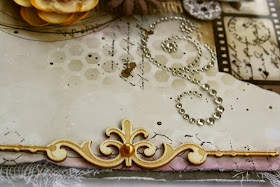
I always love to use the pretty wood embellishments from the Bo Bunny Wood Collection packs.  This one above is from their Ironworks pack.  I added a crystal flourish as well to the photo cluster, I used a lighter color from the Chocolate Jewels.

Scrapbook page by Gabrielle Pollacco for the Bo Bunny Design Team using their Altitude collection papers and embellishments

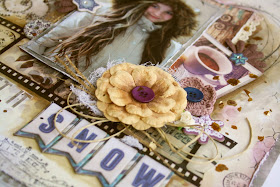
Another fun product Bo Bunny has recently come out with is their Film Strips! Although the Altitude collection has it's own coordinating film strip, I actually chose the film strip from the Rose Cafe collection because the colors were in sepia on that film strip, and I was trying to keep the coloring in the browns and creams.  The blooms are from the BB Natural Earth Floral collections.  And of course the layered chipboard and buttons are coordinating products from the Altitude collection.

Bo Bunny Products used:
Patterned Paper:  Altitude/Rustic, Cozy, Bundled
Layered Chipboard: Altitude
Buttons: Altitude
Film Strip: Rose Cafe
Stencil: Brocade Stickable Stencils
Stamps: Distressed Textures, It Is Written, Prairie Chic, Mama-razzi2
Wood Embellishments: Ironwork
Glimmer Spray: Bronze
Blossoms: Dahlias, Pansies, Zinnias (Natural Earth)
Jewel Flourishes: Chocolate Jewels

I hope you had fun checking out my winter layout and hope you all have some fun scrapping time this weekend!  Thanks so much for stopping by my blog, and for the sweet comments and feedback!


Thursday, January 22, 2015

NEW Kit Page & Video Tutorial {The Scrapbook Diaries!}


Hi everyone! I'm super excited to share with you all the new page-kit I've created for The Scrapbook Diaries!  As always, this page kit comes with a full step by step Video Tutorial to help you re-create this page design!


All the pretty page elements that you see on my page here are included in this kit! Premium products such as Prima Junkyard Findings (the cute mailbox), chipboard title, intricately cut wood accents by Wyncinanka (hard to find!), mixed media products and gorgeous blooms!


Also included in this kit, my own set of stamps!  Here I used the harlequin design from my 'Daisy' set of stamps.  This was a design that I used to doodle by hand onto some of my scrapbook pages.  I recreated the design in stamp form so that it could easily be applied as a background design!


This is my stamp set (also available a la cart at The Scrapbook Diaries).  The daisies are really fun for both card making and scrapbook pages.


Here is another close-up of some of the beautiful decorative elements in the kit, ...I love those intricately cut wood elements!  The kit also includes a lovely Tim Holtz Paint dauber in Bundled Sage.


As always, Janene Meyerowitz (owner of The Scrapbook Diaries) also includes a bonus page that she created with some of the other items in the kit.  I think you are going to love this one too, it is a two photo layout for those of you who have lot's of photos to scrap! Check out her bonus layout HERE.

If you would like to jump in on this one you can find the kit HERE.  As always she offers the kit in a couple of options 'basic kit' and 'complete kit' ...it's her way of helping you to be economical, so that if you already have certain items in your stash you are not doubling up on them. All I can advise, is jump in quickly, the kits do go fast! :)

Thanks so much for stopping by my blog today, I always read and appreciate all your kind comments and feedback! xo

Sunday, January 18, 2015

Some Krafty Cards {Bo Bunny's Star-Crossed Collection}

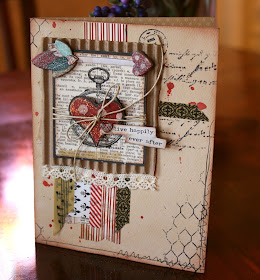
Love Card by Gabrielle Pollacco using Bo Bunny's Star-Crossed paper and embellishment collection

I've been enjoying seeing all the peeks of the new collections and can't wait to get my happy little hands on them!  But in the mean time I thought I'd have some fun with my stash at hand and make up some love cards! I have to say, Bo Bunny's  Star-Crossed paper and embellishments collection has quickly become on of my favorite papers for cardmaking.  I love that the elements work well for both masculine and feminine recipients.

Love Card by Gabrielle Pollacco using Bo Bunny's Star-Crossed paper and embellishment collection

I really love the neutral colors with the deep red in this collection. So for a base I used Bo Bunny's Vintage Decaf paper. I just love using these vintage cardstock papers as the base of my cards.  First I cut out a heart from the cute red and white dot paper, then did a little fussy cutting from the feather paper in the 6x6 paper pad.  I layered in some of the die-cuts from the coordinating Noteworthy pack, added a little hemp twine and some burlap and Presto! my quick little card is ready!

Bo Bunny Products used in this project:
Patterned Paper: Star-Crossed/Vanity, Star-Crossed
6x6 Paper Pad: Star-Crossed
Cardstock: Vintage Decaf
Noteworthy: Star-Crossed
Layered Chipboard: Star-Crossed
Patterned Washi-tape: Kraft Wood

Heart Card by Gabrielle Pollacco using Bo Bunny's Star-Crossed paper and embellishment collection

For my second card I used Almond Dot paper as my base.  I thought I'd do a kind of loose mixed media style card for this one. Lots of stamping with Bo Bunny's Distressed Textures and It Is Written Stamps. I added some paint spatters and some Bo Bunny Washi tape for some vertical interest to the card design.

Heart Card by Gabrielle Pollacco using Bo Bunny's Star-Crossed paper and embellishment collection

I again cut a heart out of the dot paper and added some sheer sparkle glue to give the heart some shimmer. I added a little hemp twine and some coordinating Layered Chipboard, and my 2nd card was complete.

Bo Bunny Products used in this project:
Patterned Paper: Star-Crossed/Vanity, Star-Crossed
Cardstock: Double-Dot Almond
Layered Chipboard: Star-Crossed
Noteworthy: Star-Crossed
Stamps: It Is Written, Distressed Textures
Patterned Washi-tape: Kraft Wood

Thanks so much for stopping by my blog today!  If you haven't seen the peeks at the new Bo Bunny collections that came out at the Winter CHA, you can view them HERE.  I've gotta say 'Garden Journal' and 'Heritage' collections have got me by my heartstrings!  Which are your favourites?

Wednesday, January 14, 2015

Getting My Family Wedding Photos Scrapped {Maja Design & Dusty Attic}

Cherish_Scrapbook_page_Gabrielle_Pollacco_Maja_Design_02   

Hi everyone!  I'm so happy to be sharing with you all my first layout using the NEW Limited Edition 'Nyhavn' collection by Maja Design!  I really love the sunny, pretty colors in this collection, and when I saw the nautical elements in the papers, I knew that I had found the perfect papers to scrap a photo I took of my niece and her hubby.

  Nyhavn-P

 My niece's reception was at a yacht club, and she chose nautical elements for her decor.  Add to that, her wedding colors where orange and blue, two colors that are prevalent in this lovely collection. So this collection was just the ticket to get this photo scrapped!

  Cherish_Scrapbook_page_Gabrielle_Pollacco_Maja_Design_03

I used 'The Sunny Side' paper as my base and dabbed a little Ingvild Bolme chalk inks (Rusty Keys, Vintage Pink) around my photo area and the small cluster in the top right side of the page.  I then added a bit of texture with some home-made texture paste and a few Crafters Workshop Stencils (North Star, Art Is, Time Travel).

  Cherish_Scrapbook_page_Gabrielle_Pollacco_Maja_Design_05 

I mounted this paper on the 'Sitting at the Dock' paper, I also used this paper as the matting behind my photo. I cropped  it to look like uneven pieces of weathered board. All the chipboard I used on this page is from Dusty Attic (Elegant Swirl #3, Elegant Swirl 13, Word Pack #4, Skeleton Clock Frames). I kept the chipboard bare with just touches of grey and white to stay with the weather wood look of the papers. I also did a little bit of stamping with a Graphic45 'By The Sea' stamp set.

  Cherish_Scrapbook_page_Gabrielle_Pollacco_Maja_Design_04   
The lovely pearl/lace strip running down the left side of the page is from Tresors de Luxe,...if you are a person that likes to add fabric elements to your projects, Lucy's etsy shop is a must see!  Her vintage lace, fabric blooms and trinkets are pure elegance! The blooms I used on this page where one of my favorite finds (from a couple years ago) at Michaels, I got a 6 pack of these blossoms for $1.50!!  Sadly most of them were sold out by the time I got to them, but I was happy to get my hands of the few that were there!

I hope you all enjoyed today's project, if you are looking to get yourself some Dusty Attic chipboard, you can either order direct from Dusty Attic (they are having a 20% off sale right now through to the end of the month), or you can find Dusty Attic in the USA at Moments of Tranquility and The Scrapbook Diaries (both online stores also carry Maja Design papers), in Canada at The Scrapping Bug.

Thanks so much for stopping by my blog today, your sweet comments and feedback always make my day! xo

Saturday, January 10, 2015

NEW Video Tutorial: Dusty Attic & Shimmerz Paints Canvas


Hello Dusty Attic Fans!  Gabrielle here with you today! I just got back from a little R and R up at my brother's lake house over the holidays, and got playing with some of my new (and old favorite) Dusty Attic chipboard pieces and a variety of beautiful Shimmerz Paints!  I created a Video Tutorial for this one (see below) so you can follow step by step how this one was made :)


I used the inspiring January Moodboard from Dusty Attic to create my canvas design.  The idea is to use the photo, colors and descriptive words to launch your creativity.  If you would like to play along with us and create a project using the moodboard, be sure to add your link to the right side column at the top of the Dusty Attic blog. The only set rule to play along in this monthly challenge is to use the Moodboard as your inspiration and that you must use Dusty Attic chipboard in your project.  An awesome prize of a $100.00 gift voucher is up for grabs each month! That is a whole lotta gorgeous chippies, who wouldn't want a shopping spree like that!


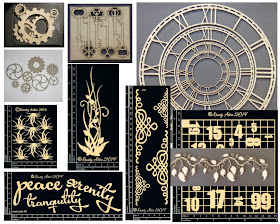
Here is a list of the Dusty Attic chipboard pieces I used for my 'Peace' Mixed Media canvas:

- Number Grid (small)
- Skeleton Clock Frames Set
- Monarch Butterflies
- Vine Borders
- Jumbo Cogs
- Cogs #1
- Mini Cogs
- Sea Gulls
- Swirly Vines #4 Small
- Mini Grasses
- Elegant Swirl #13
- 'Peace' Title Chippie
- Vintage Keys


I carefully chose colors to match the colors in the Dusty Attic Moodboard, and to do that I reached for my beautiful Shimmerz Paints!  Here are the Shimmerz Paint colors I chose to create the canvas design:

SHIMMERZ PAINTS:
- Tuscan Sun Sprtiz
- Don't Be Suede Coloringz
- Heidi Ho Blue Coloringz
- A Shade of Grey Coloringz
- Moody Mauve Coloringz
- Spiced Cider Blingz
- Good As Gold Inklingz
- Blue My Mind Inklingz
- Gosh Garnet Inklingz

So now, grab yourself a cup of coffee/or tea,....I've created a Video Tutorial so you can watch step by step how I made this mixed media canvas design...Enjoy!...


I hope you enjoyed watching my video tutorial.  It's always fun to create a mixed media project with Dusty Attic chipboard!  I chose nature elements like butterflies, birds, grasses and vines to reflect the tranquil, peaceful feeling the moodboard created for me.  Here are a few close-ups of the project...


I always love to combine mechanical elements like clocks and cogs with nature elements like butterflies, vines and birds.


Here you can see a close-up of some of the textures and colors that I added to the project.


Adding adhesive gems is a fun way of adding a new dimension to your chipboard pieces.


And finally a full front view of the canvas design.  I hope I've inspired you to give a mixed media canvas a try!  

.....AND....Dusty Attic has great news this month!  If you didn't already know, Dusty Attic now has a new Website, where both Retail and Wholesale orders can be put in!  That's right, you can now order directly from Dusty Attic.  And to start everyone off with a great new year, Jennifer Hedger has a Special for the month of January!  20% Off all Wholesale AND Retail orders!  Just use the coupon code: happy 2015
and you will receive 20% off your whole order!

ALSO...

If you are looking to stock up on some of those gorgeous Shimmerz Spritz's and Inklingz I used on this project (or some other colors you've been wanting to purchase), you can order Shimmerz Paints online directly from their Store HERE.  NOTE:  You can receive a FREE/Bonus Shimmerz Paint product in the color of your choice on your next order of Shimmerz paints by mentioning my name in the 'Instructions to Merchant/seller' part of your order!

Thanks so much for stopping by my blog today!  I hope I will continue to keep you inspired this year!  Your kind words and feedback always make my day! xo


Metal and Glass OTP Project {Bo Bunny Pearlescents and Jewels}


Hi all! Here is my first project for 2015!  This one was so fun and easy! ....Years ago I was shopping in a cute little art boutique and saw some lovely metal/glass art.  I wanted to create a similar look (for a LOT less money, LOL) so I used some 3D bronze paint on some inexpensive dollar store shot glasses....this was the result....


I wasn't sure how well these would hold up, but after more than 15 years, they have held up very well!  I use mild dish soap and warm water to wash them up (don't put in dishwasher).   So, when I was playing with some of the NEW Bo Bunny Pearlescents they other day, it occurred to me that the Bronze Pearlescents would work nicely for a OTP project using another glass design.


Basically you only need 3 things for this project....The Bronze tube of Bo Bunny Pearlescents, your favorite color of the Bo Bunny Jewel packets and an inexpensive glass vase to decorate.


My first step was to apply some long squiggly lines to create the basic shape of my Infinity Tree.  I did a few branches and then let the paint set for 10 minutes or so.  Then I would begin layering on more branches and thickened out the trunk as well.  If you are overlapping some areas, like the trunk, try to wait a few minutes between applications so that the paint doesn't meld into the bottom layer.  This way you get nice distinct lines and good definition.


When I was almost done adding branches, I started applying some of my jewels....here I used the Bo Bunny 'Aqua' Jewels packet.  I love the way aqua looks with bronze!


Here's a close-up of the tree design.  I finished the design by carrying the branches all the way around the back, linking to each other, creating an infinity design.


Finally, I added some extra gems to decorate the neck of the bottle as well as the cork stopper, easily done with the jewel strips in the BB Jewel packet. Easy-peasy!  

I hope you enjoyed todays OTP (off the page) project and will give this technique a try in your own projects!  Thanks so much for stopping by my blog today! Your kind comments and feedback are much appreciated! xo