Monday, April 5, 2010

Coming up in Stitches!! April Kits! From My Creative Scrapbook!


This months kits from My Creative Scrapbook are just so beautiful! The above layout is one I made with the Main kit which features the gorgeous new papers from Webster's Pages (2 of each paper) recently released at the Winter CHA. And as always the kit is packed with beautifully coordinating embellishments. The above photos are more of the cute photo's that my nephew and his wife had professionally done of their newborn baby girl Kiera. The photos were taken by Stephanie Robins Photography & Design, she does the most amazing pregnancy and newborn photos!

Here are some close-ups of the above layout (I did a small tutorial on how to make the scallop edge/ribbon design in an earlier post, you can find it if you scroll through a couple past posts)....


A second layout I made using this kit is of my oldest daughter Chloe, she turned 12 last month, when I looked at this photo I took of her I couldn't help but reflect on how fast the time has gone by, just another year and she'll be a teenager. I wish I could just slow down time! Here's the l/o with a couple of close-ups....


I had posted an early post of one of my DT pages for the Main kit a couple weeks ago but I'll post it again so you can see the pretty die cut paper included in this kit!

and finally I made up a 4rth page using this pretty kit. I went for a collage style design. I did a whole lot of machine and hand stitching to make up this layout.

TIP: I wanted to get the look of metalic thread stitching on some of the areas but I found it hard to find metalic thread on a spool for my sewing machine. But I think I was able to 'kind of' get the look of metalic thread by simply machine stitching with a regular cotton thread and then lightly going over it with some Stickles (glitter glue).....I recently picked up this colour called Platinum by Stickles, I really like the soft gold/silver effect it gives. Here are some close-ups (the pink papers had the metalic looking stitchwork)...


Moving on to the next kit....wait until you see the goodies in the LE (Limited Edtion) kit for April from My Creative Scrapbook! The rich gorgeous papers and the embellishments!! Awesome fabric blooms and loads of jewel-toned blooms included in this kit, ...glitter borders and pleated twill ribbon and I just totally LOVED the chipboard alpha's in the houndstooth design by Pink Paislee!! Here is a l/o I made using the beautiful goodies in this kit! There is a cute die-cut paper in this kit ( simply did a little machine stitching on the edges)....and I'm just crazy for those Prima 'Calcutta' blooms, I think they give a bit of a vintage feel to a page.....

The smaller white blooms com in a pack of 6 and I just tinted 3 of them with a little bit of watercolour paint in their centers to make them work for this l/o......


A second l/o I made with this kit I was going for a very light feminine look to go with the soft pretty lighting in this photo of my youngest daughter Meagan. So I chose the white/blue polka-dot paper and just added some punches of colour with the rich magenta colour blooms. Love that clock transparency included in the kit (be sure to see all the DT l/o's at the MCS DT gallery there are so many beautiful designs!).....

I hand-cut the flourish designs in the patterned papers to add a little extra design elements to the l/o and some really cute leaves included in the kit (the word 'kissed' was cut from black carstock with my Quickutz Revolution, the font I used is called Washington), here are some close-ups....


And finally a 3rd l/o I made with the April LE kit, I'd been meaning to scrap this photo for years! It was a pic of Chloe at a party at her cousin's house where she was making a keepsake box. She's wearing a bathing suit with a blue/white houndstooth design on it, exactly like the papers in this kit! So I finally got the perfect papers to scrap this one!....

Again, I did some hand-cutting of the red/flourish paper for a design element on this page... Love those Prima burlap flowers!...here are some close-ups...


I made 3 layouts for the LE kit but had I had extra time this month I could've made so much more...I've still got so much beautiful product left from this kit! I for sure will be pulling out the leftovers to do some more with them!

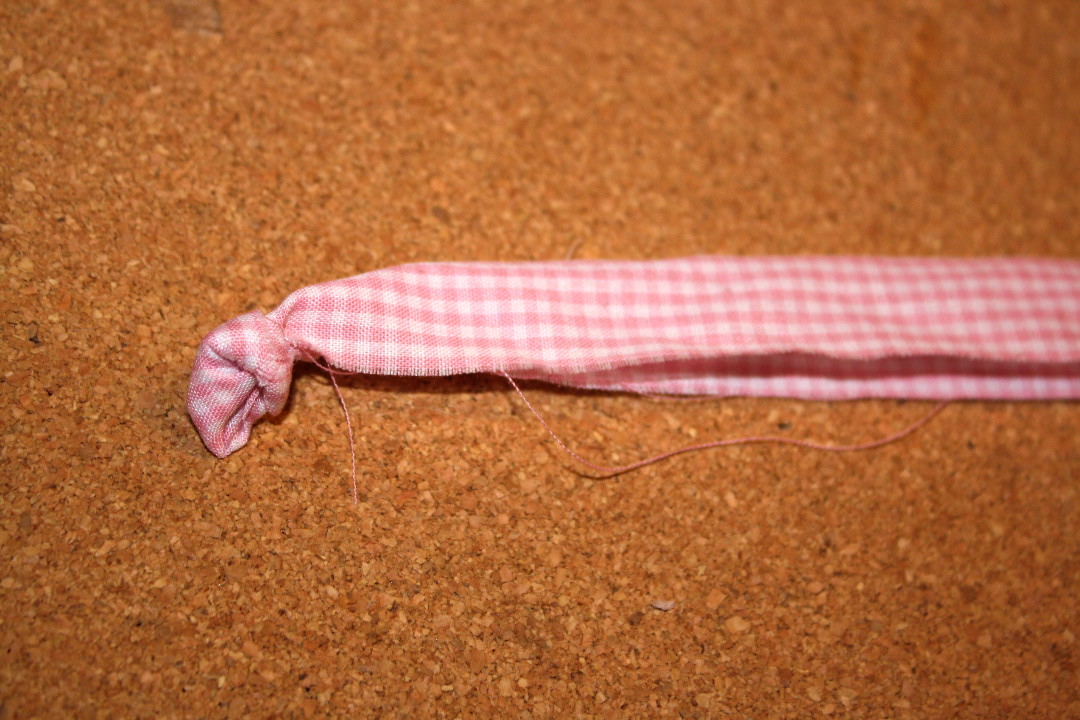
This months Album kit was a source of so much fun and creativity for the design team this month! Included in this kit was a generous swatch of a pink/white gingham fabric and we all enjoyed seeing what new and interesting things we could make with it! I got another photo of my nephew's oldest little girl (now just over a year old) and I loved the almost vintage look of the photo again done by Stephanie Robins Photography & Design. I thought the papers and embellishments needed to have a homespun look to it. So I made these gingham blooms from strips of the fabric and also cut out a heart design and stitched it to a piece of cardstock with a bit of tufting between the layers. See the post below this one for instructions on how to make the Twisted Fabric blooms .........

Here are some close-up photos of the blooms and other design elements I included on this page (I again did a whole lotta machine stitching to give the page an 'old-time' look to it)....


I made a second l/o with the Album kit using the green/brown colours in it. I again did a lot of machine stitching for the design elements on this page. I had a book from the library on working with fabrics and I saw this cut heart design except in my case I used the design on paper.....

I used the Torn Paper Flower tutorial I shared with you all in an earlier post below to make the blooms for this page except I incorporated some cream colour blooms in with it. I used two different tones of chocolate coloured cardstock to make these and I have to say the finished blooms reminded me of the chocolate curls you see on a cake! LOL!...not good when your scrapping reminds you of food! Here are a couple of close-ups.....


And finally we come around to the April Creative kit from My Creative Scrapbook. This one was definitely a colourful and spring inspired kit! Lot's of fun summery colours and pretty blooms in it! I only had enough time left over this month to get one l/o done with it, I chose some of the more subtle colours to make up this l/o......

There is a transparency overlay that comes with this kit, I used it over a couple layers of paper here. The tan colour paper is actually just some cardstock that I did a little dry brushing on with some white paint and then randomly stamped with a 'script' stamp. I then cut out some diamond shapes from the background patterned paper and machine stitched it overtop of the whole lot. I frayed some green polka-dot ribbon to frame my photo and added some of the blooms in the kit to the outer edges of the page to finish it off....here are some close-ups....


I know this has been a huge post and all I can say is thank-you for reading all the way through my long-winded post and hope that I was able to share some fun tips with you all!! If you liked what you've seen here you really must come have a look at the Design Team Gallery for this month at My Creative Scrapbook, the rest of the design team girlies have made up amazing and inspiring pages with these kits!

Thanks for having a peek!

~Gabrielle xxx

Sunday, April 4, 2010

Twisted Fabric Blooms (Tutorial)


It's almost reveal day!! But before I show you all the wonderful new kits out for April at My Creative Scrapbook this month (and my DT work with them) I thought I'd give you a little sneak peek at some blooms I made using some items in the kits.

This month the Album kit had this cute swatch of pink/white gingham fabric in it and the design team had so much fun creating things with the fabric! For one of my layouts I made Twisted Fabric roses. I used 2 different methods, the first one comes out a fair bit flatter for those of you who prefer less bulky items on your pages. The second one has a slightly more full finish but has a lovely luxurious look to it. Here are the steps to making the blooms you see in the above photo.....

Method I

1. Begin by cutting a long strip of the fabric, approx. 1/2 inch wide. Cut a piece of cardstock out (just slightly larger than you'd like your finished flower to be). Tie a knot in the end of your fabric strip. Don't worry about fraying edges, it adds a lovely homespun look to the bloom. Hot glue your knot to the middle of your carstock circle.

2. Start winding the strip around in a circle, twisting the fabric as you go. If you are using the type of hot glue that doesn't dry to quickly you can lay a larger circle of glue down and attach as you go.


3. Keep winding it on until you've got the size of rose you are looking for. You may need to add an extra strip or 2 if you want a larger rose. At the end simply trim away excess cardstock around the edges. You can leave it the way it is or finish it as I did with a decorative button (above).

Method II

1. Begin by cutting a 1 and a half inch strip (the fabric I used was about 18" long) of fabric. Fold the fabric in half (good side out). It helps to iron the fabric so it holds as you twist. TIP: If you are like me and don't want to pull your iron and ironing board out for a small project, try using your hair flattening iron (if you have one) to put a nice sharp fold in it. (see photo below)......tie a knot in one end.


2. Now just begin bringing the fabric aroung the knot twisting the fabric up as you go.


3. It takes a little practice and you can add small dabs of glue as you go to secure the bloom.


4. I used to strips to create this flower. At the end just tuck the last bit underneath. I like to lay down a circle of hot glue on a piece of cardstock at the end and plunk my bloom down on it. I feel like this better secures the whole thing and makes it easy to attach it to a page. Just trim around the edge when it dries.


Have fun with these techniques and try out different types of fabrics and colours, the blooms you can up with are endless! Try spritzing with some shimmer spray like Tattered Angels Glimmer mist....or adding some Stickles glitter glue for a pretty finish!

Don't forget to come back tomorrow for the reveal of all the new kits for April from My Creative Scrapbook....you'll be able to see the above finished page!

Thanks for having a peek!

~Gabrielle xxx

Thursday, April 1, 2010

Thanks to some good friends!


I'm not sure I mentioned this in any of my past posts but earlier this month I found out I made the Top 20 pick for the Graphic45 design team. We were asked to send in a l/o or project that reflected our style. I ran into a bit of a problem in that I couldn't find any Graphic45 product at any of the local stores in the area! and I had to get my project sent off to them asap as it had to get from Canada to the US (postal service is crazy between the borders!) in record time. Well, so many of you came forward and offered to share you product with me so I could meet this deadline!! I ended up actually finding a store in Toronto (about a 3 hour drive back and forth) that had some of the new G45 product and was able to pull off the l/o above and get it sent off in time.

Well, I didn't make the final cut, and I suppose in a way I didn't deserve it as I only now remembered to check the G45 blog to see the announcement! LOL!!.....I guess I was meant to jump out of bed this morning to check the site! and here I am at 4:00 in the afternoon only now remembering to check if I made it! So big congrats! to the ladies that made it! I'm looking forward to seeing their creations over the coming year.

But one thing I did learn from this experiance is how many wonderful friends I have out there!! The outpouring support and offers to share their products so that I could meet the deadline was overwhelming! Most of you I have never even met in person and yet you've all been so kind and wonderful! So I want to say a big THANK-YOU to all my dear friends out there!! xx

Here are a couple of close-up pic's and a small tutorial on how I make the scallop edges with the woven ribbon in it on my l/o's (I often get little PM's asking me about this, so here it is).....

1. First off I have to say that I like to save interesting shapes as templates to scrapbook with on future products. So when I picked up a package of Bazzill 'Just the Edge' paper cuts, I saved one of each design to use on my l/o's as a template. I just simply trace out the design on a piece of patterned paper and cut out. You can also treat the edges of the cut out paper at this point, I like to lightly ink with a bit of chalk ink, and sometimes lightly distress the edge with a scissor.

2. Second step is to use a hole punch an punch out two holes at the top point of each scallop leaving only a small space between the punches.


3. The next step is to simply run the ribbon through the holes and secure the two edges of the ribbon underneath the patterned paper with some adhesive. You can at this point glue it down 'as is' to your project or you can mat it with some cardstock.


Here is a close-up pic of the finished border, along with a couple more close-ups of the finished page...


Thanks for having a peek!!

~Gabrielle xxx

Thursday, March 25, 2010

My First Project for the Dusty Attic Design Team!


As soon as my nephew showed me these photos of his newborn baby daughter Kiera, I knew which papers I would have to scrap this pic and which embellishments I would wait on. I recently mentioned on one of my posts that I'm now on the design team for Dusty Attic (they make beautiful laser-cut embellishments).....well, yesterday I received my package of goodies from them so I could start creating! It was mind-boggling opening that box and finding all these beautiful intricately cut treasures! I went out and picked up the new paper collection by BasicGrey called Kioshi (soon as I saw these presented for the winter CHA I knew these were going to be the papers I wanted to scrap this photo with)

Isn't she adorable? Those cute little lips! I wanted this page to have a very whimsical fairytail look to it so the laser cut flourish from Dusty Attic was the choice I made for this one (the pretty title cut is also from Dusty Attic) For the chipboard I painted it with white paint, tinted the edges a bit with some green and brown chalk ink and then coated the whole thing with some diamond Stickles. Here are a few close-up pic's...


I can't wait to get scrapping with more of the lovely pieces they sent me! If you are interested in checking out the Dusty Attic products you can find them HERE . The photo is a professional shot taken by Stephanie Robins Photography

Thanks for having a peek!

Gabrielle xxx

LinkWithin

Related Posts with Thumbnails