Wednesday, April 30, 2014

Mixing and Matching Collections {Bo Bunny Primrose and The Avenues}


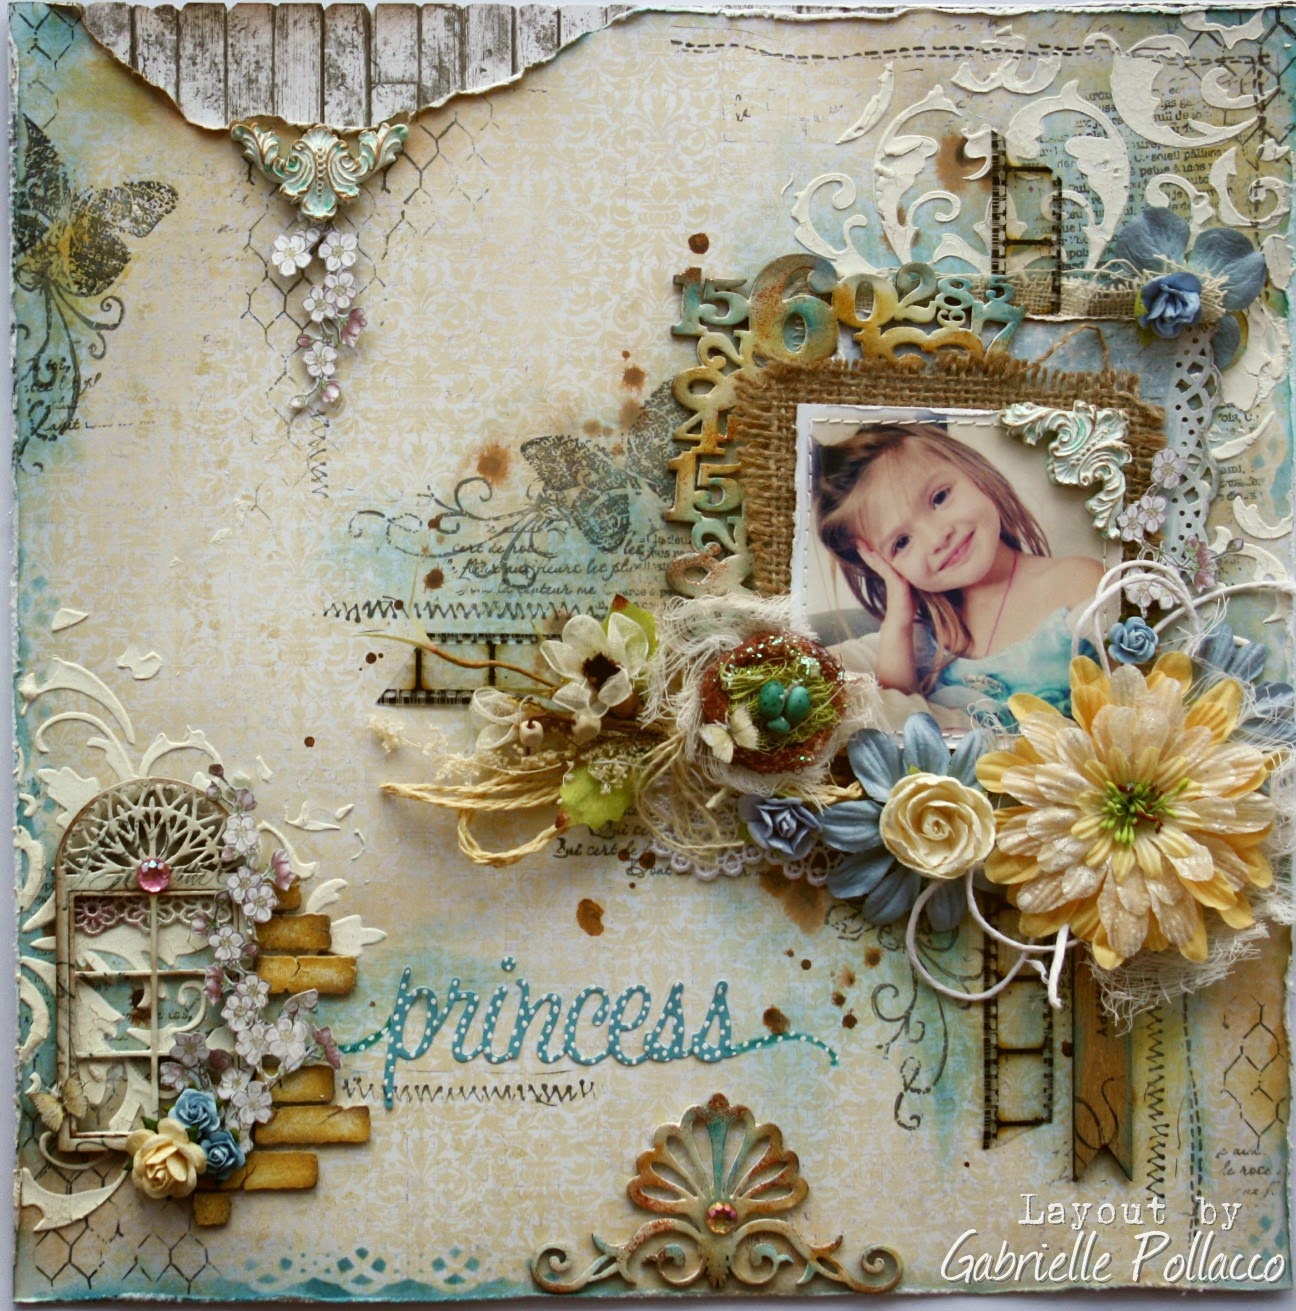
I have this photo that was taken of me and my little great-niece Kiera that I've been meaning to scrap for some time now.  I wanted the page to be soft and feminine with a feeling of 'home' about it.  For the soft and femine, I reached for the Primrose collection and for the home elements I chose to add in papers from The Avenues collection.  I love the way pink looks with gold, so I chose the gold zig-zag paper from The Avenues collection as the matting for my background paper, and then I cut a pretty window/door design and clock from some of the other Avenues papers to add a 'homey' feel to the page. 

 
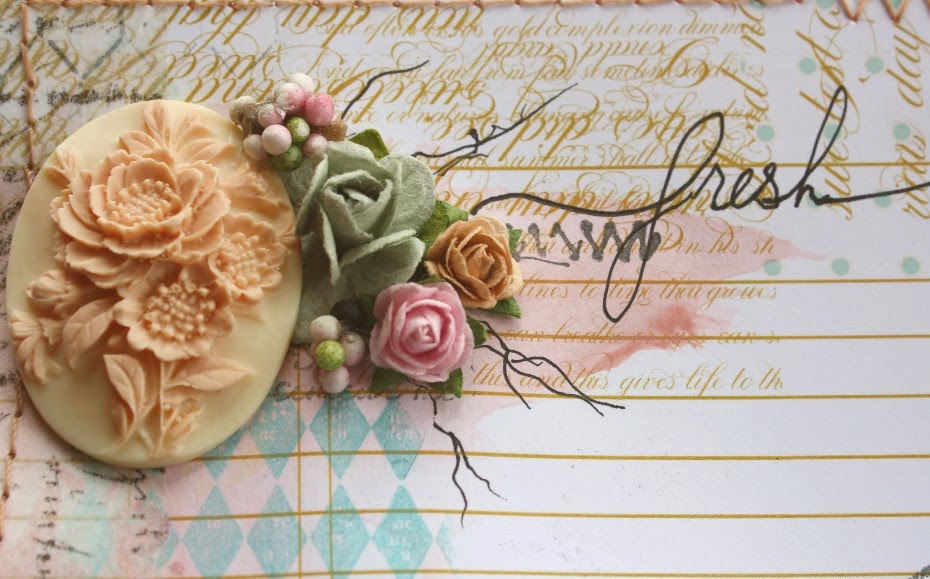
I love how the flowers from the Bo Bunny Clover Dahlia's pack goes with the Primrose papers!  And that fabric bloom with the pretty button has to be among my most favorite blooms ever!  As I was creating my floral cluster I added some cheese-cloth bits to give a more tattered look and finished it with the cute wood washer from the Primrose Button collection.

 
For my title I used one of the ornate chipboard pieces from the Primrose 12x12 chipboard and added a few of the little banners underneath.  I really love the 'Garden' paper for the beautiful and intricate labels on the back.  Not only are they great for titles but the ornate designs can be cut and used as page accents in areas where you want to add a little more interest to the page (I did this on the left and right sides of the pink pink dot paper).

 
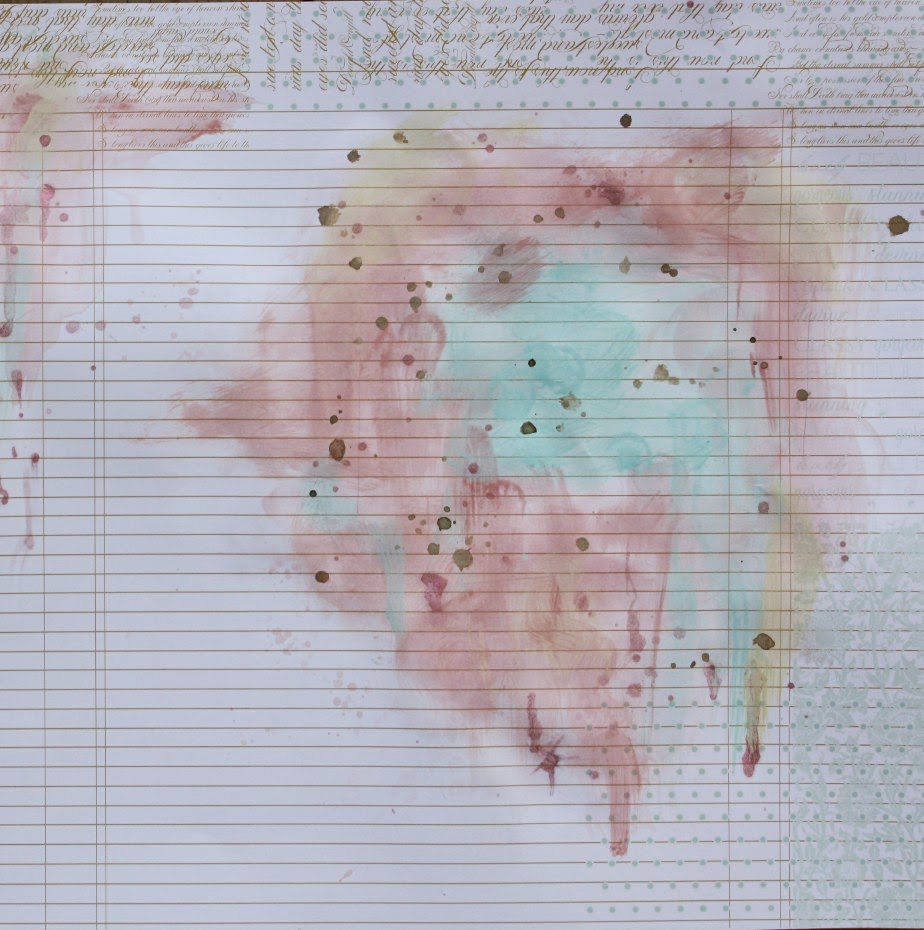
As always I LOVE to use the butterfly paper for fussy cutting and adding whimsical accents to the page.   I also did a bit of inking and stamping in the corners of my page, using the Bo Bunny 'It is Written Stamp', I then layered on a flourish design with a stencil and home made texture paste.
 
Bo Bunny Supplies:
 
Patterned Paper:  Stripe, Clocks, Doors/The Avenues;  Cottage, Garden, Bliss, Dot/Primrose
12x12 Chipboard: Primrose
Buttons: Primrose
Trinkets: Modern Miss
Blossoms: Dahlia/Clover
Jewels: Primrose
Washi Tape: Primrose
Stamps: It Is Written (Large Stamps)
Other:  Tim Holtz Victorian Velvet Distress Paint, Prima Flourish Stencil, Home-made texture paste ( you can find the recipe HERE), the small bud clusters where from some old silk blooms. 
 
Thanks so much for stopping by my blog today, I so much appreciate all the sweet comments, I read them all and answer them as well! xo
 

Friday, April 25, 2014

Spring is in the Air {Mixed Media with Websters Pages}

 
I know you've heard me moaning about the winter a lot on this blog (it has been one of the worst Canadian winters in a long time!), so I am totally in the mood for Spring scrapping when we get the slightest hint of Spring around here.  For me, Spring is in the air when you see people starting to hang their laundry on their clothes lines outside.  And for me it also evokes a warm happy feeling, reminding me of my Mom.  She has always been one for hanging the clothes on the line outside, which always left our clothes having this wonderful clean, fresh scent.

 
I used the Websters Pages 'Growing Up Girl' collection to create this mixed media style page.  I thought I would show a couple of step out photo's to show how I layer my mixed media pages.  For the base I used the 'Accept the Challenge' paper from the Growing Up Girl collection.  I used a mixture of Distress Paints from Tim Holtz (Victorian Velvet, Tumbled Glass and Antique Linen) mixed with water for my color mixture.  I used some Lindy's 'Treasure Island Aqua' spray to add splatters to the page (these are really cool IRL, they have a lovely aqua shimmer).

 
I gathered up a whole bunch of random stamps to create a background design over the color tints.  I used a variety of old and new stamps I have from Websters Pages (Dream Big, Beauty, Girl Land Diamond Tag stamp and the Love collection pack).  I also used some Bo Bunny 'It is Written' and Texture stamps.  I also used some strips of black and white washi tapes to all some more designs to the page.

 
I used some color chalk inks to the diamond stamp pad to add little bits of aqua to this page.  The cameo is a Websters Pages accent from an older collection (Family Traditions). 

 
I like to layer fussy cut flowers from the Websters Pages patterned paper with fabric blooms (Prima - Something Blue 'Veil', Meadow roses) and some natural elements like twine and burlap.  The little bud clusters are centers from some silk floral arrangements that were getting old and I was going to toss in the garbage until I realized I could use those centers on my page designs (see, you always have to have scrapbook ideas running in the back of your mind LOL).

Webster's Pages Products used on this page:
Patterned Paper - Growing Up Girl (Accept the Challenge, Honor Yourself, Express Yourself, Dress to Impress, Embrace Life).
Perfect Accents (Cameo)
Arrow Paper Clips
Stamps: WP and Unity Stamps (Love, Dream Big, Beauty, Girl Land Diamond Tag stamp). 
Girl Land alphabet stickers

Dusty Attic Chipboard:
"Chicken Wire Panel", "Mini Hangers", "Corner Flourish #4"

Thanks so much for stopping by my blog today!  I hope I've inspired you to do a little 'Spring' scrapping of your own!xo

Wednesday, April 23, 2014

Scrapping Sweet Babies {Maja Design}


I'm so happy to share with you today a layout I made for my beautiful friend and our design team leader Jenny Grotherus. She had a beautiful baby boy this past year and was kind enough to share some sweet sweet photos of her baby with me. He is so adorable, it was hard to pick just one photo to scrap....so you just might see some more baby pages coming from me.

Vintage-Springr-Basics-P1

I primarily used the Vintage Spring Basics Collection for this page, layering a variety of the pretty stripe, polka dot and floral patterns behind the photo.


Maja Design has so many lovely shades of blue to choose from, so for this layout I wanted to use the cooler shades of blue with hints of brown/taupe and butter yellow. I used the 'Princess Margareta's Garden-bs' paper as the matting for the main background paper which is a paper from the Vintage Spring Basics collection called '1st of April' (I just thought the sweet little blue & yellow birdie in the corner was a perfect accent for a baby page!). I also fussy cut some of the little dogwood blossom branches from the paper called '6th of April' and used them to dangle from the 'V' tears in the background paper.


I used a mini version of 'Decorative Frame #1' from Dusty Attic to create a corner accent on this page. As most of you know by now, one of my favorite Maja papers is the clock paper from the Vintage Autumn Basics collection (XVI) ...here I cut out one of the clocks and placed it inside the little frame, then coated it with a crackle varnish (Dusty Attic Crackle Varnish) to give it a nice aged look. I also did a bit of stamping (with Bo Bunny 'It is Written Stamp') and inking with Ingvild Bolme's chalk inks (Worn Jeans, Dusty Tote) and went over the designs with some stencils (Crafters Workshop 'Art Is' and 'Mini Well Rounded') and home-made texture paste.

 
I always love to add fabric accents to a baby page, for this one I matted the sweet photo with a scrap of burlap and a snippit of lace from Tresor's de Luxe. I added a strand of pearls to the top of the lace strip.


The main circle frame I used for the photo is from Dusty Attic called 'Decorative Frame #2', which I painted white, chalked with brown ink, stamped with a script stamp and then finished with a crackle medium. I wanted to keep my blooms light and airy so I used some blooms from Prima (Charlotte), Recollections and Dusty Attic (small roses) in light soft shades. The little butterflies are from Petalloo (Darjeeling).

I miss having babies around and so am so happy to have photo's of my friend's babies to scrap. I hope she will enjoy this page as much as I enjoyed creating it.

Maja Design Products: Vintage Spring Basics (1st of April, 6th of April, 5th of April, 4th of April, 4th of April-bs, 7th of April), Sofiero (Princess Margareta's Garden-bs).

Saturday, April 19, 2014

Cardmaking with Bo Bunny's Primrose & Kraft Wood


Hi everyone!  I thought today I would share a couple of cards I recently made with the beautiful Primrose collection and Bo Bunny's fabulous Kraft Wood Shapes. I love how the neutral color of the Kraft Wood works so well with whatever colors you chose to design with.  For this 'blank' card (I sometimes like to leave some cards I create without a sentiment so that I can just add it as I need it), I used a couple of pieces from the New 'Elegant' kraft wood collection. 
 
 
Instead of using the frame design as something to mount my title on, I used it as a base design for my handmade rose bloom (made with Primrose 'Breathtaking' paper and Spellbinder's Rose Creation dies).  I used one of the wood flourish pieces as a design element tucked under the lip of the patterned paper.  I did a little bit of inking behind the piece to make the design pop a little more. The pretty circle doilie design was made with plain glossy white cardstock and a Memory Box die 'Quinn Flourish' (thanks Janene!! Mwah!).
 
Supplies:
Patterned Paper: Cottage, Breathtaking (both sides), Bliss (both sides), Dot, Memories / Primrose
Kraft Wood: Elegant Shapes
Dies: Spellbinders (Rose Creations), Memory Box (Quinn Flourish)
Hemp Twine
 
 
For my second card I used the same paper collection and Kraft Wood Elegant Shapes pack. For this one I wanted to go a little more 'artsy' so I did some inking and misting and a whole bunch of stamping.  I even added few strips of washi tape.

 
I used one of the elegant frames to frame the greeting card title and used one of the flourish designs to add a little 'flow' to my fussy cut butterfly.  When I use natural elements like wood in my projects, I love to team them up with other natural elements like hemp twine and burlap.
 
Supplies:
Patterned Paper:  Bliss, Dot, Joy, Memories / Primrose
Kraft Wood: Elegant Shapes
Washi Tape: Primrose, Black & White Patterned
Stamps: Enchanted, It is Written, Ambrosia, Weekend Market
Other: Burlap, Hemp twine, Gesso, Lace, Martha Stewart edge punch (Swirling Lace)
Ink/Mists:  Lindy's Stamp Gang (Tainted Love Teal), Ingvild Bolme Chalk Ink (Sweet Pea)
 
I hope you enjoyed my little card projects!  They are a great way to get your creativity on and at the same time use up some of those scrap bits you have leftover from other projects!  Thanks so much for stopping by my blog today and for the really sweet comments you all are lovely enough to leave me! xo

Wednesday, April 16, 2014

40 Days of GIVE-AWAYS {New Bo Bunny Mid-Season Releases!!}

 
I love this time of year!  The promise of Spring is in the air and it's MID SEASON RELEASE time over at Bo Bunny!!  And let me tell you, I am IN LOVE with the new releases!!  Above you can get just a little glimpse of the first new release Bo Bunny is sharing with us, the Enchanted Garden collection.  This collection is so whimsical and beautiful!! 
 
AND.....In an effort to reach their goal of 40,000 'likes' on their Facebook Page, Bo Bunny is doing 40 Days of GIVE-AWAYS to promote the new collections and their facebook page!

 
They kicked it off with the first little peek at the Enchanted Garden collection and shared a really sweet blog post, sharing the inspiration behind this collection from Bo Bunny's paper designer Rae!  I've been a longtime fan of Rae's beautiful designs for Bo Bunny, she consistently comes out with designs that I just love to work with!    Here is a moodboard she put together as part of her inspiration....
 
 
So don't miss out on all the fun and ALL the chances to win!!  You can find all the information at the Bo Bunny Facebook Page, and don't forget to 'like' it! xo

Tuesday, April 15, 2014

VIDEO TUTORIAL: Webster's Pages Charms & Kidcrafts!

 
I thought I would do a fun little project today!  My girls love to craft and one of their favorite things to do is make friendship bracelets.  So I thought I would share a fun little project today using Websters Pages metal charms (I used the Nautical Frame and Dome from the Our Travels collection) and patterned paper from Growing Up Girl (Honor Yourself).
 
 
I thought it would be easier to follow along how I made this bracelet by sharing a quick little video with you all (this one is a LOT shorter than my usual videos :) ....


I show a sliding square knot enclosure on this video but it is hard to follow when seeing it done with some light DMC thread so HERE is a link on how to do the sliding knot that is a little easier to follow.

 
Here is a close-up of the charm I made using the Websters Pages paper and the metal charm.  I cut an extra floral paper circle out that I layed in the charm frame, faced down, so that if the charm flips over (which often happens with charm bracelets), the backside will look pretty as well.
 
 
Here's a photo of my daughter wearing her new bracelet.  My youngest got one look at the bracelet and announced she needs one as well, so I'll let her pick her favorite color and we'll be making another one :)

 
I hope you enjoyed my kid craft project and hope that I have inspired you to have a little fun family time with your kiddies!

Friday, April 11, 2014

A New Video & Kit! {The Scrapbook Diaries}

 
Hi everyone!  I'm super excited to share with all of you the newest page kit and video I made up for The Scrapbook Diaries.  Janene ( the owner of The Scrapbook Diaries) went to CHA and picked out all the latest and greatest scrapbook papers, embellishments and mixed media products for us to try out and play with.  This kit page was so much fun to create, lot's of pretty shabby-chic goodness in this one!
 
 
I just love the fresh and pretty colors in this kit, some really versatile beautiful shades of Ingvild Bolme chalk inks (I've already used the inks I used in this project on a number of other projects), lots of lovely chipboard (Janene, talented lady that she is, actually designed the beautiful circle frame chipboard design framing the photo of my great-nieces).

 
There is also a NEW Crafter's Workshop Stencil included in this kit and some really unique and pretty lace!

 
You can see more of the stencil design in this close-up pic, which I used with my Homemade Texture Paste....also included are the new Ingvilde Bolme resin butterflies (love those!)....and more and more chipboard!

 
As always, I've created a full step by step video tutorial to go with this page design so that you can create the exact same page design or tweek the design to your own taste. These kits are limited in quantity and although Janine has been upping the amount of kits available to try and meet demand, they do go super fast! So if this shabby-chic design is something you would like to try out, then head on over to The Scrapbook Diaries and be sure to grab up one of the kits for yourself! (Unlimited access to the video link will be provided with purchase of the kit).  And Janene has kindly provided 2 options, the Complete Kit as well as a Basic Kit (if you don't need extra options like the stencil.  You can find the kit HERE.
 
I hope you enjoy playing with this one as much as I did!!  NOTE:  The video tutorials for all the other (sold out) page kits are now available as online "Video Only' at the Scrapbook Diaries.  You can find them all in the right side panel of my blog, just click on the photo to take you to that item in the Scrapbook Diaries store.  Hope you all have a fun and crafty weekend!!

Wednesday, April 9, 2014

Mixed Media Wall Art {VIDEO TUTORIAL}


Hello my lovely friends! Today I'm excited to share with you all a home decor project! It's no secret that I'm a big fan of the shabby-chic style, and I while I love this style for scrapbooking, today I thought I'd take it off the page and into the home. For my project I used a variety of Maja Design papers, some of my favourite Dusty Attic chippies and some really lovely embellishments that I got from my friend Angelica's Little Scrap shop (I'm in love with her Vintage Butterflies and that cute Victorian frame I got to use in the middle panel!)    I made a video step by step on how I created this project, so grab yourself a cup of coffee, kick back and enjoy!


I hope you enjoyed my video tutorial. Here are some individual shots of the each of the panels in this decorative wall hanging....


I used Vintage Spring Basics (4rth of April) as the base of this panel. I also added clocks from the Vintage Autumn Basics (XVI) paper to decorate the panel. The chipboard is from Dusty Attic Designs (Cherry Blossom Branch) and the butterfly is from Angelica's Little Scrap Shop. I used home-made texture paste and a Crafters Workshop stencil (Mini Time Travel) for the clock designs.


I did a fair bit of layering with my patterned papers for the middle panel. I used a pretty blue paper from Crea Diem (Leva och växa) for the top layer, the next gingham layer is from Ska vi ta en Fika? (Två fröknar - bs) and then a bright blue layer from Crea Diem (Skapa dagen). I needed a lighter layer for my stamped quote (Tim Holtz stamp), so I used a scrap piece I had left over from my last project from the Vintage Spring Basics (6th of March). The stencils I used for this one were Crafters Workshop 'Art Is' and 'Brick'. The stitch I used was from Prima. The cute lil frame and the butterflies are from Angelica's Little Scrap Shop.


For my final panel I used another part of the Crea Diem paper I used in the middle panel (Leva och växa) and created a peek-a-boo tear showing a strip pattern paper from Vintage Spring Basics (4th of April-bs). I again used a Cherry Blossom branch from Dusty Attic and the 'Art Is' and 'Brick' stencils from Crafters Workshop. Here are a couple more views of the panels...


I hope my little project has inspired you to give home decor projects a try using Dusty Attic chipboard with vintage/shabby chic papers. Thanks for taking the time to watch my little tutorial! xo

Saturday, April 5, 2014

Maja Design April Mood Board Challenge {With Prize}

 
Yippee! It's the weekend and it's time to have some fun! (and maybe win a lovely Maja Design Prize along the way).  Each month Maja Design runs a fun and inspiring Mood Board Challenge. A board filled with colors inspiration, quotes, descriptive words and photos to jump start your creativity. 

 
This is this month's (April) Mood Board. This one has lots of soft sweet Spring colors based on the Maja Collection called 'Vintage Spring Basics' ....
 
 
For my page I included words like, shimmer, fabric, pastels, add texture, twigs, Spring, paint, yellow and stains to inspire the page.  I specifically chose the blues and yellows from the color palette for the layout as well.  (I know I've used the photo on this layout before in a sepia tone but I thought the color's in little Kiera's princess costume went so well with the mood board colors, I thought I'd use it again...I'll probably keep this l/o for my albums).
 
 
I wanted to go with Spring elements for embellishing, like birds nests, butterflies, blooms and twigs/branches.  I used Donna Salazar Distress Ink pads in 'Denim' and 'Honey' to tint the background of my paper and splattered on some random ink dots with Lindy's Stamp Gang 'Steampunk Sepia' spray.  And then did lots of stamping with a whole bunch of different random stamps.  (Butterfly is a Tim Holtz stamp, the flourish is an old Prima stamp from a frame set, the script and chicken wire is a Bo Bunny Stamp ...oh and the stitch stamp is a Prima stamp).

 
I did a little fussy cutting from the April 6th Paper, cutting out the little white floral designs for a delicate embellishment for the page. The barnboard-look paper is from Vintage Summer Basics (1905) The resin piece is from a Recollections pack I got at Michaels.

 
The chipboard of course is Dusty Attic chipboard (Flourish #8).  I painted all my chipboard pieces with gesso first then inked areas with more of the blue and yellow ink pads I mentioned that I used on the background design.  I dabbed a bit of gold Pearlex glistter onto areas of the design befoe I gave the whole thing a coating of Glossy Accents. 
 
 
I used the same combination of inks and gloss medium on the number cluster chippie (Mini Number Planet) under the photo as well.  Other favourite accents I added were some Tim Holtz Film Strips.
 
 
I added a bit of texture with a Prima 12x12 Stencil (Flourish) and some home made texture paste (found in right column of my blog under 'my tutorials'.  And used (yet more) Dusty Attic chipboard pieces (Mini Arch Windows and Brick Wall Panel). I painted the bricks white and inked with yellow chalk ink and edged with brown chalk ink. The tiny roses are also from Dusty Attic called Dusty Roses.
 
Maja Design Products:  Vintage Spring Basics (3rd of March-bs, 6th of April, 6th of May), Vintage Summer Basics (1905)
 
Dusty Attic Products:  Mini Arch Windows, Brick Wall Panel, Flourish #8, Mini Number Planet, Dusty Roses.
 
Would you like to play along this month and try out the Mood Board challenge?  You can find the challenge rules HERE.  The prize is any collection of your choice! 
 
NOTE:  If you missed my post from a few days ago, I just want to let you all know that you also can have a chance at winning another beautiful Maja Design prize pack (Crea Diem Collection...see below) by simply leaving a comment at this blog post (any time during the month of April/2014) MAJA DESIGN GIVE-AWAY
 
 
Happy Scrappin'!


LinkWithin

Related Posts with Thumbnails