Tuesday, April 5, 2011

April's Awesome kits from My Creative Scrapbook!


We had so much fun designing with the Main kit for April at My Creative Scapbook, the feature papers are the Bo Bunny Gabrielle collection with a little Prima thrown in....and loads of awesome blooms and embellishments too!  If you are looking for the Gabrielle trinkets, they are in this kit and so cute!!  I made the above l/o of my oldest daughter using the papers and the lace paper doily (I trimed down the outer edge of the doily to make it a little smaller (and idea that orginated with my friend & team mate Gerry V. Gent, thanks Gerry!) ...and then tinted it with some brown chalk ink.  There are loads of wonderful Prima blooms in the kit but for the above layout I wanted to try out another design using some Recycled Dryer Sheets.
BLOOM TECHNIQUE:   I added a few drops of Tim Holtz Alcohol Ink (Pink Sherbert) to some water in a cup.  I dunked the dryer sheets in the liquid and blotted dry on some paper towels.  Cut your dryer sheets into strips (you will need about two 1.5 inch strips to make the larger flower.  Using a slip stitch just gather both long edges of the strips, bringing the edges togther.  Tighten the center, then adjust the outside gather so that the bloom sits flat before you tie-off that edge.  Add some beads or adhesive pearls to the center...Done!  The effect is sheer and soft....give it a try!
I've been asked about the yellow diamond pattern paper inside the circle design  This is actually a scrap of one of the Bo Bunny papers.  I cut it in a circle design and then with a pencil and ruler drew a diamond pattern.  I didn't measure, just basically 'eye-balled' the design.  Then I took a brown pen (I used a Martha Stewart Brown fine tip pen) and drew a squiggly line over my pencil lines, then went over the line again with another squiggly line, this ends up give the design a sort of 'stitched' look.  It's a very simply way to add an extra pattern to your layout :)
Another page I made using this beautiful kit was using the Bo Bunny die-cut paper called 'Mocha'.....I just had to do a layout about my dear pup Mocha who this paper was named after.  I was so touched that Bo Bunny named this paper after dear Mocha, I miss her so much.....
Here's a few close-ups of the kit embellishments, love those diamond dusted roses, the pearls and the trinkets!

A third layout I made with the Main kit, I used the gorgeous new Parfait blooms from Prima (also included in the kit)....the bloom my youngest daughter is holding in the photo is a giant DinnerPlate Dahlia that she and her Grandfather grew in her little garden.....

 TIP:  I made the pink butterfly embellishments by scanning the pink chipboard butterfly into my computer and then printing a whole bunch of them out in different sizes on some white glossy cardstock.  I then cut them out and bent up the wings and attached to the page to create a 3D embellishment.

Another wonderful kit I got to work with this month was the  Limited Edition kit....this kit was packed and I mean REALLY PACKED with beautiful Prima blooms, papers and embellishements!  And such unique pieces too, in the layout below I combined cut paper blooms with the fabric roses in the kit and added some of the unique and pretty metal blooms also found in the kit.

 TIP:  I used a pink Sharpee market to tint the clear crystal flourish (also in the kit) to coordinate with the colors on my page. (Copic markers can also be used to get the same effect)


A second layout I made using the LE kit I went with the blues and browns in the kit and accented with yellow.  The other set of blooms in this kit have such a sweet homespun look to them, the yellow bloom gave me the idea to add a little yellow cardstock to the page (the photo is of Chloe and her best friends horse Darla)....

And finally a 3rd layout I made with this pretty kit I used more of the pinks in the kit.  The photos are from a few years ago when Meagan was in a little ballet/dance class.  I thought the soft pretty blooms would work well with the ballet theme....
 I loved the pretty combination of the soft celery green with the pale pink and deep rose blooms. The little vine I created using the small bulk roses (also in the kit).  I used a little floral tape to create the vine.  You can see a video tutorial I made up on how to make the vines HERE.
I'm looking forward to seeing what you all create using these beautiful kits, so don't forget to post your work in our gallery over at MCS!  Thanks so much for stopping by my blog and for your kind and thoughtful comments, I read them all!

~Gabrielle xx

Friday, April 1, 2011

Webster's Pages Challenge W. Awesome Prize!!

This will be my first month hosting a challenge over at the Webster's Pages Inspire Me site!  I'd love to have you all come join me in the fun!  I just love using fabric elements on my pages lately, whether it be trims, lace, netting, blooms made from various fabrics!  And Webster's Pages has so many wonderful fabric options for your projects.  My challenge this month is to use some of the GORGEOUS Webster's trims on your projects. For the above layout I used two types of Websters trims and layered them (the two trims I used are from the Holiday collection). I also used the Webster's Threads/Doilys and Shapes (white heart and blue circle shapes) as well as the new Websters Netting (fabric swatches....the white butterfly fabric on the blue circle cut paper).  So my challenge for you is to use  gorgeous Websters trims on your layouts or projects, the more creative the better!  .....and the best part?  The prize of course!  The winner will receive any Webster's Pages collection of their choice!   I have one added TWIST!  Websters Pages papers allow for some fun fussy cutting, so you have to include a little bit of cut paper embellishing on your page along with some trim to enter your page/card in the challenge.  To find the challenge thread and the complete details to play along just click this link Webster's Pages Trim Challenge.

In the layout above I used the lovely new WP paper collection called Country Estate.  I just love the 'shabby-chic' styling  this collection inspires.  The hinge and large chipboard butterfly are from Dusty Attic....I just gave each of them a coat of white paint, added a little ink and glitter.  The photo is one of my oldest daughter Chloe who recently became a teenager **sigh** where does the time go!  Here are are a few close-up shots of the layout....


I have one more layout to share with you that I made up with the Country Estate Collection (with a bit of the Ladies & Gents collection thrown in).  Each month Websters Pages has a Guest Designer and this months Guest Designer is the Fabulous Tara Orr.  The Websters Pages design team girls are asked to take one of the guest designers layouts and use it as inspiration for a layout.  I chose Tara's l/o 'Watching you Grow' as inspiration for the layout below.  I noticed that she often uses an off center vertical design on her layouts so I imitated this look on my page below.....
The photo is one I took last summer up at the cottage of my girls on a walk with their Grandfather (Opa in German).  I like the outdoorsy feel that the botanical papers from the Country Estate collection gave to this page.  The butterflies I got from the Webster's pages Digital Elements...I printed out a bunch of them on some glossy white cardstock and printed them out, cut them out and attached them to the page.  The large skelleton clock frame is ...you guessed it...from Dusty Attic, as is the key on the left side of the page.  Here are a few close-up shots of the page elements....

....and the blooms?  Okay don't laugh but....well, the brown bloom is of course Princess Petals from Websters Pages....but the pink blooms are actually blooms I found at a local accesories store called Ardiens.  They have the cutest blooms attached to hairbands, bobby pins, clips etc. and they sell them 5 for $10.00 (each package/hairband has a number of blooms attached) so I picked some up to use on my pages! :)   To see more of the Websters Pages Guest Designer lifts along with layouts done for WP by Tara be sure to check out the featured Guest thread at the Inspire Me site!   ....and then put on your thinking caps and come join me in this months Trims challenge!

NOTE!:  If you'd like another chance to win some awesome Dusty Attic chippies go check out Michelle's blog here ~~> DA Giveaway!  and Natasha's blog HERE

Thanks so much for stopping by and for all the sweet comments you all are kind enough to leave for me!  I really love to hear from you!

~Gabrielle xx

Thursday, March 31, 2011

My First Layout using Bo Bunny's Gabrielle Collection!!


I made this layout just over a month ago for this Bo Bunny assignment scheduled for the Bo Bunny blog today....and it's been killing me to sit on it!  Oh....I so loved working with this collection and wanted my first layout to feature the whimsical and almost vintage look of these papers.  One of my favourite papers in this collection is the Gabrielle Cut Outs, this is the one with the botanical tags and the verdigris circle frame....I used two of the tags on this page, did a little machine stitching on them and added a few Bo Bunny buttons to give the page a nostalgic feel.  The Gabrielle collection  also comes with beautiful coordinating trims (lace & pearls! love it!!) and awesome trinkets!!  Here is a couple of close-up pic's of my page....


I have since had time to work on more pages with my favourite Bo Bunny collection since My Creative Scrapbook is featuring this collection in the April Main kit this month!  I will be posting more layouts on the 5th which is reveal day at My Creative Scrapbook.  Be sure to check the Design Team gallery on the 5th to see what all our talented DT girlies have been up to with this gorgeous kit! (BTW....Pam has just packed this kit with yummy goodies....Gabrielle Trinkets (I hear they are selling out in all the stores and are hard to come by! but you'll find them in this kit!!), gorgeous blooms (Prima!) and soooo much more!)

Thanks for having a peek!!

~Gabrielle xx

Saturday, March 5, 2011

Reveal Day for March My Creative Scrapbook kits!!!

This months Main kit from MCS was just packed with punchy, colorful papers and just the cutest emebellishments!!  Although there is quite a variety in colors in the featured paper collection this month, what really caught my eye was the yellows and black!  So I designed a layout that featured just these colours.  The photo is of my little great-niece Jade (who you often see in my layouts) and her sweet mom Danielle.  There are these awesome transparent doily's in the kit that really pack a punch on a page!  I mixed them with a little bit of inking on the paper with some yellow chalk ink and for the title I hand stitched it with some black DMC thread.  
TIP:  If you are confident with your handwriting, just pencil out the titlework and get stitching.  If you are a little more timid about your handwriting try using a word stamp as I did here and use it as a guide for your stitching.


A second layout I made with this kit is another pic of my little niece Jade.  When I saw the intricate design on the black paper in the kit I thought it was a great match to the top she is wearing.......
The blooms in this kit are so pretty!!  You have to see them IRL! shimmery and rich in color!  I simply cut some of the white paper blooms from one of the patterned papers as 'extra' blooms to cluster with the pinkish/red blooms......


Another kit I had a blast working with this month is the Limited Edition Kit!  This one featured the Gorgeous new collection by Webster's Pages called Spring Market!  It made me just long for spring scrapping with the goodies in this kit!  For my first l/o I scrapped a photo of Chloe doing some gardening a couple of years back.  She's always been one of those 'happy to get her hands dirty' kinda girl.....

I just love the cute botanical designs in this collection!!  The paper with the seed packets is one of my favourites for embellishing with.  And those  cute gingham blooms, they just add the sweetest touch to a page....

A second l/o I made with this page I went with the cheery yellow and reds in this collection.  I got this really cute photo of my niece Jade.....although it has it's blurry parts (moving hands)...I thought the photo of her face was so expressive and cute!  And I thought the title fit the fact that so is such an active little girl.....
I'm just crazy about those Princess Petals by Websters Pages....layers and layers of sheer frabric, the effect is so beautiful IRL!  FOr this l/o al I added was a little tulip bouquet and some fussy cut blooms cut from the patterened paper.....

Another layout I made with this kit is one of my Meagan when she was just a little toddler.  I have to laugh, because whenever she see's photos of herself as a baby she asks me who the little boy is!  She had ridiculously long hair from early on so she's always surpised to see herself with short hair as a baby.....


I did a bit of hand stitching on this page....I simply followed the outline on the patterend paper for the outer edge design. 
TIP:  I often split up my crystal flourish to use on different layouts.  I used half the crystal flourish on the 'Live Out Loud' page. So for this page I first layed the flourish still attached to the plastic backing on my layout and used a pin to follow the outline of the missing piece of crystal flourish, poking through the plastic into the paper beneath.  I then followed this poked holes to make my stitched flourish....I then completed the florish by tinting the left over crystal flourishes with a red Sharpie (you can use Copic markers for this too) and attached it just above my stitched flourish (see this months 'How did they do that?' thread at the MCS forums for a more details set of instructions....this tip thread is posted around th 10th of the month).....

And finally one other kit I just dabbled with a little this month is the Album kit.  This kit has such soft pretty and subltle colours of blues/greens/browns.  I scrapped a photo of my niece (brothers daughter) when she was a baby, looking through a fence at her sister riding her horse.


Thanks so much for stopping by my blog!  For more inspiration with these kits be sure to check out the Design Team Gallery at MCS to see the beautiful work of my fellow Designers.....they really did an amazing job  with this months kits!  ~~>  Design Team Gallery
I'm often asked to list all the ingredients on my pages.  I use only the goodies supplied in the kits (with perhaps the addition of some carstock and ink) ....so I don't bother listing all the products in the kits as you can find them listed if you go to the My Creative Scrapbook homepage, click on the photo of the kit and a list will pop up with all the items in the kit with the name of each of the manufacturers.

~Gabrielle xx


Thursday, March 3, 2011

Recycled Dryer Sheet Blooms ~ Tutorial!!

I had so much fun making up this layout for a Bo Bunny assignment to Recycle/Re-use.   For my project I decided to make embellishments using recyled dryer sheets!!  They come out looking so sheer and pretty...and the nice part is that you can tint them whatever colors will work well for the papers you want to use.  Here are the 'ingredients' you'll need to make these:
~ used dryer sheets (yes! go ahead and use them for your laundry first!)
~ Glimmer Mist in any shades you'd like your blooms to be
~ Stickles or any type of glitter glue
~ scissors and glue or adhesive tape
~ Gems or Trinkets for the centers (I used Bo Bunny Jewels and Trinkets fromt the Timepiece collection)
Step 1
~ Layer your dryer sheets and cut out circles in varying sizes from large to small.  I made 4 circle, each just a little smaller than the other.   You don't have to be very exacting with cutting your circles, just take a pair of scissors and cut.  The circles do not have to be perfect, in fact I think they come out nicer if they are not perfect.
Step 2
~ Spritz your circles with some Glimmer Mist....you can use Tattered Angels or make up your own, (I've made my own using a small spray bottle filled with a little distilled water, a few drops of alcohol ink and a pinch of Perfect Pearls (or Pearlex) mica powder).   Allow them to dry.  You can speed up this process by just dabbing them with a paper towel to remove excess moisture.

Step 3
~ Rim each circle with some glitter glue.  Allow it to dry before stacking the layers together.  I applied a little bit of two-sided sticky tape between the layers and added the Bo Bunny Jewels and Trinkets to the center.  Here are the finished blooms close-up....

I made up this page using the new Bo Bunny collection called Timpiece! Love this collection...just filled with wonderful vintage elements and lots of flourishes!  I also embellished with the fabulous Dusty Attic Laser cuts....for this page I used the new hinges and one of the ornate corner brackets.  I gave the hing an embossed look by painting some 3D paint (thickly) onto the hinge and then taking a swirly stamp and pushing it into the wet paint....here is a close-up look at the finish....
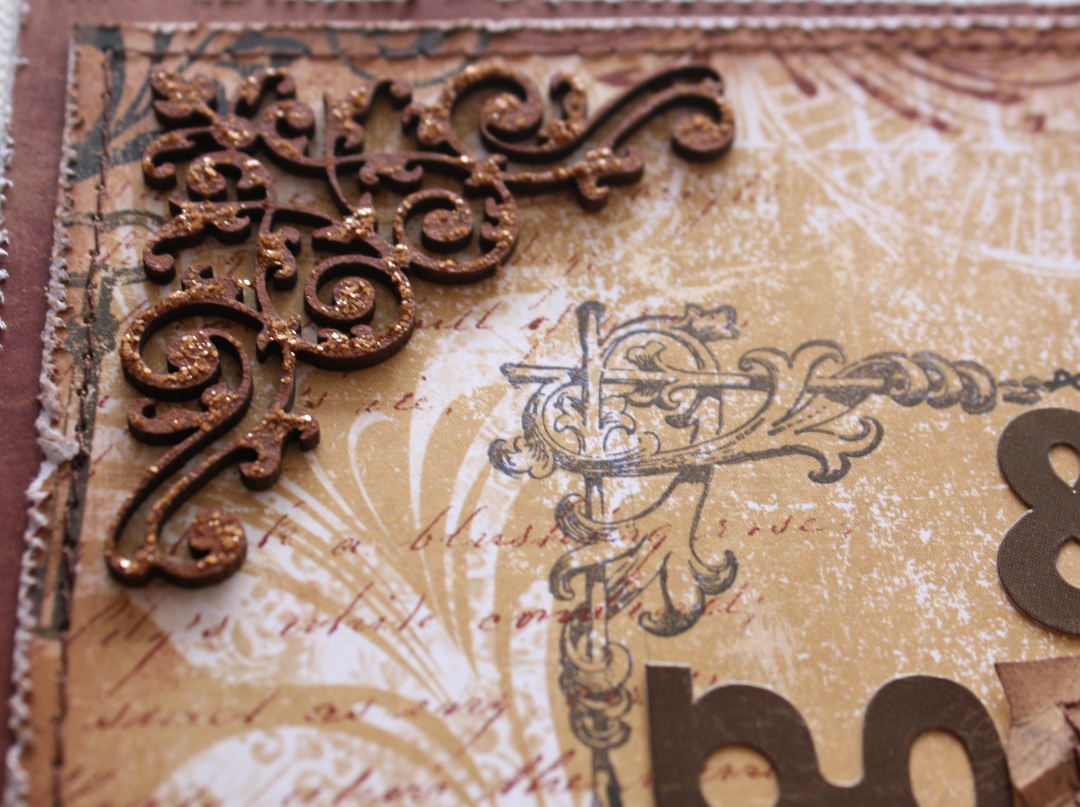
For the corner bracket I simply rubbed some brown chalk ink onto the design and touched it with some Distress Stickles by Tim Holtz....it gives the piece a kind of 'rusted' look.....
For more recycling product ideas check out the Bo Bunny blog for today and for more Dusty Attic inspiration check out the Dusty Attic Ning site.  Hope you give these fun blooms a try!

I've added another type of flower I made with the dryer sheets .....Here's a pic of them....
The pink blooms I again made from recycled dryer sheets. Again, super easy to do....just put a few drops of alcohol ink (I used Time Holtz Pink Sherbert for these blooms) or some food coloring in a small cup of water. Dunk your used dryer sheets in the mixture and just blot off on a paper towel..


TIP: IF you find the dryer sheet a bit to wrinkled to use nicely for your bloom and don't want to pull out your ironing board and iron a quick way I smooth out my swatches is to us my hair flattening iron. I just give it a quick smooth with the flattening iron and the piece is ready to work with (also helps dry it quicker too)

....so the next step is to cut some strips from the swatch and gather the two long edges using a needle & thread (I use about 2 and a half strips for the large flower). My daughter made me the flower centers using some bling from the Bo Bunny's Buttons & Bling packages and some seed beads.
~Gabrielle xxx

Tuesday, March 1, 2011

Dusty Attic Blog Prize WINNER!! & Webster's Pages SHOPPING SPREE!!

Hi everyone,

I just did my draw at Random.org for the winner of the amazing Dusty Attic goodies! Thanks for the overwhelming response by all of you!! Here is the number that got pulled up from Random.org (I've copied and pasted the results below...sorry don't know how to do a screen capture :) .....

True Random Number Generator
Min: 1
Max: 293
Result:
278
Powered by RANDOM.ORG

The post is by Tiffany!! Here is her comment "Love all your work Gabrielle and have been following for a while. Fun seeing your take now on the Webster's PAges. Thanks for the chance to win!"

CONGRATS TIFFANY!!  Tiffany please send me your mailing address to gpollacco@aol.com  ..thank you! ........Okay....hope you all have kept reading on....because, don't dispair!! The Dusty Attic Design Team girls will be doing more and more giveaways. The next person in line is Mandy ....Jump on over to Iris's Blog, and Mandys Blog for another chance to win! Yay!

KEEP READING......MORE EXCITING NEWS!!!! WHO DOESN'T LOVE A SHOPPING SPREE?!!!! A WEBSTER'S PAGES SPREE!!!

The wonderfully generous owner of Webster's Pages Brandin O'Neill has launched a new schedule for her Websters Pages blog posts. Each day of the week will be dedicated to an inspiring subject, ranging from featured work from you the members of the Webster's Pages Inspire Me site to sharing work from the design team.....and finally culminating in FREEBIE FRIDAY!!! This is a day that Brandin will be featuring different Webster's Pages products and offering AWESOME GIVEAWAYS!! This week she is offereing a $25.00 Shopping Spree....check out her blog for details!! Here ~~> Webster's Pages Blog What products would you choose if you won? *sigh!* ...so many lovely things to choose from!

Here is a layout I just finished using the beautiful new collection 'Trendsetter'. This month's Featured Artist is Sarah Mulllinax.....the Design Team was asked to lift one of Sarah's lovely layouts....below is my take on her layout called Splash....


I am just in love with those delicate and pretty Princess Petals!! Check out Sarah's layouts and the lifts the rest of the Design Team made up at this link Featured Artist   Just a little more Webster's info! Every month one member of the Websters Pages Design Team will be hosting a challenge. This month Gerry Van Gent will be hosting it. To find the monthly challenge just click on the Webster's Pages Challenge Icon to take you there ....you can find the icon in the right column of my blog! And for you digi Scrappers there will also be a monthly Digi Challenge! This month it is being hosted by Julie Walton.

So come out to join us in loads of inspiring fun and amazing prizes!!

~Gabrielle xx

LinkWithin

Related Posts with Thumbnails