

I have been wanting to try out this tri-fold shutter card for a very long time and finally got a chance to do it mainly because I got this amazing Scor Buddy sent to me! I have a scoring tool on my cutter but for some reason it always comes out crooked (I think my cutter is not exactly square). So I was thrilled to have this amazing tool to use! I used the ScorBuddy two ways, to create scor lines for my card folds and to create an embossed edge for my journaling piece. Below is the template I used to make up this card....


These are the basic Instructions:
1. Cut a 12" x 5 '1/2 " piece of Cardstock. (I used Bo Bunny's Shitake Dot paper)
2. You will create score lines at the 2", 4", 8" and 10" marks (some will be 'valley' scores and some will be 'peaks'....see diagram above to differntiate which go where.
3. You will cut measure 1 1/2" up (and down) from the 2 and 20 inch marks and cut 2 slits between these markings (I cut these slits first so that I knew when to stop and start my valley and peak scores).
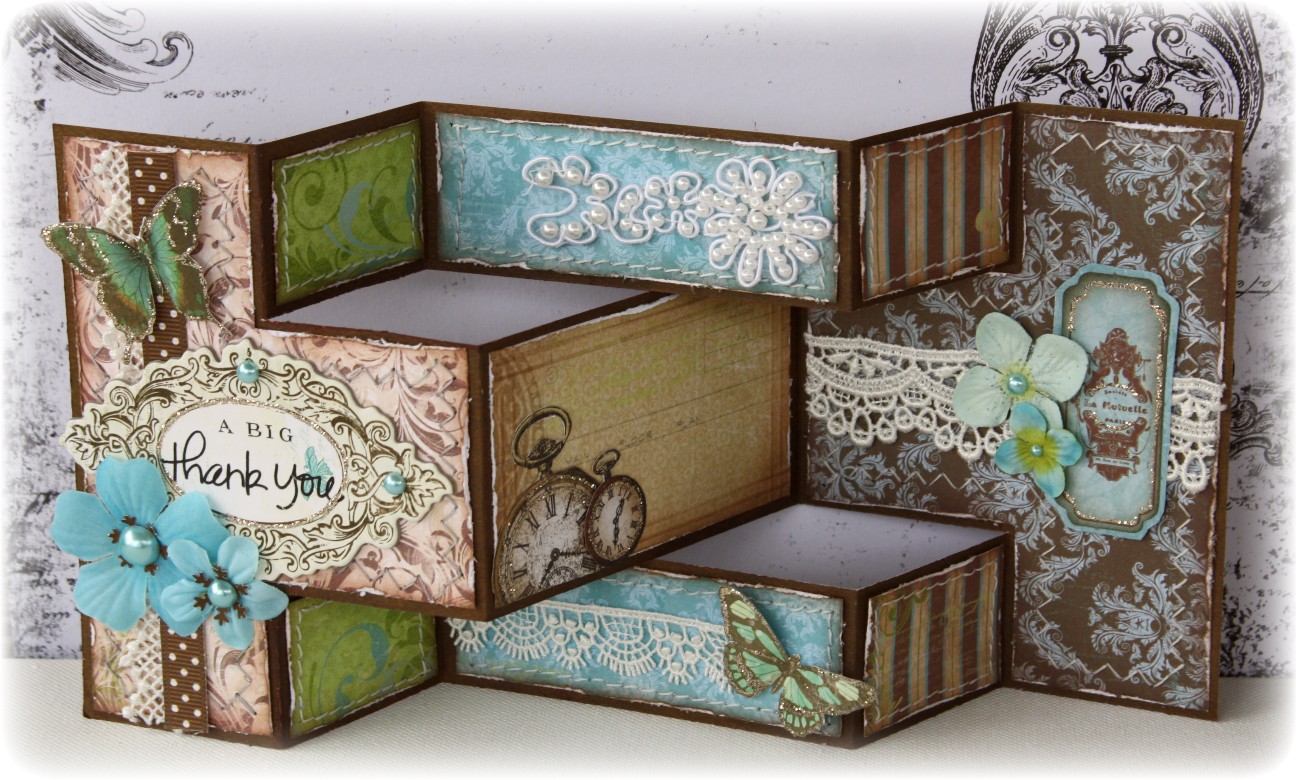
4. Your card is not ready to shape into the folded design (see above photo to see if you have your folds correct).
5. Choose your patterned papers that you want to use for this card and then use the card as your template, you will need to cut patterned paper:
2 pieces of the T shapes (trim 1/16" off each edge)
4 x 1 3/8" x 1 3/8"
2 x 1 7/8" x 3 7/8"
1 x 2 3/8" x 3 7/8"
I used the Scor Buddy on the middle (2 3/8" x 3 7/8") piece to make a nice embossed edge for my journaling piece. I flipped the piece over and used the two scores closest to the left edge to scor my border...

When you flip the piece over you end up with a nice bumped up border for your journaling piece, here is a close-up of the finished section, I added some clock cut-outs from the BB Timepiece 6x6 patterned paper pad to decorate this piece with...

Now just decorate to your hearts content! Bo Bunny has so many beautiful embellishing products to coordinate with each of their collections,...Rub-ons, stickers, chipboard, Jewels, flowers, ribbons and Noteworthy die cut shapes! Here is one more view of the card opened...

Supplies used:
Patterned Paper: Welcome Home ~ Porch Swing, Welcome Home, Front Door,
Cardstock: Bo Bunny Shitake Dot
6"x6" Paper Pad: Welcome Home, Timepiece
Chipboard: Gabrielle
Butterflies, dot ribbon: Gabrielle card kit
Noteworthy: Welcome Home
Jewels: Welcome Home
flowers: Bo Bunny Serenade collection
Be sure to stop by the Bo Bunny site this week to check out all the projects being made with BoBunny products and Scor Buddy! I've seen a number of them already and they are amazing! Bo Bunny and Scor Pal are having a Blog hop all week long so come and join the fun!


13 comments:
GABRIELLE HI, YOUR WORK IS WONDERFUL!
THIS CARD WAS DIVINE! LOVED!
Congratulations and thank you for the tutorial.
Your blog is inspiring for me, so I am his follower.
YOUR PROJECTS I love it.
XOXO
Oi Gabrielle!!!
Sou apaixonadíssima pelos seus trabalhos !!! Esse cartão está perfeito !!!
Beijos e tenha dias abençoados
So beautiful and so ...complicated :)
Oh my word Gabrielle, this is incredibly beautiful. I love it. Lee x
Wow, your card is a true masterpiece! So so gorgeous! I really love the model and your use of the Scor Pal to emboss the edges of the journal piece.
Gorgeous! I've always wanted to try this card..it's a must on my list now. You've so inspired me!
Gabrielle, that card is fabulous, I love it
Simply fabulous! I love all your special embellishments!
Beautiful card - I've done one of these - they are fun!
Beautiful card ;)
HI.. wow. this card is amazing.. how beautiful it is!!
Just loved it. The colours you choose, is beautiful....
Hug from Brazil, sweetie.
Gorgeous card... I love it!! Thank you for a perfect tutorial. I'm totally inspired to make one.
Hugs...
Post a Comment