Tuesday, November 29, 2011

Dusty Attic & Websters Pages! A Match made in Heaven!

I just love that this week Websters Pages & Dusty Attic is doing a product collaberation in which both design teams get to work with both companies products together!   I was sent this beautiful 12x12 Display Frame a while back from Dusty Attic and finally got the chance to use it!  I decided to make a Shabby-Chic wall hanging for on of my daughters bedroom.  I used a combination of Websters Pages Western Romance, Postcards from Paris and Lifes Portrait Collections, along with a number of their beautiful trims and embellishments (DesignerThreads/Heart Doily, Silhouettes/Cameo, WP/Unity Stamp Set/Beauty).  And from Dusty Attic I used the 12x12 Display Frame and about another 10 pieces of their beautiful laser cuts including the new Cameo Sliders (behind the cameo), Corset, 2 of the new Rose Stems, a Lamp Post #4, Baroque corners, Wrought Iron Fence, and a Wrought Iron Trim Set (along the top of the design).  Here are some close-up shots of each of the sections on this home decor piece...
The Rosebud I simply painted white and used a pink and light green chalk ink on the edges to give it some subtle color. 

I just LOVE these new Dusty Attic Cameo Sliders!!  It's like they were specially made for the Websters Pages Silhouettes!  They fit perfectly! 


For the Corset chippie, I painted the whole thing with white paint, then inked it lightly with some pink chalk ink.  Then I stamped the piece with a lace stamp (I used a strip stamp from an old Prima Frame stamp set for this).  And then finally added some glitter with a bit of Stickles (Stardust).
TIP:  I wanted to keep the pinks very soft on this project so I slightly changed the look of the Websters Pages Cameo by dabbing some Colorbox White Chalk ink over the edges of the Cameo piece...
This week the design teams of both Websters Pages and Dusty Attic will be posting their projects at a special thread in their forums.  I've seen most of the projects and let me say, they are spectacular!  You can view the projects made by the Dusty Attic design team girls throughout the week at this link DUSTY ATTIC FORUM ...and you can see the projects of the girls from the Websters Pages design team girls at this link WEBSTERS PAGES FORUM.

Thanks for stopping by my blog and having a peek, and thanks so much for your kind comments, your feedback means a lot to me!  (Please note:  I am often asked where you all can find the Dusty Attic Products, I have listed a number of great retailers for this product that are happy to ship worldwide!  You can find them in the right hand column of my blog....I got a note from a number of them recently that they have just recieved new product and are fully stocked....but my advice is hurry, because I understand they sell out quickly!  ...Many of them  (such as http://www.staytruetogod.com/ ) will take orders too if they don't have the items you were looking for in stock!

Saturday, November 26, 2011

Websters Pages & Dusty Attic!

Although I usually tend to do 12x12 layouts, I've been in a bit of an altering mood lately.  I found these cute tissue box covers at my local dolar store and thought it would be fun to make some box covers for my girls rooms.  Meagan is going with a beach theme in her room so I used the Websters Pages Yacht Club collection  papers and embellishments (Sparklers) and some Dusty Attic chippies (Sea Shells and Baroque Corner flourishes and Anchor)  Here is a before shot of the tissue box....
The 12x12 patterned paper is almost a perfect fit for the 3 long sides of the box, you just need to trim one side edge, and cut out 2 smaller rectangles of paper for the two sides.  I added machine stitching to all the sides before attaching in the paper.  I attached the paper by slightly watering down some white wood glue and pasting on the sides.  I then simply decorated with the Dusty Attic Chipboard and a variety of gems and pearls and a bit of fish netting from my local Michaels store.  Here is the reverse side and a few more close-ups...


While I had out the Yacht club papers I thought I'd do a Thank-you card combining this collection with the Western Romance collection.  The frame is an ornate frame from Dusty Attic....

I've got a really fun project to share in a few days using a bunch of the newest Dusty Attic pieces along with Websters Pages goodies....so excited to share this one with you!  Thanks for stopping by!


Wednesday, November 23, 2011

Focus on SnowFall!! Bo Bunny's New Release!! & New Dusty Attic!!

I just love the beautiful color combination in Bo Bunny's new Snowfall collection. The rich aqua/teal blues and the warm brown tones are so pretty together!  And the embellishments that compliment this collection are again, over the top beautiful! (Check out the pretty Trinkets for Snowfall!)  I had seen this collection online before I recieved my design team package but I was just blown away when I saw this gorgeous collection in real life!  Just covered in glittery goodness!  And the nice kind of glitter that doesn't come off all over everything :)

I also added a bit of the new goodies from Dusty Attic to this page!  The large corner flourish #1 DA0628 and the Lacing Tash DA0631.  I simply painted them with a chocolate brown craft paint and then added some texture with a bit of Aqua and Platinum color Stickles (glitter glue).  To see all the the awesome new releases for Dusty Attic you can find the HERE.  Here are some close-ups of this page I made of my youngest daughter.
Check out the Trinkets that go with this collection (on the lace-up piece and on the snowflakes)... 


TIP:  I added some older Prima Hydrangia's I had in my stash to this layout and used the Bo Bunny brads as centers.  I also added a pearl strand to finish the design.  A great glue for adding things like pearl strands is the Tombow Liquid Adhesive (the green & white bottle).  It has a fine tip on one end.  Just apply the glue to your project in the design you want the pearl strand to follow.  Then allow it to dry a little so it becomes tacky.  Now you can apply your pearl strand and it will stay in place as you apply it.  You can even re-adjust a little as you go.  The glue will become more permanent as you leave it to dry.

If you haven't picked up your supply of this beautiful new collection, go check it out for yourself, you will be delighted to see how even more dazzling this collection is in real life!  Thanks for having a peek!

Tuesday, November 22, 2011

Heads Up!!! Super duper Black Friday Deal from Websters Pages!

I just wanted to do a quick share with you all! Check out this amazing deal Websters Pages has for this Friday (Black Friday Sale!!) Websters Pages has put together 2 AMAZING kits at a crazy value too! These kits include all the product shown in the photos along with step by step instructions for projects made by the WP design team! Each kit is valued at $65.00 and are on sale for $25.00! Here are the kit details:

“It’s a Sweet Season” Premium Paper & Embellishment Pack with FREE Page & Card Project Included:
1-Card & Page Project Instruction Sheet, 1-TM9808 Collection Trim Pack, 1-WB1003 Wire Floral, 5-6x6 diecut paper, 1 6” NEW gem strip, 1-R03 Petite Roses, 1-TM9712 Robins Egg 1yd bloomers, 1-TM9714 Pink Kiss 1yd bloomers, 1-VB1003 Velvet Berries, 1-WGS10 Peacock Pack of 10 Glitter Sparklers, 1-LNF06 Princess Petals, 1-US1664 Journaling Card Pack, 1-FR1800 Fabric Ribbon Card set, 1-WS1044 Image Stickers, 1-WS1040 Alphabet Stickers, 3-US1786D 12x12 diecuts, 3-US1787D Vellum, 3-US1755D Vellum, 3-US1785D 12x12 Papers, 3-US1784D 12x12 Papers, 3-US1783D 12x12 Papers, 3-US1781D 12x12 Papers, 3-US1780D 12x12 Papers, 3-US1782D 12x12 Papers.

“Come Home for the Holidays” Premium Paper & Embellishment Pack with FREE Mini Album Project Included...


1-Mini Album Project Instruction Sheet, 1-TM9716 Celery 1yd bloomers pack, 1-TM9803 Collection Trim Package, 1-TM9814 Collection Trim Package, 1-LNF02 Princess Petals, 1-R01 Petite Roses, 1-WB1002 Wire Bouquet, 2-6” NEW gem Strips, 1-WGS07 Glitter Sparklers Pack of 10, 1-VB1002 Velvet Berries, 5-6x6 diecut papers, 1-WVS08 Vintage Glitter Sparklers Package, 1-WS1043 Image Sticker Sheet, 1-WS1039 Alphabet Sticker Sheet, 1-WS1021 Alphabet Sticker Sheet, 1-WS1015 Sticker Sheet, 3-US1778D 12x12 diecut paper, 3-US1779D Vellum, 3-US1715D Vellum, 2-US1772D 12x12 Papers, 2-US1720D 12x12 Papers, 3-US1776D 12x12 Papers, 3-US1774D 12x12 Papers, 3-US1775D 12x12 Papers, 3-US1777D 12x12 Papers, 3-US1776D 12x12 Papers.


So, now that we're all scrambling to drop hints to our husbands, here's what you need to know...

•Black Friday Deals START at MIDNIGHT (EST) on Thursday night & last through the weekend, expiring Sunday at Midnight.


•We have VERY Limited Quantities Available – when they’re sold out, they’re OUT


•Both kits retail for over $65 but they can be all yours for only $25 plus shipping. (No handling fees.)


•Also, we've added a special addition to these kits...each one contains never before seen 6" gem strips. These gems are exclusive to these kits and aren't currently available anywhere else.

Don't miss out on this awesome deal!  For more info on project included in the kits you can check out the Websters Pages blog site HERE

Wednesday, November 16, 2011

An Art Journal! Websters Pages & Dusty Attic


I have been wanting to try making an art journal for a long time now and I finally gave it a go!  For me, Websters Pages and Dusty Attic are two companies that just go so well together!  So I used the Dusty Attic Arched Window Set DA#0569 and one of their title chippies (Art) DA0386 along with Websters Pages Western Romance Papers, WP Ribbon, WP Stamps (Beauty stamped on frame) and WP Postcards (birds).

I got my journal book at a local dollar store and other than the above items I added a bit of simple kitchen cheesecloth and some pearl strands.  I treated the DA frame with some cream color paint, brown chalk ink, some script/flourish stamping and finally coated it all with some Tim Holtz Rock Candy (crackle finish). Here are a few close-up pic's of the book.... 

Now I have somewhere to keep page ideas I come up with, little hand drawn sketches or even notes for my design team work.  My daughter saw this one and now wants me to make her one too....so you may see some more of these books pop up on my blog :)  ....Keep an eye out, hint hint, Dusty Attic and Websters Pages will be teaming up and sharing projects from their DT's in a few weeks time!

Thursday, November 10, 2011

Dusty Attic and The Color Room Collaberation! Win some DA!!

Talk about a match made in heaven!  Dusty Attic is sponsoring The Color Room for this month....so if you are a fan of Dusty Attic laser cut chippies you've got to come and play along in the color palettes this month for a chance to win some beautiful Dusty Attic goodies!!
I made the above page using the lovely 'white-washed' palette #84, lots of warm neutrals and white!. I used 3 different styles of DA chippies to make up this page, The Floral Frame Set DA0576, Brick Wall Panel DA0316 and Scroll Border #2 DA0564.  I used a white gel pen to add a little detailing to the Floral frame piece.  The papers I used are from the Bo Bunny Et Cetera Collection.  The blooms are done with the Water Distress Method  Here are some close-ups...

Here is the inspiration palette for The Color Room #84

Would you like to play along and win some Dusty Attic goodness?  Play along with this color palette and upload your project to the Color Room Gallery before next weeks color palette is up (Friday 18th) and you can have a chance to win!  And remember, the Color Room DT is always checking out the gallery to pick your beautiful projects to feature in our newsletter and on the website!  Your project may be the next one featured!

And now for an exciting sneaky peek at the newest designs Dusty Attic is bringing out!!  I was just blown away when I saw all the new goodies....here is a little peek at just a few of them!   Ohhh! Cameo sliders!!  How cool are these to mount your Websters Pages Cameo's on! and they have those cute little slots for sliding them onto ribbon!! LOVE!


....And for those of you who love Steampunk! how cool are these!!!...


I get asked often on where to find Dusty Attic.  I try to keep a list in the side of my blog (right side) on Dusty Attic Retailers.  I've heard many of them have just recently restocked their stores and many also will do pre-orders for you too! Check it out! ....and don't forget to join in the fun at The Color Room!

Tuesday, November 8, 2011

Bo Bunny Card Challenge & Sketch!

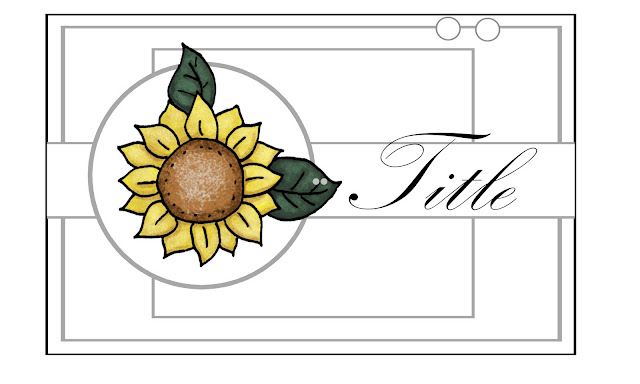
It was my turn to do a card challenge this month for the Bo Bunny Design Team.  So I came up with a sketch and decided to make the challenge that there has to be a handmade bloom on the card made from any Bo Bunny product whether it be pattern paper, trinkets, trims or jewels.  Here is the sketch I made up for this card....

I used the new Enchanted collection to make this card along with some Bo Bunny dot cardstock.  I used the Water Distress method <~~ Click this link or you can find the tutorial in the right column of my blog.  Here are some close up pics...

Supplies used for this card:
Patterned Paper: Enchanted 6x6 Paper Pad (Papers used from the paper pad are: Enchanted Love (both sides)
Cardstock: Bo Bunny Dot Cardstock; Raspberry Dot, Mulberry Dot, Kiwi Dot
Enchanted Jewels, Enchanted Buttons, Enchanted Noteworthy,
Enchanted Combo Stickers

Come join in the challenge over at the Bo Bunny blog!  You have until November 21st to play along!  At the same time you can check out what a couple of our other talented design team members, Tomoko and Mireille have created with this sketch!  BO BUNNY BLOG 

LinkWithin

Related Posts with Thumbnails