Tuesday, September 30, 2014

Tag Making with Bo Bunny's Madeleine Collection

Enjoy_The_Ride_Tag_Gabrielle_Pollacco_Bo_Bunny_Madeleine_Wild_Card_01

Bo Bunny's Madeleine collection has so many pretty designs in it for card making.  One of my favorite papers in this collection is the 'Allure' paper with it's many frames and lil birdie designs.  For this tag I cut out my tag background from the new Chevron Double Dot paper in Passion Fruit.

Enjoy_the_little_things_Tag_Gabrielle_Tag_Madeleine_Wild_Card_02

I used a piece of 'wood look' paper from the 6x6 paper pad from Bo Bunny's Wild Card collection as the next layer to my tag. I added the frame cut out using foam dot adhesive stickers to give a bit more of a 3D element to my design.  Then added some chipboard pieces from Madeleine collection as accents.  I cut out a butterfly from a 6x6 paper pad from the Primrose collection.

Enjoy_The_Little_Things_Tag_Gabrielle_Pollacco_Bo_Bunny_Madeleine_Wild_Card_03

I created the branch using a Quickutz die and dark brown cardstock.  The nest was made by swirling a bit of Spanish moss (floral dept. in craft store) into a nest shape and gluing it onto the card.  I added 3 adhesive pearls from the 'Blue Hues' pack from the NEW Bo Bunny Double Dot Jewels.

Bo Bunny Product used in this Tag:
Patterned Paper: Madeleine/Allure
Cardstock:  Chevron Double Dot/Passion Fruit
6x6 Paper Pad: Wild Card, Primrose
Chipboard: Madeleine
Double Dot Jewels: Blue Hue
Stamp: New Romance

Imagination_Tag_Gabrielle_Pollacco_Bo_Bunny_Madeleine_Primrose_01

I made a second tag, again using the frame designs in the 'Allure' paper from the Madeleine collection.  I again began with a tag cut from the Chevron Double Dot paper in Coral.  I then used some of left over pieces I had from another project I did using Madeleine.  

Imagination_Tag_Gabrielle_Pollacco_Bo_Bunny_Madeleine_Primrose_02

Next step was embellishing with some coordinating chipboard from the Madeleine collection (chipboard title)...and a butterfly cut from some paper in the Primrose collection.

Imagination_Tag_Gabrielle_Pollacco_Bo_Bunny_Madeleine_Primrose_03

Bo Bunny Product used in this tag:
Patterned Paper: Madeleine/Tiles, Allure
6x6 paper pads: Madeleine, Primrose
Chipboard: Madeleine
Cardstock: Chevron Double Dot/Coral
Stamps:  New Romance Stamp

I hope you enjoyed my projects today!  I just want to give a big THANK-You! to Pam Ellis for your very sweet gift ....a sweet surprise! xo xo


Wednesday, September 24, 2014

My Water Droplet Stamp + Maja Papers = Tag VIDEO TUTORIAL!!


Hello my sweet friends!  I'm so happy to share with you all a tag I made using some of my favorite Maja Design papers, 'Walking in the Forest' and my new Water droplet stamps!  I know so many of you have already bought the stamp and I meant to have something out sooner to show how I would use the stamps. Today I finally got around to having some fun with the stamps.  Seems like lately I jump straight to videoing my steps, I feel like it's a lot clearer to everyone rather than verbally trying to explain :)  So if you indulge in a nice cup of coffee, go grab one and enjoy!...


I hope you enjoyed my video!  I was down and out with a migraine this morning and thought I wasn't going to have a post for today, but I felt better in the afternoon and got working on this project.  This tag came together surprisingly fast and easy (as did the video editing and uploading...for a change, lol).  Here are a few close-ups of the tag that can be enjoyed at a more leisurely pace...


I used a little leaf stamp that is part of my Water Droplet stamp set to make the greenery in my floral cluster. I just stamped the design on one of the dark green papers from the Maja 'Fika' collection, cut it out, gave it a crinkle and added it to the floral design.  The lacy doily behind the floral cluster is a die from Memory Box called 'Quinn Flourish'.


Here is a close up picture of the stamp work, easily done with some black archival ink and a white gel pen. I like to add the little white highlights to the water droplets because it give more of a 3D look and sheen to the images. If you don't have a good white gel pen, an easy alternative is some white acrylic paint with a fine paint brush (may even work better).  The pretty wood floral embellishment is from Wycinanka (got these from Janene at The Scrapbook Diaries), and the butterflies are from The Kraft Nook.


Autumn is in the air!  I noticed my Burning Bush tree outside my window is starting to turn that brilliant scarlet, so I was really in the mood to scrap Autumn!  I hope you get a chance to use these beautiful 'Walking in the Forest' papers from Maja Design and hope that this has inspired you to give my Water Droplet stamps a try in your crafting projects!  You can find my stamps at the lovely Janene's store, 'The Scrapbook Diaries' ....actually almost everything I used on this tag is from her shop! :)

Thanks for stopping by my blog today and for all the kind support and lovely feedback, you all make my day! xo

Saturday, September 20, 2014

Video Tutorial: Creating a Keepsake Box {Bo Bunny - Madeleine}


Hi Everyone!  It's my pleasure today to share my latest project using some beautiful new products from Bo Bunny!  I just LOVE the new stickable stencils, it's so cool the way they keep the stencil in place as you are working and allows you to move and re-adjust, all the while keeping that tacky backing so that your designs always come out perfect!


I thought you might enjoy watching a step by step tutorial in which I show, start to finish how I created this little keepsake book/box using the gorgeous new Madeleine collection with some of the new Bo Bunny mixed media products (Pearlescents and Shimmer Sprays) and stencils.  Just click the arrow above and enjoy!


I thought I would share a few close-up shots of the project that you can enjoy at your leisure.  The photo above lets you see how I used the stencils and texture paste on the cover and spine of the book.  I used the Gold Shimmer Spray to help the texture design stand out.


I like my projects to look pretty inside and out, so I lined my box with some of the beautiful papers from the Madeleine collection (and added a butterfly cut out from Primrose collection).


Another new product that I absolutely LOVE is the Wood Shapes! For my box cover I used a few of the elegant designs from the new Iron Works Wood Shapes packet.  I finished the look with some of the lovely pearls from the jewel packets.


Bo Bunny products used on this project:
Patterned Paper: Madeleine/Grace, Happiness, Madeleine, Symmetry, 
6x6 Paper Pad:  Primrose
Pearlescents: Blush, Island Mist, Brilliant Blue
Glimmer Spray: Gold
Stamps: Distressed Textures, It is Written
Stencil: Bliss Stickable Stencil
Iron Works Wood Shapes
Jewels: Frosting Flourish Jewels, Primrose Jewel packet
Flowers:  Madeleine Petals, Blush Zinnias 
Lace: Blush

Thanks so much for stopping by my blog today, your kind words and feedback always make my day!  I hope you enjoyed my project today and hope that you give these beautiful new Bo Bunny products a try!

Thursday, September 11, 2014

An Art Palette Canvas Video Tutorial {Flying Unicorn} & AWESOME Shimmerz News!!


Hello friends! I'm excited to share with you today an OTP (Off the page) using a really fun wooden art palette canvas I got in the September kit at Flying Unicorn Kit Club.  There were so many cool metal ornaments included in this kit so I went and used these and some of the flowers and Shimmerz mixed media elements included in this kit as well.  I also added other colors of Shimmerz paints as well. Here are the Shimmerz products I used in this project:

~Golden Wheat Shimmerz
~Grape Escape Vibez
~Caribbean Sunset Spritz
~Hot Fudge Vibez
~Beets Me Inklingz
~Pugnacious Purple Inklingz
~Me and Blue Inklingz
~ Giddy about Green Inklingz
~Gold Mine Inklingz
~Pink Inklingz
~Tarnished Treasure Inklingz
~ Brass Knuckles Inklingz


I recorded a video tutorial on how I made this canvas design, hope you enjoy!


I thought I would share a bunch of close-ups that you can enjoy at your leisure. Above is a close-up of the embellishment cluster, a combination of metal accents, blooms and gems.  I gave the whole thing a coat of gesso and then spritzed and painted with Grape Escape Vibez.  Last but not least, I dabbed on some Brass Knuckles Inklings to further the metalic look on my embellishment cluster.


I used a variety of stencils....Heidi Swapp Moroccan stencil, Crafter's Workshop 'Art Is' stencil and the Prima 'Sunrise Sunset' Checkerboard stencil to create a textural background on my palette.  I then layered on lots of Shimmerz colors to create an 'artsy' looking background.


I chose a quote that I thought would work nicely with the art palette design....'Art is not what you see but what you make others see' ....I used the Tim Holtz alphabet stickers (included in the Flying Unicorn kit mixed with some Webster's Pages alphabet stickers I had in my home stash).


Here is another shot of the embellishment cluster.....I finished the design with a few colorful adhesive gems.


Originally I had planned to use a bunch of large colorful gems as my 'paint colors' but couldn't find them in the size and colors I was looking for....then I came across these 'sugared' gems at a local dollar store and went with these.  I used a variety of coordinating colors of Inklingz as a background mosaic design behind the colored gems.


There are a bunch of paint brushes included in the palette set, so I took two of these brushes as accent pieces to my design and 'dirtied them up a bit, giving them a well used look, by smudging on some paint colors before I applied them to my canvas.

I hope you enjoyed today's project! If you would like to order some of the beautiful Shimmerz products used on this project you can find them HERE.....and remember if you would like to get a FREE/Bonus Shimmerz product, be sure to mention my name 'Gabrielle' in the INSTRUCTIONS TO MERCHANT part of your order, and Shimmerz will send you a bonus product in the color of your choice.


Before I leave today I want to share some exciting news!!  The lovely folks at Shimmerz Paints have been hard at work creating NEW and EXCITING paint colors!  I just had a peek and the NEW colors are up and ready to go!  I don't know about you but I'm super excited to give these new color palettes a go! xo


Wednesday, September 10, 2014

A NEW Page Kit/VIDEO for The Scrapbook Diaries {Dusty Attic & Maja Design!!}


Hi everyone! It's here!!  My NEWEST page kit and VIDEO TUTORIAL for The Scrapbook Diaries!!  Have you ever said to yourself, 'Where can I get the pretty things she gets to work with?"  Well at The Scrapbook Diaries they make it super easy for you!  You can get all the things I used to make up the page you see above, including unique International papers from Maja Design (not easy to get a hold of in North America), gorgeous Dusty Attic Chipboard - 'Ivy Corners' (also hard to find here), loads of pretty blooms and embellishments and all the mixed media products and stencils, stamps etc. used to make this page! PLUS unlimited access to a free video tutorial (made by me) with the purchase of the kit!

A little while back I made up a page using Maja design papers and this Ivy Corners chippie from Dusty Attic.  I got a number of emails from people asking if I would create a page kit for The Scrapbook Diaries with these colors using the same lovely chipboard piece.  I finally got around to doing it!


I incorporated a lot of pretty Prima blooms on this page design as well as some really fun beaded embellishments.


For the Ivy corners chipboard I first painted the whole thing with a base of white Gesso.  I always like to give my piece this base because it allows the colors I apply after to really show up well.  For the Ivy Corners Dusty Attic chippie I used some Ingvild Bolme ink pads (Moss Green and Branch Bark) to color it.


I used a really fun stamp created by the owner of The Scrapbook Diaries (Janene Meyerowitz) to create the circle designs that I accented the pagewith and I used the title stamp included in this stamp set as my title.


I really like to add texture to my pages so for this page I used a cool new stencil by Crafter's Workshop called 'Mini North Star' (also in the kit) and some of my home-made texture paste (recipe can be found HERE).  I finished the look with some green adhesive pearls.


If you like this page and would like to order the kit which has all the products I used to create it and view a video tutorial I made up to go with the kit, you can find it at The Scrapbook Diaries (while quantities last).  As always, Janene is kind enough to offer it two ways, as a complete kit, or a basic kit for those of you who may already have the stamps or stencil in your stash. ....It also comes with a lovely BONUS page design created by Janene, wait till you see the bonus page, it's a beauty! Thanks so much for stopping by today!


Monday, September 8, 2014

New Bo Bunny Collection ~ Madeleine!


I recently got my design team package from Bo Bunny and have to say I was so excited to see the fun new products like stickable stencils, glitter pastes, glimmer sprays and dimensional mediums pearlescents.  And among my favorites of the new collections, Madeleine has to be love at first sight!  For the background design I used the Brocade Stickable Stencil set.  I love that the stencils stay in place while working with them, especially because I used 2 of the new ink pads by Bo Bunny....I didn't have to worry about the stencil slipping while I was working with the two colors.


For my floral accents I layered a couple of the coordinating blooms that go with the Madeleine collection and layered a bit of cheesecloth between the layers.  I used a bit of the Gold Shimmer paste on the tips of the blooms.


Another product that I'm totally loving from the new Bo Bunny releases are the new Wood Shapes!!  The Ironwork and Clock works wood shapes are absolutely stunning....the intricate detailing, just add so much to a project!


I just LOVE the pretty birdie images found in this paper collection.  For the design in the bottom right corner of my page I wanted a little bit of a 3D touch so I used a little EK Success 5 petal floral punch and punched a few flowers from the deep rose paper in this collection, gave them a crinkle and added them to the branch of birdies with an adhesive pearl in the center of each of them.

Bo Bunny Product: 
Patterned Paper: Madeleine/ Tiles, Songbirds, Symmetry, Madeleine.
Flowers: Madeleine Petals, small flowers punched from Madeleine paper.
Wood Shapes:  Ironworks Wood Shapes, Clock Works Wood Shapes
Jewels: Ruby Red
Brocade Stickable Stencil
Double Dot Ink Pads: Licorice, Pink Punch
Gold Shimmer paste

Thanks so much for stopping by my blog today!  Even though I've been down with the flu this past week, I've still got lots of projects to share with all of you this week! xo xo


Thursday, September 4, 2014

Mixed Media Canvas & Video Tutorial {Shimmerz Paints & The Flying Unicorn}


Hi all! I'm so excited to share with you today a small canvas design I made using goodies from the September Flying Unicorn kits and some of my favorite Shimmerz Paints Products. There were so many beautiful metal embellishments in this kit I wanted to use them on a mixed media style canvas.  Most of what is on this canvas is from the September kits from Flying Unicorn (I think the only thing from my stash is a couple of adhesive gems and a couple small Dusty Attic chipboard pieces and some Shimmerz Paintz....I will list them below).  As always, I find it easier to show than to tell, so here is a little video tutorial I made up for this piece,...enjoy!


As I said, most of the products I used on this canvas are from the Flying Unicorn kits, but here are the Shimmerz Products used on this canvas....

~ Sunset Strip Vibez
~ Before the Dawn Vibez
~Truffle Spritz
~ Jeni B Bleu Vibez (in Kit)
~ Apple Cider Blingz
~ Artechoked Texturez (in Kit)
~ Golden Wheat Shimmerz

NOTE:  If you would like to order the Shimmerz products used on this canvas you can order them directly from the Shimmerz online STORE.  And remember if you would like to get a FREE/Bonus Shimmerz product be sure to mention my name "Gabrielle' in the 'INSTRUCTIONS TO MERCHANT' part at the end of your order and Stacey will send you a bonus Shimmerz product in the color of your choice :)


Here are a few of close ups of the canvas that you can view at your leasure....


I just love that metal branch!


For the centerpiece design I took one of the label chipboard pieces in the Small Art kit and added some bronze dimensional paint to give it a metalic look.


Hope you enjoyed my project! This one came together quick and easy!  I've got another really fun canvas/and video tutorial coming up in a few days (11th) done with more goodies from this kit!  Hope you'll be able to come by and check it out!  Thanks so much for stopping by today!


Monday, September 1, 2014

Guest Designer for Flying Unicorn {Layouts & Cards}


Hi again!  So happy you all could make it back today to see more of my projects using the beautiful September kits from The Flying Unicorn!  A couple of weeks ago my family and I went on a nice little hike in our area.....the girls had found this trail while riding their bikes and found a spot with a beautiful waterfall!  So they got my hubby and I to do a hike with them to see it.  The girls are always exploring and I caught a photo here of Chloe climbing a rockwall to peek into a cave.... (more daring than I would ever be, lol).  So I thought I would use the barn board looking paper in the kit to create a vignette, sort of peering through a window at Chloe peering into a cave.  I decided to put the barn board pattern going sideways rather than straight up because I liked the contrast better with the upright window.  (the window is from Dusty Attic).


I used a variety of blooms from the kits, tinting the center of the creamy white fabric blooms with some of the Shimmerz 'Pop Art Pink' Spritz in the kit.  I added a small nest from my own stash (I believe it's a Recollections embellishment), I thought it would go well with the birdie/floral vine in the kit.


Here's a close-up of the window design....I inked around the window frame with the brown 'Ingvild Bolme' chalk ink that is in the kit....I think it makes the window design pop a little more.


For my second layout using the Main Kit, I used the corrugated card piece in the kit for the background, then I used one of the floral patterned papers to create a border.  I fussy cut out the floral design and then stamped a flourish border with an old stamp I had in my stash along the cut edge....I then trimmed along the stamp design and tucked the floral cutout behind it.  I took my inspiration from an old Prima paper from years ago (I don't even remember the name but Ingvild Bolme did something similar with it).


I wanted to add a little more texture and fabric feel to the page so I added a strip of the cool tattered canvas strip that was included in the kit.  I added a bit of machine stitching to the fabric strip to add to the homespun feel of the page.


I added a small floral cluster in the corner of the photo using more of the blooms found in the kits (I mixed and matched from all the kits for this month).  And again, I tinted the centers of the creamy fabric blooms with a spritz of the Shimmerz Pop Art Pink Spray.


I often like to balance a page by creating a small embellishment cluster in an opposite corner.  Here I used more of the floral embellishments, the metal accents and a fun little Prima Stamp included in the kits.


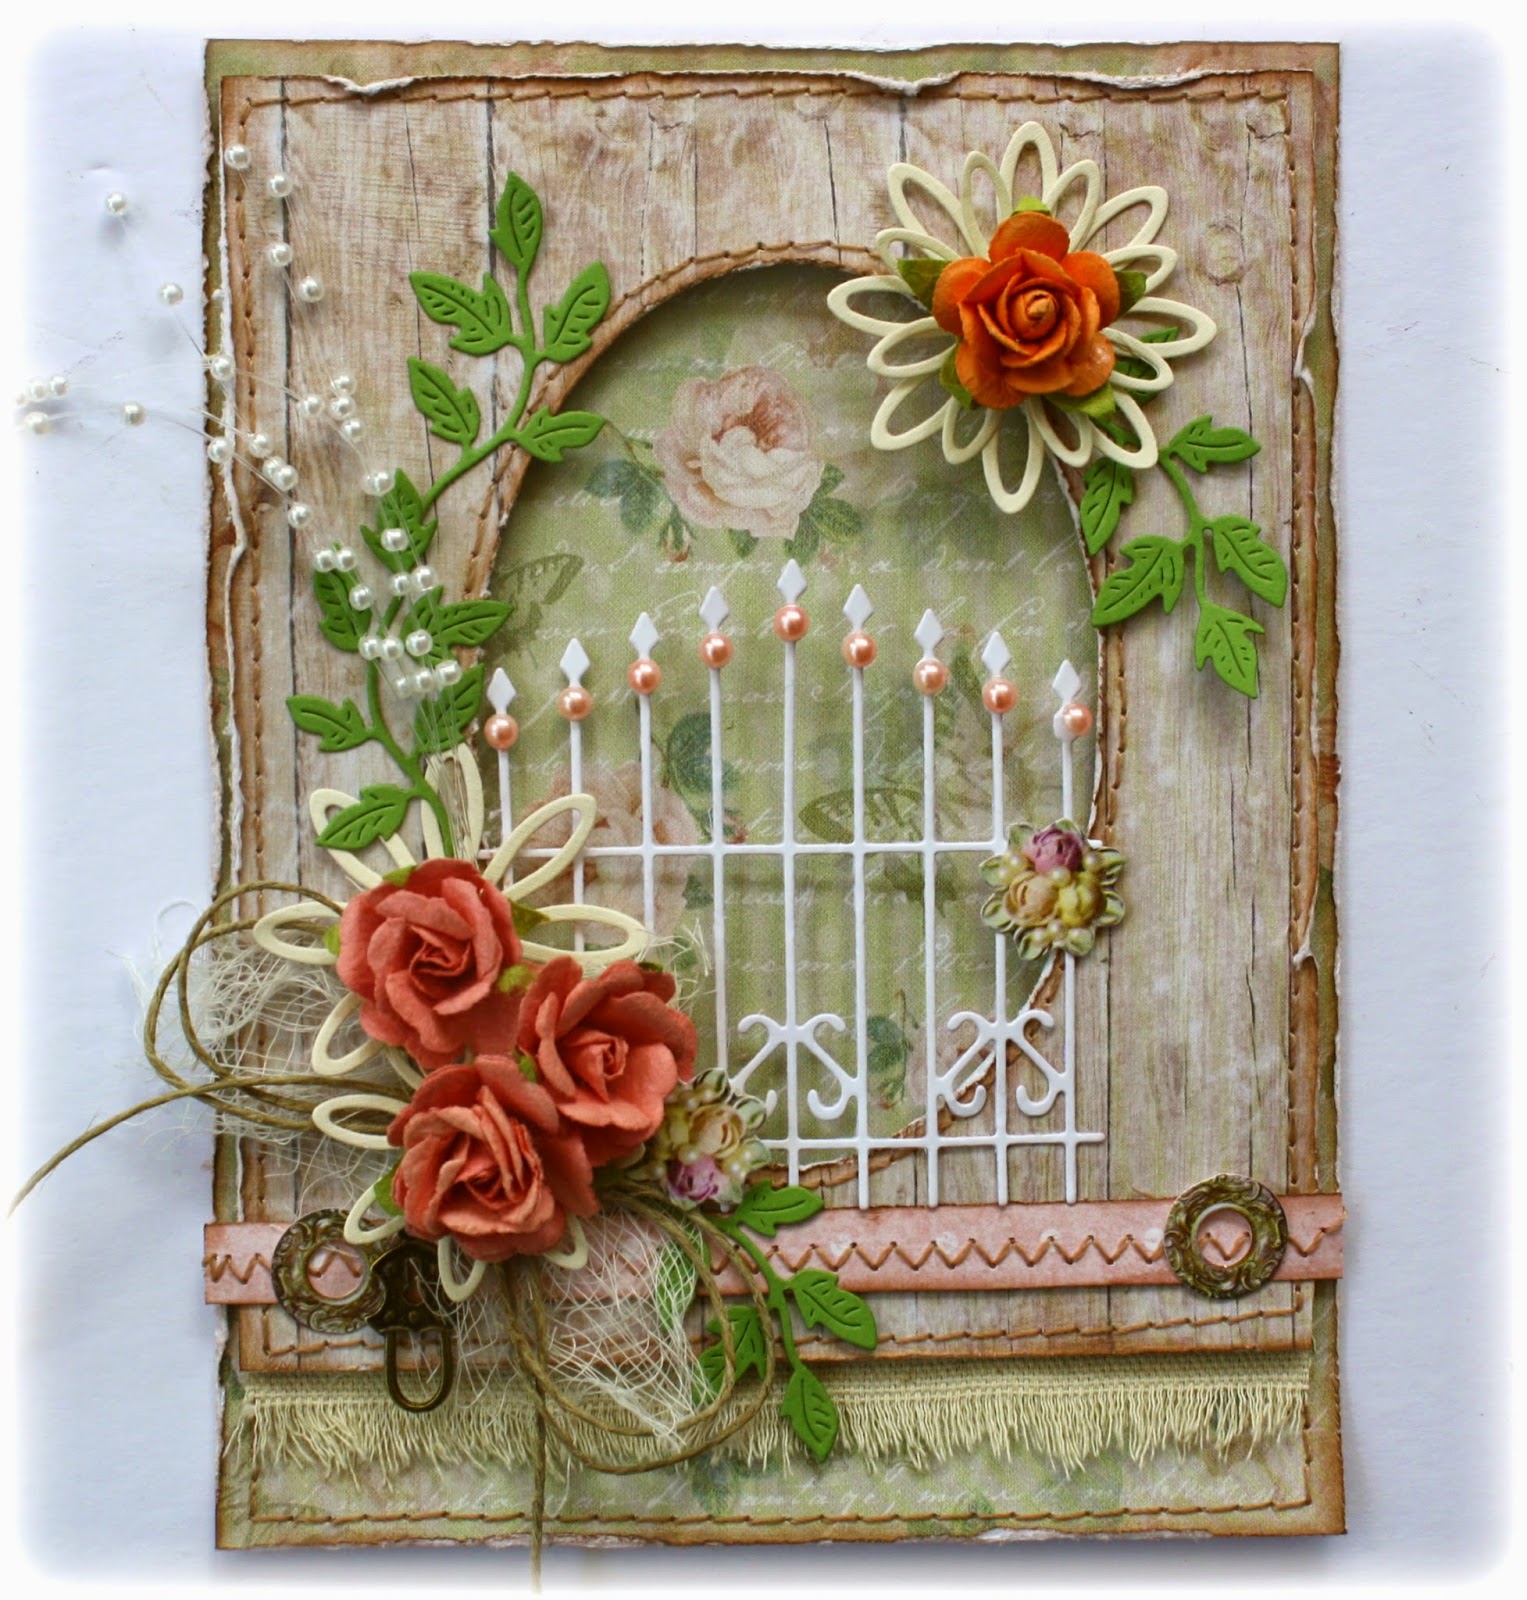
And finally one more project I wanted to share with you all was this little card I made using the small 6x6 papers in the Small Art Big Passion kit.  I cut out an oval window and again used the barn board paper design mixed with one of the floral papers.  I used a Cheery Lynn Gate die to make the white iron fence design and added a few more blooms from the kit.

I hope you enjoyed these projects I made using the gorgeous September kit from The Flying Unicorn.  If you haven't ordered yours yet, just hop on over to The Flying Unicorn and grab yours, while quantities last!  

Please come back on Thursday for another Flying Unicorn project I made with this months kits (this will be a canvas design with a video tutorial.....using Shimmerz Paints with it. Here's a little peek....


.....See you Thursday!!!  Thanks for stopping by today!!


LinkWithin

Related Posts with Thumbnails