Wednesday, May 27, 2015

Nautical Cards with NEW BoBunny 'Boardwalk' Collection!!

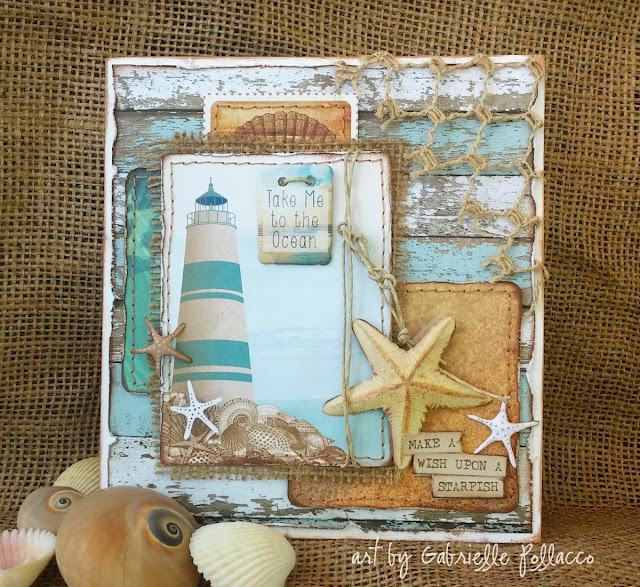
Nautical Cards made by Gabrielle Pollacco using the BoBunny Boardwalk collection papers and embellishments

Hello my friends!  Just a few days ago I got my new Bo Bunny collections in the mail and was so excited about them, that I immediately stopped all other projects just to give this adorable 'Boardwalk' collection a play!  I just LOVE the nautical/beach elements in this collection, lighthouses, ships, starfish, weathered wood.....I just had to take a moment and do up a couple of cards!

Nautical Cards made by Gabrielle Pollacco using the BoBunny Boardwalk collection papers and embellishments

For my first card I used the Boardwalk 6x6 paper pad for my background (I chose the weather wood paper for this), and then cut out the lighthouse image from the 'Sandcastle' paper as my focal point image.  


I then took 2 of the Misc Me Boardwalk pocket square designs (the starfish) and mounted one on the card and then cut out the starfish/title from the other.  I gave the starfish a little dimension by using an embossing tool on the back and rubbing along the lines of the legs.  I also cut out some smaller starfish images from the back of the 'Beach Bliss' paper and did the same with an embossing tool.  It takes a minute to do but makes a big difference in the finished look of the card.  I finished the design with a bit of burlap, some hemp twine and a piece of trim (netting) I got from my sweet friend Janene, at The Scrapbook Diaries.

Nautical Cards made by Gabrielle Pollacco using the BoBunny Boardwalk collection papers and embellishments

For my second card I used the ship postcard design from the Boardwalk 'Beach Bliss' paper as my focal point, and matted it on the dark blue 'Sail Away' paper.  I sandwiched a piece of burlap between the two layers. 


I made the fun anchor design by using a piece of die cut paper (anchor) from the matching 'Noteworthy' pack (this is a pack full of really fun nautical and beach die cuts).  I used Bo Bunny's Chocolate Pearlescents to add a metalic 3D effect.  I added a layered chipboard medalion and added some hemp twine and some bits of denim of some old jeans.

Products used in these cards:
Patterned Paper: Bo Bunny Boardwalk/Beach Bliss, Sail Away, Sandcastle
6x6 Paper Pad: Bo Bunny Boardwalk
Noteworthy: Boardwalk
Layered Chipboard: Boardwalk
Pearlescents: Chocolate
Hemp Twine
Burlap

The new Bo Bunny products should be in your local stores now (or on their way)!  Thanks for stopping by my blog today and for the lovely comments and feedback, they always make my day! xo

Sunday, May 24, 2015

Beach Canvas Video Tutorial {Shimmerz Paints & Dusty Attic Designs}


Hi All! I'm so happy to share with you today some summery fun with Shimmerz Paints and Dusty Attic chipboard! I'm super excited because I just recently got my nice stash of  Dusty Attic chippies in the mail, and I am head over heals in love with the new scripty titles Jennifer Hedger just released! One of my favorites from the new selections is the Word Pack #10.....love the soothing summery words!  I used one of them for this beach canvas.  And so much fun to get out my Shimmerz Paints again and get playing!


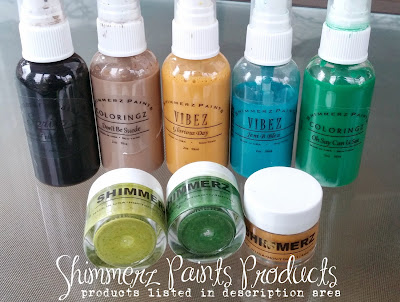
Shimmerz Paints Used in this project:
~ Taupe of the World Spritz
~ Don't Be Suede Coloringz
~ Glorious Day Vibez
~ Jeni B Bleu Vibez
~ Oh Say Can U Sea Coloringz
~ Lime Shimmerz
~ Olive Green Shimmerz
~ Golden Wheat Shimmerz


Dusty Attic Products used on this page:
~ Crooked Fence
~ Word Pack #10
~ Anchors
~ Seagulls
~ mini Seagulls
~ Grass Clusters #1


I used the Dusty Attic Inspiration Board as a jumping off spot for my canvas design, I just love this months serene peaceful colors and words!  And I easily found the colors I wanted to match it in my Shimmerz stash ....If you haven't played along this month, there still is time!  Just be sure to link your project to the right column of the Dusty Attic Blog to be entered into the challenge and have a chance at the AWESOME monthly prize!

So, rather than explain each step in creating this canvas I thought I'd share another Video Tutorial so you can just sit back relax and watch! Enjoy!


I hope you enjoyed my video tutorial today, I had lots of fun making it!  Here are a few close-ups that you can view at your leisure....


Here you can see some of the chipboard designs close-up so you can see in more detail how I finished the chipboard designs.  I also made a few embellishments out of air dry clay (Martha Stewart, ...the Starfish and barnacles).


I just love the crooked fence design!  This is my first time using this chippie and I love the way it looks for this beach scene!


I added some sand color seed beads to the beach area just for a little added texture to the canvas.


Here you can see a close up of the title chippie and the stamp work I added using my own stamp design (peeled paint)....the stamp can be found at The Scrapbook Diaries.


I was really happy with the way the anchor came out too!  I used some 3D Bronz metalic paint on the anchor and then spritzed it with Shimmerz Taupe of the World Vibez paint.


I hope you enjoyed today's project and hope you feel inspired to enter the Dusty Attic May Inspiration Board challenge!  You can find Dusty Attic Chipboard direct from the Dusty Attic Website - http://www.dustyattic.com.au/ or in North America at http://www.thescrapbookdiaries.com/product-tag/dusty-attic/ and  http://moments-of-tranquility-shop.com/chipboard/.

NOTE: If you are looking to order some of these yummy paints I used you can find them HERE.  Be sure to mention my name "Gabrielle" in the message to merchant/seller part of your order to get your FREE/Bonus Shimmerz Paint product!

Thanks so much for stopping by my blog today and for the lovely comments, I appreciate and read them all! xo


Thursday, May 21, 2015

Video Tutorial: Steampunk Style Glasses Case {Bo Bunny}


Mixed Media Tutorial by Gabrielle Pollacco using Bo Bunny Pearlescents, Ironworks wood accents, Stickable Stencils and Glitter paste

Hi everyone!  A little while back someone suggested on one of my posts that I should do a steampunk style phone cover.  I thought it would be a fun idea but then wasn't sure how well that would hold up with the beating it would take in my purse and pockets! lol!   So I thought I would instead, do a Steampunk style eye-glass case using a variety of Bo Bunny's gorgeous mixed media products and one of my favorite wood embellishment collections called Ironworks.  I have an eye-glasses case that I keep on my night table so I thought I could give that a nice make over :)

Mixed Media Glasses Case tutorial by Gabrielle Pollacco using Bo Bunny Ironworks wood accents, Pearlescents, Glitter Paste, Lasercut chipboard and Stickable stencils.

Have you tried these beautiful new lasercut chippies by Bo Bunny?  I was lucky enough to get my hands on this stunning butterfly chippie, they have such intricate cut-work, love them! So I decided to make this, and a lovely scroll from the Ironworks wood accents collection the centerpiece of my OTP (of the page) project.  I thought it would be nice to make a video tutorial up to show how this thing went together.... so grab a cup of coffee (or tea) click on the arrow below and enjoy!


I just love the way the Pearlescents adhere so well to almost any surface, I didn't even have to pre-coat my piece with Gesso!  Here are a couple of views of this project from other angles...

Mixed Media Glasses Case tutorial by Gabrielle Pollacco using Bo Bunny Ironworks wood accents, Pearlescents, Glitter Paste, Lasercut chipboard and Stickable stencils.

This is the backside of the glasses case, you can see the nice texture I got using the Cascade Stickable Stencil with a combination of  Licorice, Graphite and Chocolate Perlescents streaked across it.

Mixed Media Glasses Case tutorial by Gabrielle Pollacco using Bo Bunny Ironworks wood accents, Pearlescents, Glitter Paste, Lasercut chipboard and Stickable stencils.

I finished my design with some Bo Bunny Trinkets and Mocha Jewels. 

Mixed Media Glasses Case tutorial by Gabrielle Pollacco using Bo Bunny Ironworks wood accents, Pearlescents, Glitter Paste, Lasercut chipboard and Stickable stencils.

A view of the left side.  I also added some little hits of the Bronze Glitter Paste to the wings o the butterfly and on the metal flowers.  This project came together quick and easy and now I have a pretty eye-glass case to keep on my night table.

Product used in this project:
Bo Bunny Stickable Stencil/Cascade
Bo Bunny Pearlescents/Licorice, Graphite, Chocolate
Bo Bunny Glitter Paste/Bronze
Bo Bunny Laser cut chipboard/Butterfly
Bo Bunny Wood Accents/Iron Works
Bo Bunny Double Dot Jewels/Mocha
Bo Bunny Trinkets/Apple Cider collection

Hope you enjoyed my tutorial and hope this has inspired you to use Bo Bunny's fabulous wood accents and mixed media products! Thanks to all my lovely blog readers for the sweet comments and feedback, they make my day! xo


Wednesday, May 13, 2015

Heritage Style Altered Notebook {Bo Bunny}


Hello my friends!  It's been a crazy busy time around here for me.  I'm in the middle of a laundry room renovation and oh boy! is it a mess here!  What we thought might take a few days, has turned into 2 and a half weeks (so far!)....but I'm seeing the light at the end of the tunnel, finally!  We have the new drywall put up on the ceiling and walls, the new floor and cabinets are in, I just have to add a few little things like shelves and hook up the washer and dryer and I'm in business again!  

In the meantime I had to shove a few boxes aside and make myself a little scrapping space in all this mess!  It's nice to get a little creative break.  My daughters are both voracious little note takers, so I thought I would take one of these plain notebooks my DH brought home from a trade show and turn it into a pretty little notebook for one of my girls. (I'll probably have to make another for the other :)


This notebook cover came together fast and easy using some of the elegant papers in the Bo Bunny Heritage collection.  I then just added a few chipboard accents from the same collection, a little bit of hemp twine and ....this is so cool....one of Bo Bunny's NEW Gold Foil Transfers!  They go on so smooth and easily!!  Just rubbing with your fingertip is enough pressure to release the rub-on, and the effect is brilliant.  I used the gold script design (see above) on this project and was so happy with the effect!

Bo Bunny Products Used in this Project:
Patterned Paper:  Heritage/Anthology, Lifetime, Key
Layered Chipboard: Heritage
Buttons & Brads: Heritage
Gold Foil Transfers: Filigree

Okay, I've had my little break, ....back to work.  I'm off to Ikea to get some floating shelves and Amazon to find a cute Laundry room vinyl wall rub-on. ....I'll post a pic when I'm done! :)

Thanks so much for stopping by my blog today, your kind comments and feedback always make my day!! xo xo

LinkWithin

Related Posts with Thumbnails