Friday, December 19, 2014

VIDEO TUTORIAL: Mixed Media Steampunk Style Keepsake Box {Bo Bunny}

A Keepsake box by Gabrielle Pollacco using Bo Bunny mixed media products: Glimmer Sprays, Pearlescents, Glitter Paste and Stickable Stencils

Hi all! I've got another fun little project to share with you today, and I made a video tutorial to show step by step how I made it!  I had picked up a variety of plain craft boxes at my local dollar store and decided it was high time I decorated one of them up.  My other trinket boxes are overflowing and I needed another pretty box to store my crafting goodies.

A Keepsake box by Gabrielle Pollacco using Bo Bunny mixed media products: Glimmer Sprays, Pearlescents, Glitter Paste and Stickable Stencils

I used a variety of the new Bo Bunny Mixed Media products to make up this Vintage/Steampunk style box.  I began by doing a little stenciling with Bo Bunny's Stickable Stencils (Brocade stencil)...I used the script stencil and the honeycomb stencil with my homemade texture paste. Then I painted the whole thing with Gesso, added my embellishments and began spritzing with 3 of BoBunny's new Glimmer Sprays (Gold, Bronze and Frost (Blue)....I added some accents with their new Pearlescents as well (Brilliant Blue and Chocolate).  At the end I added some dabs of Glitter Paste in Gold to the tips of the petals and a few of the trinkets. Here is my video tutorial to go with this project....Enjoy!


I hope you enjoyed watching my tutorial as much as I enjoyed making it!  Bo Bunny makes so many fun products and I'm happy they've added mixed media products to the mix!  Here are a few more pic's of the project so you can see from other angles....

A Keepsake box by Gabrielle Pollacco using Bo Bunny mixed media products: Glimmer Sprays, Pearlescents, Glitter Paste and Stickable Stencils

Some of the things I like to keep in my 'keepsake' boxes are odds and ends I find lying around the house...pop can tabs, old keys, buttons, broken bits of knick knacks and trinkets....(I have so many trinkets left over from older Bo Bunny collections.  I put them in this box to use for projects like this).

A Keepsake box by Gabrielle Pollacco using Bo Bunny mixed media products: Glimmer Sprays, Pearlescents, Glitter Paste and Stickable Stencils

I love that Bo Bunny now makes their Gem/Jewel packets by color,they are called Double Dot Jewels.  I used some of their Aqua and Mocha jewels to decorate my treasure box.  This is a design idea I had first seen on a project by one of my fabulous friends on the Bo Bunny Design team Ilene Tell.  She had embedded her jewels into some texture paste on one of her projects and I just loved the look!

A Keepsake box by Gabrielle Pollacco using Bo Bunny mixed media products: Glimmer Sprays, Pearlescents, Glitter Paste and Stickable Stencils

Another thing I love about all the new Bo Bunny mixed media products is the way the color change, almost chameleon-like as you change the view of the box!

A Keepsake box by Gabrielle Pollacco using Bo Bunny mixed media products: Glimmer Sprays, Pearlescents, Glitter Paste and Stickable Stencils

I liked the way that the Gold Glitter Paste added another element of texture and shimmer to the tips of the petals and some of the trinkets. It looks white and creamy when you apply it, but after a few minutes of dry time it becomes sheer and super glittery!

A Keepsake box by Gabrielle Pollacco using Bo Bunny mixed media products: Glimmer Sprays, Pearlescents, Glitter Paste and Stickable Stencils

I hope you enjoyed checking out my latest project and hope I've inspired you to give Bo Bunny's new mixed media product a try!

Bo Bunny Products used in this project:
~ Stickable Stencils: Brocade
~ Glimmer Mists: Gold, Bronze, Frost Blue
~ Pearlescents: Brilliant Blue, Chocolate
~ 6x6 paper pad: Rose Cafe (optional)
~ Various trinkets
~ Blossoms: Zinnia's (blue)
~ Wood Embellishments: Iron Works, Clockwork
~ Double Dot Jewels: Aqua, Mocha
~ Glitter Paste: Gold

Thanks so much for stopping by my blog today, I always appreciate all the sweet feedback I get from you lovely ladies, you make my day!

Wednesday, December 17, 2014

Love Completely {Maja Design & Dusty Attic}

Love_Completely_by_Gabrielle_Pollacco_for_Maja_Design_02

Hi everyone, here is my last project for 2014...I think, LOL!  I came across this photo of my dear husband and our oldest daughter Chloe from when she was just a little baby. We've had a tradition of going apple picking in the Fall, even before our babies were born, and we continued the tradition on, each year with our girls (and family).  This was Chloe's first apple picking trip.  Now she is 16 years old and will soon be driving a car! Oh my, how time flies!

  Love_Completely_by_Gabrielle_Pollacco_for_Maja_Design_CLoseup_01

I used 4 different Maja paper collections for this one.  It's fun to combine the collections, the way I do it is to either go with the 'warm' colors from each of the collections or the cool colors. I used a color combination that I have not used in a long time.  When I think of whimsical, the two colors I like to put together is usually purple and green.....but this time I went with purple and blue.  I tore some paper strips from left over scraps I had in these colors and layered them with some drywall tape (found at your local hardware store). I then decorated around my photo with some chipboard...the circle design is a new Dusty Attic chipboard piece from their String Frames Set.  I added some clocks from Vintage Autumn Basics XVI paper and tucked them around my photo area.  The blooms are from my sweet friend Lucy over at Tresors de Luxe.  


And that diamond stamp you see around the photo and edges of my page?....That's one of my new stamps that I designed!  I used to doodle this design by hand on my layouts, so I thought it would be fun to make a stamp of it!  You can find my stamp at The Scrapbook Diaries.

Love_Completely_by_Gabrielle_Pollacco_for_Maja_Design_CLoseup_02

Once I had my embellishing done around my photo, I went to add my title, another new set of chipboard titles from Dusty Attic 'Love Completely'.  I just LOVE these new title chippies!! I love the pretty delicate font they've used and love the combination of fonts as well!   I wanted the white letters to show up better so I did a little dry brushing with my Victorian Velvet Distress paint by Tim Holtz behind the title area....this allowed the title to pop.

Love_Completely_by_Gabrielle_Pollacco_for_Maja_Design_CLoseup_03

I added a small corner design to balance the page by moistening the Maja paper and pulling it back a little.  I love the way these papers withstand the rigors I put them through, LOL.  I then tucked a piece of lace in the exposed area and added some chipboard accents, again from Dusty Attic (Small Scroll #2). 

Maja Design Papers used in this project:   

Coffee In The Arbour:  Raspberry Jam Cookies, Butterflies are Free (both sides), Raspberry Cupcakes 

A Gift for You:  My Dear Friend 

Vintage Autumn Basics:  XVI (clock designs) 

Ska vi ta en Fika: Våffla m. björnbärssylt (both sides)


Dusty Attic Product used in this project:
~String Frame Set
~Live Beautifully (Title Set)
~ Cogs
~Small Scrolls #2

Where can you get these lovely products?  You can find both Dusty Attic Chipboard and Maja Design Papers (including the NEW release collection) at The Scrapbook Diaries, and you can find more Dusty Attic chipboard at Moments of Tranquility.


And speaking of NEW collections....Here is a sneak peek a the NEW LIMITED EDITION Maja Design collection called Nyhavn!  I cant wait to get playing with these!  (as I mentioned earlier, Janene over at the Scrapbook Diaries has ordered in this Limited Edition collection so get them while they are still available!) :)

Thanks so much for stopping by my blog today, your kind words and feedback always make my day! xo xo


Monday, December 15, 2014

Unique Card Design & Tag! {Bo Bunny}

Star Fold card by Gabrielle Pollacco using Bo Bunny Madeleine paper collection.

Okay, so if you've been following my blog, you'll know that I've been into unique folded card designs lately.  I thought this was a really fun card design, and actually pretty simple to make! I gathered together some  of my favorite Bo Bunny patterned papers (for this one I used papers from the Madeleine collection)

Folded star card by Gabrielle Pollacco using Bo Bunny's Madeleine collection papers and embellishments

The card opens out and you can put your sentiment in the center.  For mine I just used a rub-on for the sentiment and added a cute lil birdie design from the matching Noteworthy die-cuts from the Madeleine collection.  Below I've posted a template for this unique card (instructions below the template).

Star Card Template by Gabrielle Pollacco For Bo Bunny

Step 1:  Take a solid color piece of 12"x12" cardstock.  Mark the center point (6") at the top (make a pencil line, a few inches down...this is the dotted line you see on my template).

Step 2:  Now put the zero mark of your ruler in the bottom left corner of your paper and pivot the ruler until the 12 " mark meets the dotted line.  Mark this line. Do the same for the right bottom corner. (this is how you get 3 equal sides).

Step 3: Mark the center point of each of the 3 sides (6 inches) These will be the score lines (valley fold).

Step 4: Now put another mark 2" from the center point along the edge of the paper (both ways from each center point).  This will be the other score lines....I flipped the card to make these scores as you want them to fold the opposite way of the other score lines).  Done! Now decorate! 

I made my decorative paper designs an 1/8" smaller around the edges  so that some of the darker cardstock border showed around the edges.

Bo Bunny Products used on this card:
Patterned Paper:  Madeleine (Symmetry, Tiles, Frames)
Double Dot Cardstock: Licorice
Noteworthy: Madeleine 
Double Dot Jewels: Think Pink

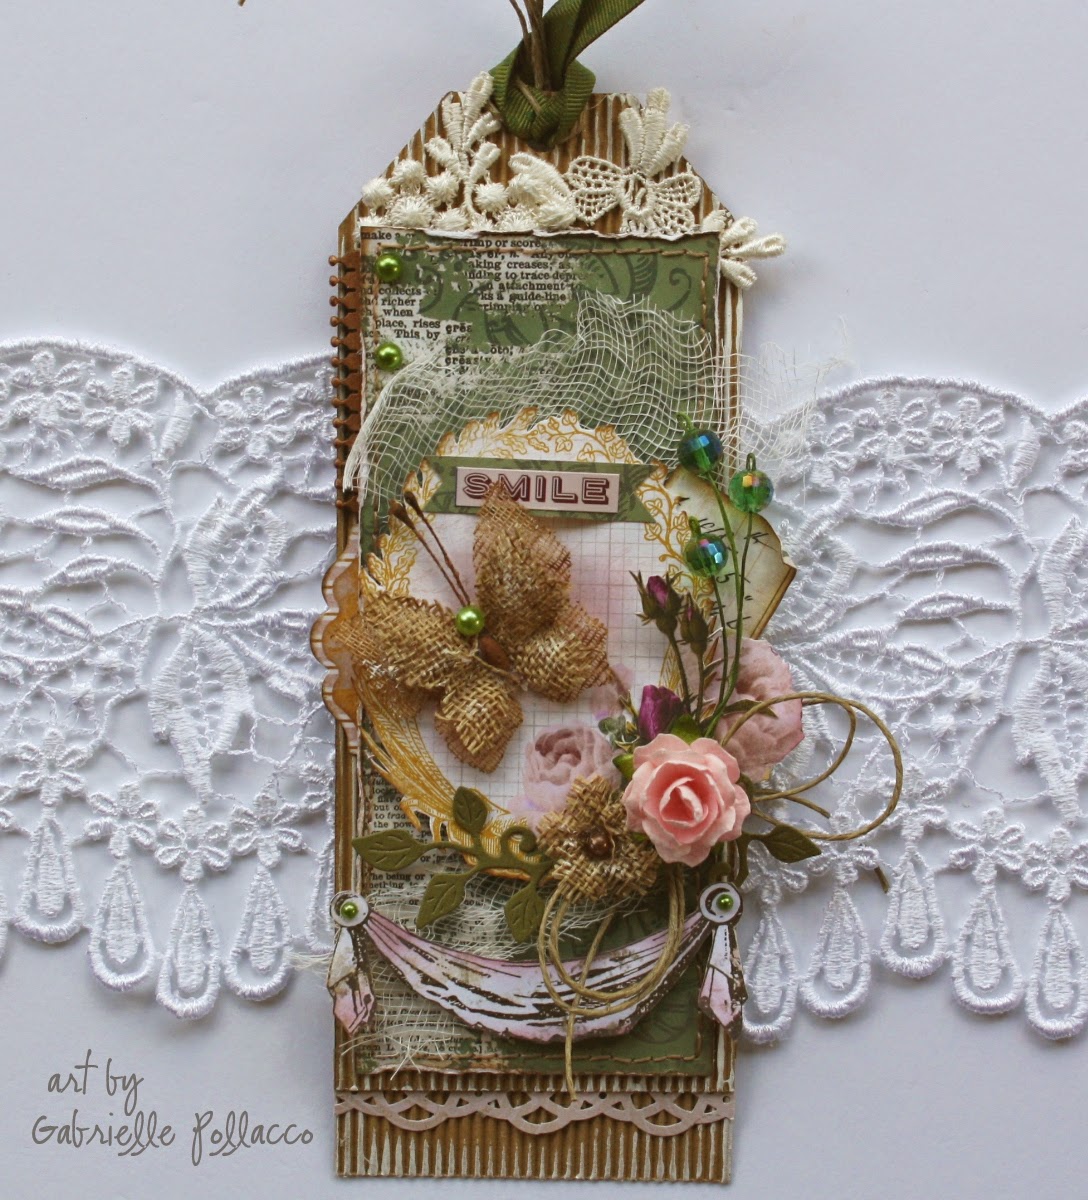
Tag by Gabrielle Pollacco using Bo Bunny 'Rose Cafe' collection

A second Tag/Card I made was using the Bo Bunny 'Rose Cafe' collection. I went with the soft sage greens and pinks for this tag.  I like to add neutral elements for this color grouping so I began by cutting a tag shape out of some craft paper corrugated card.

Tag by Gabrielle Pollacco using Bo Bunny 'Rose Cafe' collection

I layered on some scraps of the Rose Cafe 'Garden' paper I had left over from another project. I then cut out a frame design from the 'Frames' paper and added it with some foam dots.  I fussy cut out a few of the pink rose designs from the "Espresso" paper and from a scrap I had left from the name paper from the Rose Cafe collection (swag is from this paper as well).

Tag by Gabrielle Pollacco using Bo Bunny 'Rose Cafe' collection

I added a few blooms and some burlap blooms & butterfly (by Petaloo).  Put in a twine bow....easy peasy, the tag is done!  I like to put a little sentiment on the back of the tag to use on a gift. (Some of you have asked what you do with tags :)

Bo Bunny Product used on this Tag:
Patterned Paper:  Rose Cafe (Garden, Frames, Espresso, Rose Cafe)
Double Dot Jewels: Emerald

Thanks so much for stopping by my blog today, I hope you enjoyed my cards and hope you will give the folded card design a try!  If you have any questions (if my template and instructions are not clear enough) please don't hesitate to ask! :)


Wednesday, December 10, 2014

Creating a Scene with Dusty Attic & Websters Pages

Scrapbook page by Gabrielle Pollacco using Dusty Attic Chipboard and Websters Pages Paper, Nest Collection

Hi all!  Today I had a chance to play with some really sweet papers from Webster's Pages called "Nest". Lately I'm just crazy about bird/nest/nature images in my work and this beautiful collection is just full of them! I wanted to do sort of a view, peeking outside using the fun Dusty Attic chipboard Door Frame on the pretty, shabby-chic looking wood/board paper from the Nest collection (called Begin Anew).  I printed out the photo as a 3x7 to fit behind the piece of chipboard and gave the door a weathered look.

Scrapbook page by Gabrielle Pollacco using Dusty Attic Chipboard and Websters Pages Paper, Nest Collection

For the door frame (Door #2) I started by first painting the whole thing with some white Gesso.  Then I added streaks of Cashmere, Oceania and Mountain Meadow 'Dusty In Color' paints.  I did some light stamping with a Bo Bunny Text stamp (It is Written) and rubbed a brown chalk ink (Ingvild Bolme's 'Branch Bark'}along all the edges of the frame. There was a really versatile paper in the Nest collection that has a number of cute designs called 'Storyteller Card Sheet II" that has this weathered door design, I cut out the door handle bit from this and glued it onto the door frame.  To add another fun effect I cut out an egg/floral design from the paper called 'The Nest' and added it to the top of the door with some Spanish Moss, to make it look like a bird had made a little nest at the top of the door frame. I also fussy cut lots of the floral images from this paper to tuck around the door frame.

Scrapbook page by Gabrielle Pollacco using Dusty Attic Chipboard and Websters Pages Paper, Nest Collection

I embellished the top right corner of my page with brand NEW chippies from Dusty Attic.  I just love the new branch designs! Here I used the Branch #4 Small chipboard piece, combining the two pieces to make this branch accent.  I used brown and green chalk inks to add color to the branches (Ingvilde Bolme's 'Branch Bark' and 'Moss Lawn' inks)....then I added some floral buds but fussy cutting some of the blooms from the back of the paper called 'The Nest' and glued them onto the branches.

I added another NEW and gorgeous chipboard piece from Dusty Attic called Ornate Corners #13, you get 2 sets of corners (4 in all)....I used one of the smaller corner accents here.  I simply painted the chippie with some white Gesso, gave the edges a light rubbing with brown chalk ink and added a few adhesive pearl accents.


Here is a close-up of a couple more chipboard designs I added to my page.  Dusty Attic just put out a whole lot of fun new title designs, among these is this 'Serenity' title...while I had my Oceania paint out, I just lightly brushed the bottom part of my title chippie with the aqua paint so that it faded into the top white part.  I gave the title a quick coat of Dusty Attic "Clear Crackle Varnish' to give a pretty effect to the title. (I didn't mention it, but I did the same for the Door frame and for the hinge accent).  One more little chipboard accent I added was the Seagull on the stump. Again, easy to paint, just add a coat of white Gesso, and using some Ingvild Bolme 'Branch Bark' and 'Old Road' chalk inks, I colored up the the piece.

Scrapbook page by Gabrielle Pollacco using Dusty Attic Chipboard and Websters Pages Paper, Nest Collection

In the bottom right corner I hung a cute little knot-hole image from the 'Special Places' paper, from a Dusty Attic chipboard Hinge. I added a fussy cut butterfly from the 'My Style' paper (also cut some of the Rose designs for around the door from this paper as well).

Scrapbook page by Gabrielle Pollacco using Dusty Attic Chipboard and Websters Pages Paper, Nest Collection, Tresors de Luxe fabric flowers

Here is a close-up of the floral cluster in the corner of the door.  You can see some of the fussy cut blooms from the 'My Style' paper as well as some Maiden Hair Ferns, a NEW chipboard design .  These I again used the brown and green chalk inks on them and then used a bit of 'Dusty Pink' paint and 'Navajo White' paint to the top few tips of the fern strands to give the appearance of a floral strand.  And finally I added some beautiful pink/coral color fabric blooms that were sent to me from Lucy Ohanyan, owner of Tresors de Luxe.


Dusty Attic Chipboard used on this project:
~ Door #2
~ Branch #4 small
~ Ornate Corners #13
~ Word Pack #5
~ Hinges
~ Maiden hair Fern
~ Seagulls
~ Dusty In Color: Dusty Pink, Navajo White, Oceania, Mountain Meadow
~ Dusty Attic Clear Crackle Varnish

You can purchase both Dusty Attic chipboard and Websters Pages papers directly from their websites or at a local scrapbook store near you (if they don't carry these products, it's always good to ask your local store owner if they will bring them in!).  There are also some awesome online stores in North America that have a great variety of Dusty Attic chipboard in their shops.... Moments of Tranquility (has a huge selection), and The Scrapbook Diaries. I recently found out a local store here in Ontario (Canada) called The Scrapping Bug has ordered in a variety of Dusty Attic chipboard as well!  Natasha over at Moments of Tranquility is also willing to order in DA specific Dusty Attic Chipboard pieces if she does not have them in her shop....just follow the instructions at her site HERE. And for those of you who would like to give a gift of Dusty Attic chipboard to a scrapping friend, Dusty Attic now has Gift Certificates as well! You can find them at the top of the Website just under the spot where it says 'Go To Checkout".

Hope you enjoyed todays project, I appreciate all your kind comments & feedback! xo


Monday, December 8, 2014

Autumn Mixed Media Canvas {Shimmerz Video Tutorial}

Autumn Canvas by Gabrielle Pollacco using Shimmerz Paints

Hi all! I'm so happy to share with you today a canvas I made using Fall leaves, some Gesso and a few Shimmerz Paints products!  Winter has come way to fast this year and I wanted to get this Autumn project done before there weren't any usable leaves left on the ground.  I managed to find a few after doing a little hunting around in my backyard.


These are the Shimmerz products I used on this project:
~ Punked Up Purple Coloringz
~ Treasured Hymn Spritz
~ Hot Fudge Vibez
~ Bamboo Leaf Spritz
~ Tuscan Sun Spritz
~ Oh Say Can U Sea Coloringz
~ Miner Miner 49er Inklingz

I made up a Video Tutorial to go with this canvas design....Enjoy!....


Here are a couple more views of this canvas....

Autumn Canvas by Gabrielle Pollacco using Shimmerz Paints

I just love the effect the gold 'Miner Miner 49er' Inklingz gives to the leaf and relief parts of the canvas.  One of the cool things about Inklingz is that as you let the water sit in the paint cake, and the more you stir, the thicker and more luxurious the paint becomes.  Then it's easy to 'dry brush' the metalic gold effect on your raised surfaces of your canvas design.

Autumn Canvas by Gabrielle Pollacco using Shimmerz Paints

I hope you enjoyed today's project and will give it a go either in these colors or your own favorite color combination!  REMEMBER....If you go to the SHIMMERZ STORE to or some of these yummy goodies, be sure to mention my name in the 'Instructions to Merchant....or message to seller' part of your order and you will receive a FREE/Bonus Shimmerz product in the color of your choice! xo


Saturday, December 6, 2014

Sweet ~ NEW Bo Bunny 'Rose Cafe' Collection

Scrapbook layout by Bo Bunny design team member Gabrielle Pollacco using the Rose Cafe collection papers and embellishments

Hi all! I'm so happy to be sharing my second layout that I made using the beautiful Rose Cafe collection!  There are so many lovely color combinations in this collection.  For today's post I went with the blues and warm golden yellows.  The patterns and colors make me think of the French countryside,  in Provence.

I've had this photo of my little great-niece Kierra in a cute little blue and white polka dot dress, and was happy to have this collection to scrap these two photos.

Before I added my photo and paper layers, I did a little work with one of the Bo Bunny Stickable Stencils and some blue ink on the background paper.  I used the Brocade Stencil set and applied my ink using a soft makeup sponge, fading the color out as I move away from the photo cluster.

Scrapbook layout by Bo Bunny design team member Gabrielle Pollacco using the Rose Cafe collection papers and embellishments

I really liked the pretty fountain design on the Rose Cafe Villa paper, I thought it fit well with the photos of my great niece, but I wanted the fountain to pop forward more, so I took a brown ink pen and just outlined some of the details of the fountain to make it pop.

Scrapbook layout by Bo Bunny design team member Gabrielle Pollacco using the Rose Cafe collection papers and embellishments

I chose blossoms from the Bo Bunny Buttercup Zinnia's collection and rounded out the design by fussy cutting some of the yellow roses and buds from the Rose Cafe 'Garden' paper.

Once I had my photos and paper layers attached, it was easy to add more interest to the page by using some of the coordinating embellishment packages, like the Stamp Stickers, Layered Chipboard and Buttons.

I hope you enjoyed checking out my project today.  I can't decide which of the color combinations are my favorite....pink and burgundy, yellow and blue, green and gold...they are all so pretty!  I know I've got lots more color combinations to explore!

Bo Bunny Product:
Patterned Paper: Rose Cafe/Dot, Dreamers, Villa, Heirloom, Garden, French Roast.
Stamp Stickers: Rose Cafe
Buttons: Rose Cafe
Stencil: Brocade
Layered Chipboard: Rose Cafe
Blossoms: Buttercup Zinnia's

Thanks for stopping by my blog today, I always appreciate all your kind comments and feedback! xo xo


Wednesday, December 3, 2014

NEW! Scrapbook Diaries Kit Page & VIDEO TUTORIAL! {Maja Design Papers!}


Hi everyone!  I have a really fun to make layout to share with you today that I made as a kit page for The Scrapbook Diaries!  There are lots of the hard to get Maja Design papers in this one as well as some of my favorite Dusty Attic Chipboard pieces!  And as always, this kit comes with a full step by step VideoTutorial showing how I made this page that you can follow along and create the same design....or you can tweak it to match your taste! Here are some close-up peeks at some of the design features of this page kit....


I'm sometimes told that people have a hard time finding the products I use on my pages....well, problem solved!  You can find pretty much everything I used to make this page all in one kit (plus instructions)....couldn't be easier....here you can see a close-up of the resin heart accent and a corner of the Dusty Attic chipboard frame....you get the complete frame set in the kit (you can see the other pieces used in the Bonus sample that Janene made!).


Another peek at some of the chipboard designs in this kit.  I also used a fun printed tissue paper in this page design (also included in kit). Yep, all the tinye sweet roses are in the kit as well!


Janene always adds gorgeous blossoms from premium manufacturers like Prima in her kits, I just love the ones that come in this kit!


I love the pretty 'frosting' the blossoms have! They come this way :)


This was a fun page to make and I think you will enjoy creating it as well.....and guess what?  Janene (owner of The Scrapbook Diaries) always creates a Bonus page design to go with the kits, wait till you see her bonus page for this kit....


Isn't her Bonus Page design beautiful?!!  You will of course get all the products to make up this page as well! I just love the soft pinks with the hits of deep red/burgundy! I love the Maja Design papers she used on this one!

As I mentioned above, you will get full unlimited access to the online Video Tutorial with the purchase of this kit!  You can order yours today at this link (or what a fun gift this would make for a crafty friend!) ~ The Scrapbook Diaries.  Kits are limited so grab yours asap, they do go quickly! 
PSSST! ....Janene was even sweet enough to throw in the awesome Tim Holtz Inking Tool  (that you see me use in the video) and a couple of the foam pads that go with it as her own special little gift to you!  This kit is just packed with great product and tools you will love! xo

Thanks so much for stopping by my blog today, your sweet comments and feed back just make my day! xo


LinkWithin

Related Posts with Thumbnails