Sunday, April 4, 2010

Twisted Fabric Blooms (Tutorial)


It's almost reveal day!! But before I show you all the wonderful new kits out for April at My Creative Scrapbook this month (and my DT work with them) I thought I'd give you a little sneak peek at some blooms I made using some items in the kits.

This month the Album kit had this cute swatch of pink/white gingham fabric in it and the design team had so much fun creating things with the fabric! For one of my layouts I made Twisted Fabric roses. I used 2 different methods, the first one comes out a fair bit flatter for those of you who prefer less bulky items on your pages. The second one has a slightly more full finish but has a lovely luxurious look to it. Here are the steps to making the blooms you see in the above photo.....

Method I

1. Begin by cutting a long strip of the fabric, approx. 1/2 inch wide. Cut a piece of cardstock out (just slightly larger than you'd like your finished flower to be). Tie a knot in the end of your fabric strip. Don't worry about fraying edges, it adds a lovely homespun look to the bloom. Hot glue your knot to the middle of your carstock circle.

2. Start winding the strip around in a circle, twisting the fabric as you go. If you are using the type of hot glue that doesn't dry to quickly you can lay a larger circle of glue down and attach as you go.


3. Keep winding it on until you've got the size of rose you are looking for. You may need to add an extra strip or 2 if you want a larger rose. At the end simply trim away excess cardstock around the edges. You can leave it the way it is or finish it as I did with a decorative button (above).

Method II

1. Begin by cutting a 1 and a half inch strip (the fabric I used was about 18" long) of fabric. Fold the fabric in half (good side out). It helps to iron the fabric so it holds as you twist. TIP: If you are like me and don't want to pull your iron and ironing board out for a small project, try using your hair flattening iron (if you have one) to put a nice sharp fold in it. (see photo below)......tie a knot in one end.


2. Now just begin bringing the fabric aroung the knot twisting the fabric up as you go.


3. It takes a little practice and you can add small dabs of glue as you go to secure the bloom.


4. I used to strips to create this flower. At the end just tuck the last bit underneath. I like to lay down a circle of hot glue on a piece of cardstock at the end and plunk my bloom down on it. I feel like this better secures the whole thing and makes it easy to attach it to a page. Just trim around the edge when it dries.


Have fun with these techniques and try out different types of fabrics and colours, the blooms you can up with are endless! Try spritzing with some shimmer spray like Tattered Angels Glimmer mist....or adding some Stickles glitter glue for a pretty finish!

Don't forget to come back tomorrow for the reveal of all the new kits for April from My Creative Scrapbook....you'll be able to see the above finished page!

Thanks for having a peek!

~Gabrielle xxx

Thursday, April 1, 2010

Thanks to some good friends!


I'm not sure I mentioned this in any of my past posts but earlier this month I found out I made the Top 20 pick for the Graphic45 design team. We were asked to send in a l/o or project that reflected our style. I ran into a bit of a problem in that I couldn't find any Graphic45 product at any of the local stores in the area! and I had to get my project sent off to them asap as it had to get from Canada to the US (postal service is crazy between the borders!) in record time. Well, so many of you came forward and offered to share you product with me so I could meet this deadline!! I ended up actually finding a store in Toronto (about a 3 hour drive back and forth) that had some of the new G45 product and was able to pull off the l/o above and get it sent off in time.

Well, I didn't make the final cut, and I suppose in a way I didn't deserve it as I only now remembered to check the G45 blog to see the announcement! LOL!!.....I guess I was meant to jump out of bed this morning to check the site! and here I am at 4:00 in the afternoon only now remembering to check if I made it! So big congrats! to the ladies that made it! I'm looking forward to seeing their creations over the coming year.

But one thing I did learn from this experiance is how many wonderful friends I have out there!! The outpouring support and offers to share their products so that I could meet the deadline was overwhelming! Most of you I have never even met in person and yet you've all been so kind and wonderful! So I want to say a big THANK-YOU to all my dear friends out there!! xx

Here are a couple of close-up pic's and a small tutorial on how I make the scallop edges with the woven ribbon in it on my l/o's (I often get little PM's asking me about this, so here it is).....

1. First off I have to say that I like to save interesting shapes as templates to scrapbook with on future products. So when I picked up a package of Bazzill 'Just the Edge' paper cuts, I saved one of each design to use on my l/o's as a template. I just simply trace out the design on a piece of patterned paper and cut out. You can also treat the edges of the cut out paper at this point, I like to lightly ink with a bit of chalk ink, and sometimes lightly distress the edge with a scissor.

2. Second step is to use a hole punch an punch out two holes at the top point of each scallop leaving only a small space between the punches.


3. The next step is to simply run the ribbon through the holes and secure the two edges of the ribbon underneath the patterned paper with some adhesive. You can at this point glue it down 'as is' to your project or you can mat it with some cardstock.


Here is a close-up pic of the finished border, along with a couple more close-ups of the finished page...


Thanks for having a peek!!

~Gabrielle xxx

Thursday, March 25, 2010

My First Project for the Dusty Attic Design Team!


As soon as my nephew showed me these photos of his newborn baby daughter Kiera, I knew which papers I would have to scrap this pic and which embellishments I would wait on. I recently mentioned on one of my posts that I'm now on the design team for Dusty Attic (they make beautiful laser-cut embellishments).....well, yesterday I received my package of goodies from them so I could start creating! It was mind-boggling opening that box and finding all these beautiful intricately cut treasures! I went out and picked up the new paper collection by BasicGrey called Kioshi (soon as I saw these presented for the winter CHA I knew these were going to be the papers I wanted to scrap this photo with)

Isn't she adorable? Those cute little lips! I wanted this page to have a very whimsical fairytail look to it so the laser cut flourish from Dusty Attic was the choice I made for this one (the pretty title cut is also from Dusty Attic) For the chipboard I painted it with white paint, tinted the edges a bit with some green and brown chalk ink and then coated the whole thing with some diamond Stickles. Here are a few close-up pic's...


I can't wait to get scrapping with more of the lovely pieces they sent me! If you are interested in checking out the Dusty Attic products you can find them HERE . The photo is a professional shot taken by Stephanie Robins Photography

Thanks for having a peek!

Gabrielle xxx

Sunday, March 21, 2010

Torn Cardstock Flower Tutorial


I used the gorgeous papers from Webster's Pages and I just wanted to give this handmade flower design a go on this page. So here are the steps in making this cute bloom out of cardstock, just in time for Spring!

1. First off you'll want to choose 2 complimentary colours of cardstock. I used a soft yellow and a whisper of green cardstock. (Plus a small scrap of brown and light blue for the flower centers). You'll want to tear a rough circle the size you'd like your flower to be out of one of the colours of cardstock. Then draw 5 lines almost to the center (they do not have to be even, the more uneven the more natural they look) This will define your petals. Tear along your pencil lines.

2. Step 2 is optional. You can ink all your edges with some soft brown chalk ink. I find brown chalk ink works well on pretty much every colour but you can experiment with other chalk ink colours....or use none at all, the effect without it is lovely too!

3. Next you'll want to take a toothpick or wooden skewer (I used an embossing tool I had handy, but a skewer works just as well) and curl up all the edges of the blooms.

4. Next you'll tear a slightly smaller circle from your other color piece of cardstock and repeat the above steps. Then layer the smaller piece inside the larger and glue together.

5. Now here is the part that gives your bloom an cute homespun appeal. Take a length of thin cording preferably in a dark colour and tie a simple knot in one end. Trim off excess. Now tie another knot about an inch and a half in from the last one (slightly wider than your smallest flower). Trim. Make 4 of these. Glue them to the center of your flower with some hot glue. Making an X with the first two and then another X criss-crossing over the first ones....

6. To create a rounded looking center for your bloom, punch our hand-cut out a small circle out of cardstock (I used light blue) and punch or hand-cut a slightly smaller flower shape from a dark colour cardstock. To give them a rounded look, place each piece in the palm of your hand then press the rubber end of a pencil into it (for the smaller flower)....for the slightly larger blue circle I pushed the rounded end of my scissor into my palm and twisted till I get the desired cup shape (see photo's below)

7. Glue the brown flower on top of the blue circle. Final step....place an adhesive foam dot in the center of your bloom and attach the rounded flower center your made.

Viola! you are done.....here is a close-up photo of the blooms on my page (see top photo for the full page design).....
If you like this flower design and create a l/o using them please do take a moment to leave me a comment with a link to your project! I love to see what other's create using the tutorials I post!
The photo is of my newest baby niece Kiera at only 14 days old!! My nephew sent me these wonderful professional photos taken by this amazing local photographer. Here is her link in case you're looking for a great maternity/baby photographer! Stepanie Robin Photography & Design
Thanks!

Monday, March 15, 2010

And the Winner is.......


Thanks everyone for the overwhelming response to my blog give-away!! I'm so glad to get the word out there about the My Creative Scrapbook blog, it's such a fun place and will keep you all up to date on what's happening at MCS! I wish I could've had a prize for every comment left here, but I only had one kit to give-away, so without further ado .....the draw went to.....

Denise Jensen!!! CONGRATULATIONS!!

Denise please take a moment and send me your mailing addie at gpollacco@aol.com and I'll have the prize sent out to you today!

Thanks everyone for playing!!


Sunday, March 14, 2010

Dusty Attic Design Team!!!

I finally get to share my exciting news!!!!!

I was recently asked to be on the Dusty Attic Design Team!!

Dusty Attic is a manufacturer of gorgeous vintage style laser cut chipboard designs located in Australia. You've got to check out their beautiful designs, so intricate and detailed!! I can't wait to receive my first package so I can start playing!!

The Design Team consists of some really amazing talent:

Evana Willis, Many Harrell, Trina Mclune, Jen Burns, Michelle Grant
I'm so thrilled to be part of this awesome team!

Here's a link to the Dusty attic websites if you want to have a peek at their beautiful products....

http://dustyattic.ning.com/

and

Dusty Attic

Since I haven't got my goodies in yet to show you, here is a peek of a few of the products done up by some of the other DT members....


I'll be stalking the mailman for my goodies and soon as I get some projects done I'll share them here with you all!
Hope everyone is having a great weekend!!.....stay tuned for my post tomorrow for the winner of the draw for the MCS Album Kit giveaway!
~Gabrielle xxx

Friday, February 19, 2010

Featured Guest at Idea's for Scrapbookers!!


I was recently asked to do a guest spot at the wonderful blogsite 'Idea's for Scrapbookers' hosted by Pam Callaghan. This is such a fun site with loads of inspirational ideas!! I decided to share my Polished Stone tutorial inwhich I showed an easy way to make faux polished stones with some ink and cardstock. I did up a little card using pink carstock this time to make a pink granite look as an example.

You can find this awesome site at this link Idea's for Scrapbookers. Grab a nice cup of tea and browse this wonderful site to get your inspiration for a fun scrappy weekend!

Thanks for having a peek!

~Gabrielle xxx

Tuesday, February 16, 2010

A Challenge l/o for My Minds Eye


I had a little down time while waiting for my next DT kits to arrive for March and so thought I would give a challenge a go at My Minds Eye. It's challenge #8 Pink or Red! It gave me a chance to use some more of one of my favourite MME paper collections again (Bella Bella).....Above is my entry layout. The patterned papers are all MME as are the die cuts, and the butterflies are cut from a butterfly design in the Bella Bella collection, I simply added some chalk ink and stickles to finish them off. Here are a couple of close-up pic's....


Last year we had this beautiful collection included in a kit at My Creative Scrapbook, here are a couple of l/o's I made with these yummy papers....


They just had a bunch of new collections come out at this past Winter CHA show, I think my favourite is Lush! Yum! If you want to give the challenge a go you can find it at the MME blog (just click on the blinkie to the right of my blog to take you there) There are still a couple of days left for this challenge.

Thanks for having a peek!

~Gabrielle xxx

Wednesday, February 3, 2010

February Kits Reveal!! ~ 4 Yummy new kits from My Creative Scrapbook!!


This month I gave each of the 4 kits available from My Creative Scrapbook a test drive, and boy are you in for some Yummy fun!! If your preference is vintage/shabby-chic style then the February Limited Edition kit is the one for you! I had a blast working with this kit, a wonderful combination of papers by Fancy Pants, Prima and Pink Paislee! The l/o above is one I made going after a kind of shabby-chic look. This l/o was inspired by a page I had seen done by Nic Howard. I used a soft pink cardstock and gave it a little distressing using some ink and watered down paint.

TIP: to get the look of the thin random lines at the edges of the paper (see l/o above) take an old plastic credit card, dip the edge in some slightly watered down paint and just run the edge of the card across the paper!

Here are some close-up pic's, the butterfly was cut from some of the Fancy Pants paper in the kit and then I simply machine stitched the edges (just take it slow around the corners and it's really quite easy to do).....


Here is a 2nd l/o I made with this same kit. This is a photo of my youngest daughter a few years ago when she was about 4 years old....love that age, where they just walk around the house wearing tu-tu's for no reason other than they love it! Here she was counting while playing hide 'n seek, there is something so vulnerable and sweet about the back of her cute little pig-tailed mussed up hair!.......

I did a little paper tearing and inking for this one and then a little corset stitching at two of the corners. I did a ruffle edge on this page, for a video tutorial on how to do this please see this link Ruffle/Distress Edge Here are a couple of close-up pic's of this l/o....


In this 3rd l/o I made with this kit I went for the soft pink/brown colour palette. The photo is one of my niece, my brothers youngest daughter. She has always been a thumb sucker and I had to smile when I found this photo of her as a newborn!....

This kit is packed with beautiful Prima blooms and some cute cute velvet blooms that to me say 'vingtage' to co-ordinate with the papers... and these really fun envelopes. I added a few rub-ons and stickers to dress up this envelope inwhich I put some fun little facts about my sweet little niece! Here are a few close-ups.....


And, while I normally do about 2-3 l/o's per kit, I enjoyed this one so much I made up a 4th l/o for it!! (and there is still plenty of leftover goodies to make more!) This is a photo of my 2 nieces, they have such a sweet relationship, the older one is almost 'motherly' with her little sister.

TIP: To make the scallope circle edge you see in this l/o I simply punched a bunch of 1" circles from some of the patterned paper in the kit and tucked them under the edges of my cut circle.


Moving on to the February Main Kit....here are 2 l/o's I made with this amazing kit!! It's just jam packed with papers and embellishments that make you think of dark chocolate and spun sugar!! Can you tell that I raided my relatives photo stash? Another l/o of my cute little (thumb-sucking) niece! LOL! ...a little older here.....

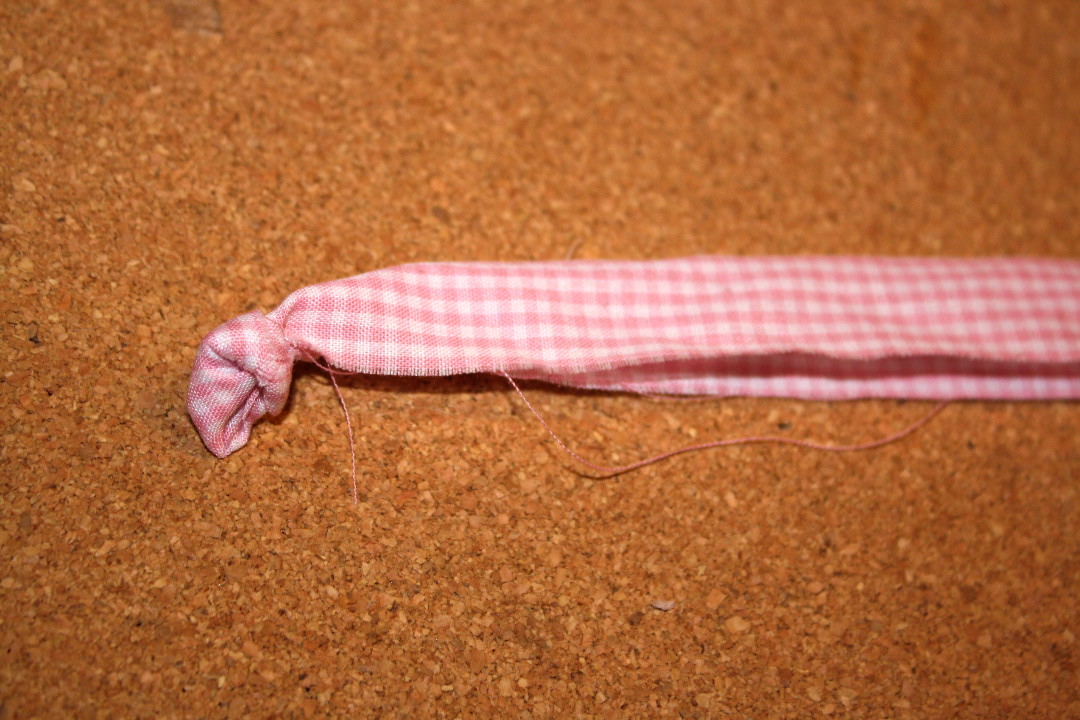
I made the blooms on this page using some brown cardstock and cutting various sized wavey circles and edged them with some white ink. I then pressed them into the palm of my hand with the 'eye' of my scissor's to get the cupped shape. I also gathered the edges of some of the pink sheer ribbon in the kit to get the frothy looking centers. Here are some close-up pic's.....


Here is a 2nd l/o I made using the February Main Kit

This was a favourite photo I have of my 2 girls. When I was pregnant with Meagan I found these cute little footie PJ's at The Gap and just had to have them....I still wasn't sure Meagan was going to be a girl but I went for it anyways!! ......I used scallop edge/w holes punch to make the base for the corset stitching on the bottom strip of paper. Here are a few close-up pic's (there are a ton of felt, paper and transparent die cuts in this kit to decorate you l/o's and cards with!)....


The Creative Kit this month is a wonderful mixture of Pinks with a hint of grey. I played up the greys in the kit by using a grey cardstock (thank-you Simply Scrapping! ...love that I have a wonderful place closeby to pick up cardstock, inks and stickles to round off my kits!) Here is a l/o I made using the fun February Creative kit!....

I used a bunch of the blooms included in the kit to make up this fun heart embellishment. I simply cut out a piece of pink cardstock in the shape of a heart. Added the crochetted red trim around the edges and just started adding the blooms in a symetrical pattern. I can't claim the idea of the floral heart embellishment, I saw this idea on a page of a friend at sb.com name Nike, I was looking at a l/o she said was inspired by my work and funny enough I was inspired by her addition of a heart bloom to her l/o!


And last but not least I did a couple of l/o's for the amazing Album Kit for February! This kit featured the wonderful Bo Bunny collection called 'Persuasion'! I just love their die-cut papers!! I made this l/o of my dear husband and I using the die-cut paper. When I was visiting my sister a couple of weeks ago I was skimming through here photo stash and found this photo my nephew had taken of my husband and I when we were on a walk up at the cottage last summer.

I mounted the paper on some corrugated cardboard sprayed with some Tattered Angel's Glimmer Mist and dry brushed with some white paint. I made the little red roses from some of the red patterned paper in the kit using this 6 Petal Punch Technique I made quite a few of them but I find they actually go quite quickly once you are on a roll! Here is a close-up pic.....


Here is a 2nd l/o I made using this fun kit! There are some really cute embellishments in this kit including some fun little Prima heart gems!


TIP: For those of you who like to mix in a little Hybrid digital scrapping into their l/o's and cards, the Prima Hybrid site has some wonderful digital images that can be combined with the Prima heart gems to make some really playful cards and l/o's Prima Hybrid ....they are fairly inexpensive and some are even Freebies! Below is a card I made using the February Album kit along with the Prima hybrid digi elements.


To all of you who so kindly visit my blog each month and read through some of my very lengthy pieces and especially those of you who even take the time to leave a comment, this is my 'Thanks' to you!

Thank You!!

~Gabrielle xxx

LinkWithin

Related Posts with Thumbnails