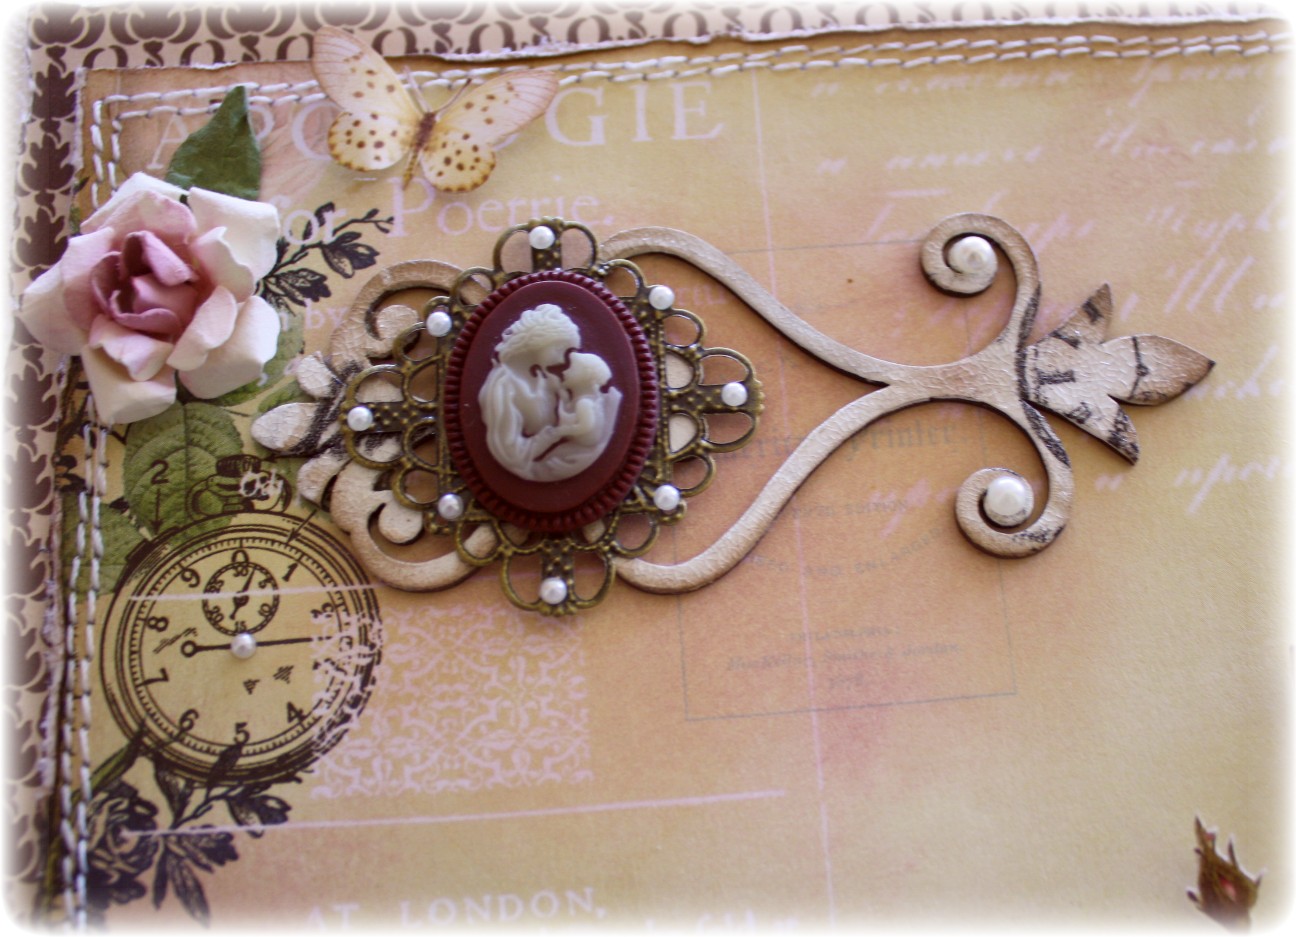
I made this layout of my niece Jenny singing, using a combination of papers and embellishments by Webster's Pages (
Ladies & Gents, Magical Wishes, Hollywood & Natures Storybook), the trims are from WP Hollywood Collection, the
Netting & Cameo (Silhouttes) of course is Websters Pages. The alpha's are my favourite...the
scripted alphabet stickers from Websters Pages!!....and hey! did you notice??? The newest collections from Websters pages have these gorgeous scripted fonts back again!! I am sooo happy about it!! I know a LOT of you are too considering all the emails I get asking where I get my title alphas! :)
The Chippies are of course Dusty Attic! Both the circular frame and the scroll design, which I again finished with some white paint, brown chalk ink and a little stamping. I coated both of them with Tim Holtz Rock Candy Crackle medium. The blooms are more roses that I handmade using the Rose Creations die cuts by Spellbinders. (Tutorial will follow) Here are a few close-up pic's of the page...
I had this tiny bit of Webster's netting left over from a previous project and stitched it into the corner of my layout....I have to admit, I think that I was a bit influence to make this move because of having recently viewed that GORGEOUS page by Jeni O'Connor where she used some of this trim on the edge of her page...thanks Jeni! xx
~~~~~~~~~~~~~~~~~~~~~
ROSE CREATIONS TUTORIAL!
Okay, I promised I would share a little tutorial on how I made the yellow roses for a Webster's Pages and Bo Bunny layout I made a while back and since I was making more of them in pink for the above layout I thought I'd take pic's as I went along to show you how to make these. Here is what you will need to make these roses:
I have a Quickutz Revolution Die cutting machine, and I was so happy to find out that I can use these die cuts with my machine! I believe they can be used on most die cutting machines but you may need inserts with them for some other machines. For the Revolution you can use them 'as is'. There are 6 flower shapes in this collection ranging from small to very large. I used the 4 smallest bloom sizes to make my blooms.
Step 1 ~ Cut one of each of the 3 smallest petal designs, but cut 2 of the larger one (using light pink carstock). Ink the smallest cut and just the centers of the larger ones (you don't have to have perfect fading just ink in the center)
Step 2 ~ Take each of the petals and with your right hand press your thumb in the center, with your left thrumb and forefinger pinch the petal in a V and puch toward your right thumb (as shown above) Note: you can very lightly mist your paper with some water to make this step a little easier.
The smallest flower cut will be a little different, you will put the 'good' side down and just give each petal a little cure (see below)....this will create your bud.
Here you can see what the petals will look like when you are done shaping them (Note the smallest shape is a little different, you simply curl each petal up a bit, this will be your center bud). Add glue to your shapes. I put the glue up high on the smallest petal so that when I wrap it around the brad it will create a nice tight bud. I bring the glue high up the petals on the second smallest bloom size also because this one needs to hold tight around the bud. For the rest, a simple circle of glue at the base will suffice. I like to use the Tombow repositionable/permanent adhesive, if you let it dry slightly it stays tacky and will allow you to play with your design a bit.
Step 3 ~ Take your brad, it can be any old brad because it will be hidden in the end. Push it through the hole in the petals center and wrap the petals around the brad. See above...
Step 4 ~ Add the next size up die cut and wrap the petals around the bud. You will then continue with the rest of the petals moving up in size each time. Arrange your petals so that they do not all run the same way, alternating the petals so they overlap. Done! The finished blooms will look like the ones below....
I made some variations in color and size for these blooms. For the partial pink and white blooms I changed the large size and next size down die cuts to a white cardstock and lightly inked the centers with some soft pink chalk ink. For the buds (smaller roses I used the following steps & cuts)....
~~~~~~~~~~~~
I have one more layout to share with you all using my Webster's Pages goodies.....I thought I would get some more pages done before the newest collections get here! This is a photo I took of Meagan at the beach, she was sitting there gathering sand around her legs, and we got the idea to turn her into a mermaid. I used some Websters Pages Yacht Club & Country Estate papers to make this page, along with those fabulous WP Bloomers, Princess Petals & Alpha's. The corner flourish is Dusty Attic.
I got confirmation on my Webster's Pages package, so I'm ready to stalk the mailman lol! Can't wait to play with the new collections! I hope your local scrapstore owners went to CHA armed with lists for these gorgeous collections, so that you all can play along with me! xx