Tuesday, September 24, 2013

Some Cheer from Cheery Lynn Designs!!

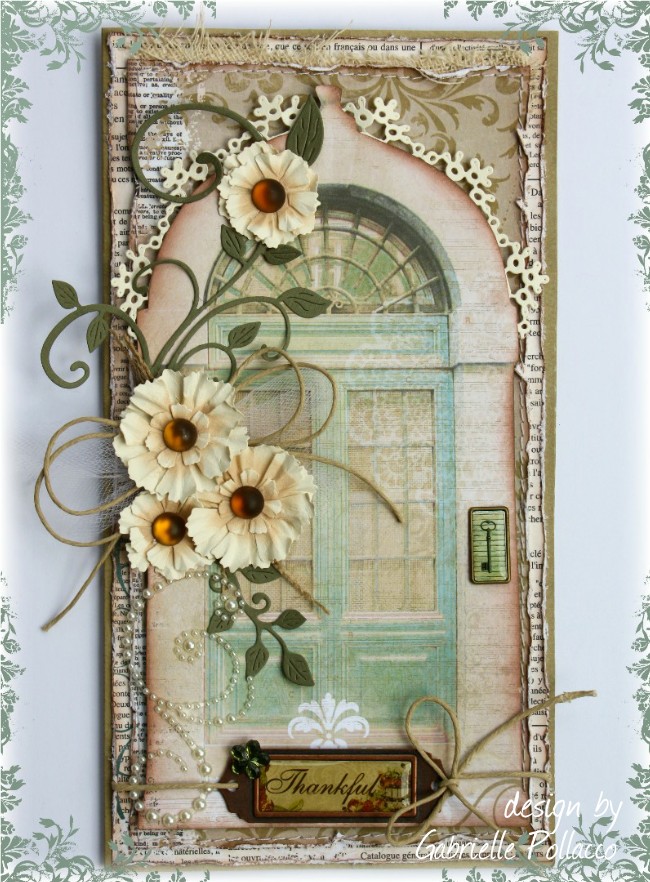
Hi everyone, today I'm sharing with you my final projects as guest designer this month for Cheery Lynn Designs.  It's been such an enjoyable month creating with all these beautiful die cuts!  For my final projects I thought I would play a little more with the Shasta Daisy Flower strip!  I thought I would change things up a bit and use the strip on two types of paper, regular card stock and some vellum, so that I could make a bloom with layers that you could see through. 

To make this flower I cut 2 of the largest blooms on the strip out of pink vellum, and 2 of the same size from a soft pink card stock.  I used a good white gel pen (my favourite is the Signo Unibal pen, it works very well on vellum) to make little dots fading out from the center of the bloom (you only need to add the dots on the top 2 sheer layers).  And finally added an adhesive pearl center to finish the bloom.  I used a couple of cuts from the Tropical Flourish coming out from behind the bloom cluster to add a little dramatic flourish to the finished card.
 
Cheery Lynn Supplies:

For my second card I again used the Shasta Daisy Strip and combined it with Manon's Wedding Garland die cut.  This die cut has a pretty lacy oval design and a couple of pretty floral cuts in it as well.....here is what the die cut looks like...
I love that you don't end up wasting paper when you use this die cut, ...you get the lacy oval design and you get the extra floral bloom accents as well!
 
To make the daisy's above I just cut out 2 large and 2 of the next size down....I tinted the centers of the medium size blooms with some green chalk ink and finished with a gem accent.  For the smallest daisy I used 3 of the smallest cuts layered.
 
Cheery Lynn Supplies:
 
It's been such a pleasure being guest designer for the month of September, I hope you've enjoyed my projects as much as I've enjoyed creating them!  I want to thank BJ for her kind generosity and thank Lori Williams for her patient help in getting me organized for the month! xo
 

Mixed Media with Websters Pages! {VIDEO TUTORIAL}

I thought today I would have some mixed media fun using the new Websters Pages collection called New Year New You.  I tore pieces of the patterned paper to create a unique background and used some Faber Castelle Gelatos to tint/paint the background as well.  Just click below to watch a video tutorial on the making of this canvas (I must appologize in advance, I taped this video myself ....usually I have my daughter doing the filming, and I can't tell pause from play!  so I ended up missing a couple of steps that I wanted to show, namely cutting out the patterned pieces for the bird!)  I've shown some fun techniqes including using hot glue as a page embellishment! ....


I hope you enjoyed my little video and found some things you can incorporate into your mixed media designs!  Here are a couple of close up shots of the page as well as a template for the bird I drew out for the canvas. (I know not everyone is comfortable with sketching out a design, so enjoy!)


Just right click on the photo and 'save picture as' to your computer.  You can then print out the bird design and cut out as shown in my video.
 
I've given a supply list at the end of the video, if  I've missed anything or you have any questions, I'm always happy to answer them! :)
 
Thanks so much for stopping by today! xo
 

Tuesday, September 17, 2013

Cheery Lynn Designs & Bo Bunny {Blooms 2 Ways}

Hi everyone, today I though I would share with you some cards I made as guest designer this month for Cheery Lynn Designs.  I began with a base made fromt the NEW Bo Bunny 'The Avenues' Collection papers.   I thought I would play a little bit with the Sweet Williams Flower strip.  For the card above I used a misting technique, moistening the flower petals and giving them a little crinkle. 
For these blooms I used the smallest petal cuts for the center and 2 of the largest (for the large blooms) and I used the 2 of the medium petal cuts forthe medium blooms.  I used some Honey distress ink in the centers of the blooms so that the color would fade out (note: I did the tinting step before I did the water/wrinkling technique).  Here is a close-up view of the blooms..... 
Cheery Lynn Dies used for this project:
~ Sweet Williams D-137
~ Fanciful Flourish B-117
~ Manon's Wedding Garland DL218
~ Ivy Corner Flourish B-315
 
Bo Bunny Products used:
Patterned Paper:  The Avenues (Home, Antique, Song Bird)
Cardstock: Double Dot (Khaki)
Trinkets: The Avenues, Apple Cider
Pearl Flourish: Bo Bunny Frosting Jewels

I don't know about you but personally I like to get all I can out of a die, so I thought I would try using the Sweet Williams petals the way I would prep a rose bloom.  I thought the results were very close to a rose bloom.
 
I basically used the curling techniqued I showed you all on the video I posted last Tuesday.  Just gently curling back the petals to create a softer rounder bloom.  I used 2 of the smallest petal cuts for the 'bud' center of the flower.  Then I used 1 of the next size up and 2 of the next size up after that (this makes up the smaller roses on this card).  To make the large rose just add two of the largest petal cuts. 
Here is another close up view of the blooms.  I just left the paper as is, no extra tinting on this one.  I find the flower centers curled tightly together create their own depth of color.

I finished the card using more of the beautiful Fanciful Flourish cuts and little pieces of the Ivy Corner Flourish, as well as the intricate and beautiful Celtic Heart. In the corners I added a few pieces of the Dusty Attic Brick Panel chipboard pieces. (these I first white washed with some Gesso and then inked with some brown, green and yellow chalk inks, once dry I dry brushed on a little more white gesso).
 
Cheery Lynn Products used for this project:
~ Sweet Williams D-137
~Fanciful Flourish B-117
~ Ivy Corner Flourish B-315
~ Celtic Heart B-144
 
Bo Bunny Products used:
Patterned Paper: The Avenues (Bird Song, Clocks)
Cardstock: Double Dot (Chiffon)
Noteworthy: The Avenues (Title background)
Stamps: You're Invited (Large Stamps)
Jewels: The Avenues
 
I hope you enjoyed my projects today and hope that I've inspired you to play with your dies a little and see what different ways you can put them to use! xo

Wednesday, September 11, 2013

Whimsical Trinket Box {Maja Design and Dusty Attic}

 
Today I want to share with you another 'off the page' project with you using Dusty Attic chipboard, Dusty Blooms and Dusty in Color paints and Maja Design Patterned Papers.  I've had these cute little 3D Birdhouse chippies in my stash for some time now and have finally had an opportunity to use them!  If you are like me, you always need lots of trinket boxes to house your scrapping stash and photos.  Personally, I think if you are going to have boxes sitting around you may as well make them look pretty right? 
 
These little birdhouses where so easy to put together I just traced out the pieces on some pretty patterned paper (I used Maja Design papers from the Sofiero collection, and some from the Vintage Spring Basics colleciton).  Once I had my patterned papers glued to the panels and just glued each of the houses together.  Then the fun stuff started....dressing up the little houses with tiny picket fences, grasses, scrolls, key holes, branches, birdies, topiaries, vines, bricks and blooms. 

And since it's a box, you dont't want to forget the back since it can be seen from all angles!  Here I used the 'Elegant Flourish Small' chippie and a cameo to pretty up the back of the box.  I also added extra blooms, grasses and picket fences to the backs of the houses.  Here are the Dusty Attic supplies I used to make this page: 
Dusty Attic Supplies:
~ 3D Birdhouse Set 3pkg
~ Baroque Corners
~ Brick Wall Panel
~ De Vine Frame Set
~ Elegant Flourish Small
~ Mini Birds #1
~ Mini Picket Fence
~ Mini Branches
~ Mini Grasses #3
~ Decorative Keyholes #8
~ Topiary Trees #1
~ Dusty in Bloom Vintage Rose
~ Dusty Roses, Latte, Caramel
~ Dusty in Color, Sage, Hot Chocolate
 
Maja Design Supplies:
Patterned Paper: Sofiero Collection (Strolling Down the Rose Path,  Enjoying the Fragrance,
Exuberance of flowers in bloom-bs, Enjoying the Frangrance-bs, The Elegant Winehouse), Vintage Summer Basics (1905, 1934-bs), Vintage Spring Basics (6th of May).
 
I hope you enjoyed my project as much as I enjoyed making it! xo
 

Tuesday, September 10, 2013

Cheery Lynn Gardenia Bloom {Flower Video Tutorial}

Hi everyone, I'm sharing with you all today another project I made as guest designer for Cheery Lynn Designs (die cuts).   Lately I've been fixing up my scraproom and find myself in need of pretty little boxes to store my scrap goodies.  This time I thought I would go with a 'shabby-chic' look for the box design.  I used the amazing Gardenia flower strip die to create the center piece blooms for this box.  Here's a top view of the box...

I started out with a simple craft paper covered box and glued one of the beautiful lacy doilies Cheery Lynn is so famous for to the top of the box.  I used the Sophia's Heart Doily DL184 cut from pink card stock (it fit perfectly to the top of my box, yay!)  I then layered on some burlap, white netting, some leaf flourishes (Fanciful Flourish cut from a sage green cardstock) and then added some blooms made with the Gardinia strip (video tutorial to follow). I edged the lip of the top with the matching border to the doily - Sophia's Heart Border B333.  Two pieces of the trim left a small gap so I cut the heart design from the center of the doily and used it as an opening for the lid adding a small button.  
 
The blooms were super easy to make and I thought I'd do a little video tutorial to show you all how to create a varigated color design with your bloom die cuts.... 


Supplies used for this project:
~ Gardenia Strip B339
~ Sophia's Heart Doily DL184
~ Sophia's Heart Border B333
~ Sweet Williams D137 (small bud)
~ Fanciful Flourish B117
~ Lace Corner Deco B162

I hope you enjoyed my project for today and hope you'll give these blooms strips a try, they are super easy to make and the variations and colors are endless! xo

A Taste of Autumn! {Bo Bunny Pinspiration}

I'm so sad summer is over, it just went way to fast!  My girls started school again yesterday and happily all is well, they love their teachers and are happy to be back.  But I have to admit Fall is also a favourite time of year for me, I like the slightly cooler temperatures and who doesn't love the gorgeous colours that come with this season right?  I was totally in the mood for scrapping something 'autumnish' so when I was asked by Bo Bunny to do another Pinspiration post, I went rummaging through Pinterest for a lovely autumn photo....here is the photo I picked....

I just love the warm beautiful colors in this photo, and while I normally shy away from really vivid colors, I knew that Bo Bunny's New collection called Autumn Song would have all the pretty papers and embellishments I'd need to scrap this photo of my daughter Chloe in a field of Tiger Lilies. Here are a few close-ups of this really easy to put together page!...


Supplies:
Patterned Paper: Harvest, Leaves / Autumn Song
Cardstock: Chocolate Vintage Dot
Layered Stickers: Autumn Song
Jewels: Autumn Song, Chocolate Flourish
Blossoms: Natural Earth / Dahlia, Wildberry /Zinnia, Wildberry, Clover / Bouquet, Harvest Orange, Buttercup, Wildberry / Bouquet
Trinkets: Autumn Song
Paper Doily: 4" Small
 
Did you have a chance to scrap this past weekend?  Are you looking for inspiration?  A great way to find it is on Pinterest.  Before I close I just want to say thanks to everyone for the sweet comments you leave me, and the lovely messages you send me as well.  I've had a busy month so far (my beautiful niece just got married and we had a wonderful weekend away at the wedding)....hopefully I'll be able now to do a little blog hopping and see what I've been missing! xo


Saturday, September 7, 2013

September ATC ~ Shabby-Chic {Dusty Attic}

This months theme for the Dusty Attic ATC challenge is 'Shabby-chic", a style that is near and dear to my heart.  For my ATC I used the cute lil 'Corset' chippie and just added a little DMC thread to lace it up.  I added a little Mini Bird simply painted white and lightly inked with brown chalk ink.  And finally I wanted to add a flourishy element so I used part of the Sweet Pea Border to crown the ATC. 
Supplies:
~ Corset
~ Mini Birds #3
~ Sweet Pea Border
~ Dusty Roses Latte
 
If you enjoy creating in the Shabby-chic style as much as I do, I know you'll have a blast creating your ATC for this month!
 
Do you want to win some awesome Dusty Attic goodies this month?? 
 
Check out the Dusty Attic Facebook page HERE (and get a chance at winning $150.00 worth of Dusty Attic goodies!!)

Wednesday, September 4, 2013

Thankful for You {Cheery Lynn Die Cuts!!}

  I was so happy to be asked to be a guest of Cheery Lynn's Designs for the month of September, I've been admiring their beautiful die cut designs for some time now so I was thrilled to find out I could use them with my Revolution die cutting machine!
 
For my first project this month I thought I would do a layout using a variety of the dies. They have such amazing 'build your own' flower dies which allow you to make one large, full, frilly bloom or if you break them up like I did, you can make a few blooms in different sizes. 
 
I basically went with a large, medium and small floral design using the Shasta Daisy B-310 die cut.  I used 1 large + 2 medium to make a large bloom, 2 medium + 1 Small to make the medium bloom and 3 small cuts to make the small bloom.  I used some green chalk ink to tint the centers of the blooms to give them a slight color depth and finished it by adding a soft yellow gem to the center. I also used one of the Lace Corner Deco B - B162 pieces to give a lacey accent around my flower cluster. and a piece of the gorgeous Fanciful Flourish B-117 to finish the cluster.
 
For my other floral cluster I used a design technique that is a favourite of mine to use and that is to softly ink the area around the cluster and add a mask with some texture paste.  Here I used a script mask.  This helps draw focus into the main embellishments on the page and draw the eye into the photo. 
 
Another die that I'm crazy about is the Ivy Corner Flourish B315.  This die cut is awesome for frame and underscoring.  Here I used it to frame the floral patterned paper that I layered onto the page and also used it to underscore the title.
 
Another beautiful die that I just knew I had to have was the Window A FRM-141, it just adds such a light, airy, summery design to a page!  I added a lace 'curtain' to the design by adding the Anastasia Border B-136 along the top edge of the window panes.  I also used the lace edge along the bottom of the photo and peeking out from the pulled back paper edge at the top of the page.
 
I also used another one of the Lace Corner Deco B-162 die cuts to create a corner/border design to go all around the edges of the layout.  I simply adhered the corners onto the background paper and then used a white Signo Unibal gel pen to draw a doodled line to link them up.
 
Cheery Lynn Dies Used:
The patterned papers I used were from K& Company.
 
I hope you all enjoyed my project for today!  And I look forward to sharing more fun projects with you in the upcoming weeks! 

Tuesday, September 3, 2013

MAJA Design GIVE-AWAY!! {Plus September Mood Board Challenge}

Hi everyone!  I'm so excited to be sharing this post today for my Maja Design Team! (I have an awesome MAJA DESIGN GIVEAWAY today....further down the post!) and  It's the first Tuesday of the month so that means it's time for the Maja Mood Board Challenge!  I made the above page using the September Mood Board as my inspiration.  The mood board colors are based on the 'Walking in the Forest' collection, and are just perfect for those autumn photos!  The photo I scrapped above is of my daughters best friend, I took this photo when they were are the Maple Syrup festival, they were eating some of those huge smoked turkey legs, and her friend was hamming it up with the turkey bone :) 
 
 
As I mentioned I used the 'Walking in the Forest" collection for this page, here are the individual papers I used from this collection to make up the page...


I used a bunch of Recollection blooms to decorate the page, and I found this clay bloom I made a little while back using Fimo and some Pearlex powder and a glass bead, I thought the colors went well with page so I just added it into my bloom cluster. 
The blue flower is from Petaloo and the chipboard is a border flourish from Dusty Attic that I cut in half and used in a couple of places on the page. 
I also used another Dusty Attic chipboard piece Berrie Branches to frame the photo.  The mask I used around the photo is the Prima mask by Finnabiar.  I used the Clearsnap Distress Ink in Denim and Honey. 
Have I mentioned how much I love the My Little Yellow Bicycle word stamps?!  I just adore the swirly font they use, and the words are really the sort I can use for my everyday layouts!
 
MAJA DESIGN GIVE-AWAY!!!
Okay now for the fun part!  Maja Design is bringing out their NEW Autumn collection called Vintage Autumn Basics!  Here is a little peek at the collection....
 
All the beautiful vintage elements we've come to love about Maja Design papers (Ohhh, lovin' the clock design sheet!)  I know I can't wait to get my happy little hands on this collection!  But I can go one better than that!  I have a full collection pack to give away to someone I will chose from the comments at this blog post!
Just leave a comment letting us know which papers have caught your eye in this collection.  (We would love for you to 'like' our new FaceBook page as well, if you have not done so already....you can find the Maja Design FaceBook page HERE).  You have from now until midnight September 30th to leave a comment, I will announce the winner at my blog on October 1st! 
 
We'd love to hear what you think of the new collection, so leave a comment and you might be one of the first happy ladies to get your hands on this stunning new collection! xo

LinkWithin

Related Posts with Thumbnails