Showing posts with label Shimmerz Paints. Show all posts

Saturday, March 4, 2017

Mosaic Video Tutorial! {TCW & Shimmerz Paints}


So guess what?! The stencils are finally hitting the stores!  Just got word from Janene over at The Scrapbook Diaries that the NEW stencils I designed for TCW (The Crafter's Workshop) are finally in the house!  (I was a little premature showing my last tutorial for the Bride book....got a lot of emails asking where to get,...and they weren't in yet! lol!)  This time I have somewhere to send you! :)


For this project I used the stencil I designed for The Crafters Workshop called 'Stained Glass Daisies' TCW657.  The photo you see above is an extra canvas I made using acrylic paints.  But in the following video tutorial I used a variety of Shimmerz Paints Products to create my Mosaic canvas.  Time to grab yourself a cup of coffee (or tea), kick back, relax and enjoy!


Hope you enjoyed my little tutorial....and easy, right?  Almost like painting in a coloring book!  And you get a mosaic effect without having to cut and match pieces, it's all done for you, just a few swipes with some texture paste and your can get your creative on with coloring!


This is a still shot of the stencil I created in the video tutorial using the Shimmerz paints, here I used a wash in the 'grout' lines, giving more of a vintage look.  For the canvas at the top of this blog I simply used TCW's Black Gesso for the background and TCW's Ultra Thick Molding Paste for the stencil and then painted with some favorite acrylic paint colors.


But Getting back to the canvas in the video....I used a variety of Shimmerz Paints products for this one and finished the design by adding some Dusty Attic Grasses at the bottom of the canvas.

Shimmerz Paint Products used in this Tutorial:

Creameez: Get Glowing, Peachie Keen, Sage It Isn't So, Boogie Boardin' Blue, Purple Rain, Black Cherry Cola, Strawberry Fields
Inklingz: Greener Pastures
Coloringz: Chocolate Brownie

You can pick up your Shimmerz Paints HERE.  NOTE: Be sure to mention my name 'Gabrielle' in your next order to receive a FREE/Bonus Shimmerz Paints product in the color of your choice! 

Just imagine all the places you can use this mosaic stencil design....on the cover of an art journal, ...on a tissue box cover,...on a keepsake box....I can't wait to see what you all come up with using this fun new stencil!  Be sure to tag me in if you post something using the stencil, I just love to see what you all create using them!  As I mentioned you can now find them at The Scrapbook Diaries (USA & Canada, she also ships International)....I also heard that The Mad Scrapper in the UK has them in as well!  (Just click on the links to take you there).  If you don't like to shop online you can always check your local scrap store or art shop (many now carry TCW products!)

Thanks so much for stopping by my blog today!  I always appreciate and read all the lovely comments and feedback! They make my day! xo


Thursday, May 26, 2016

A bit of Whimsy & Video Tutorial {49 & Market, Dusty Attic, Shimmerz Paints}


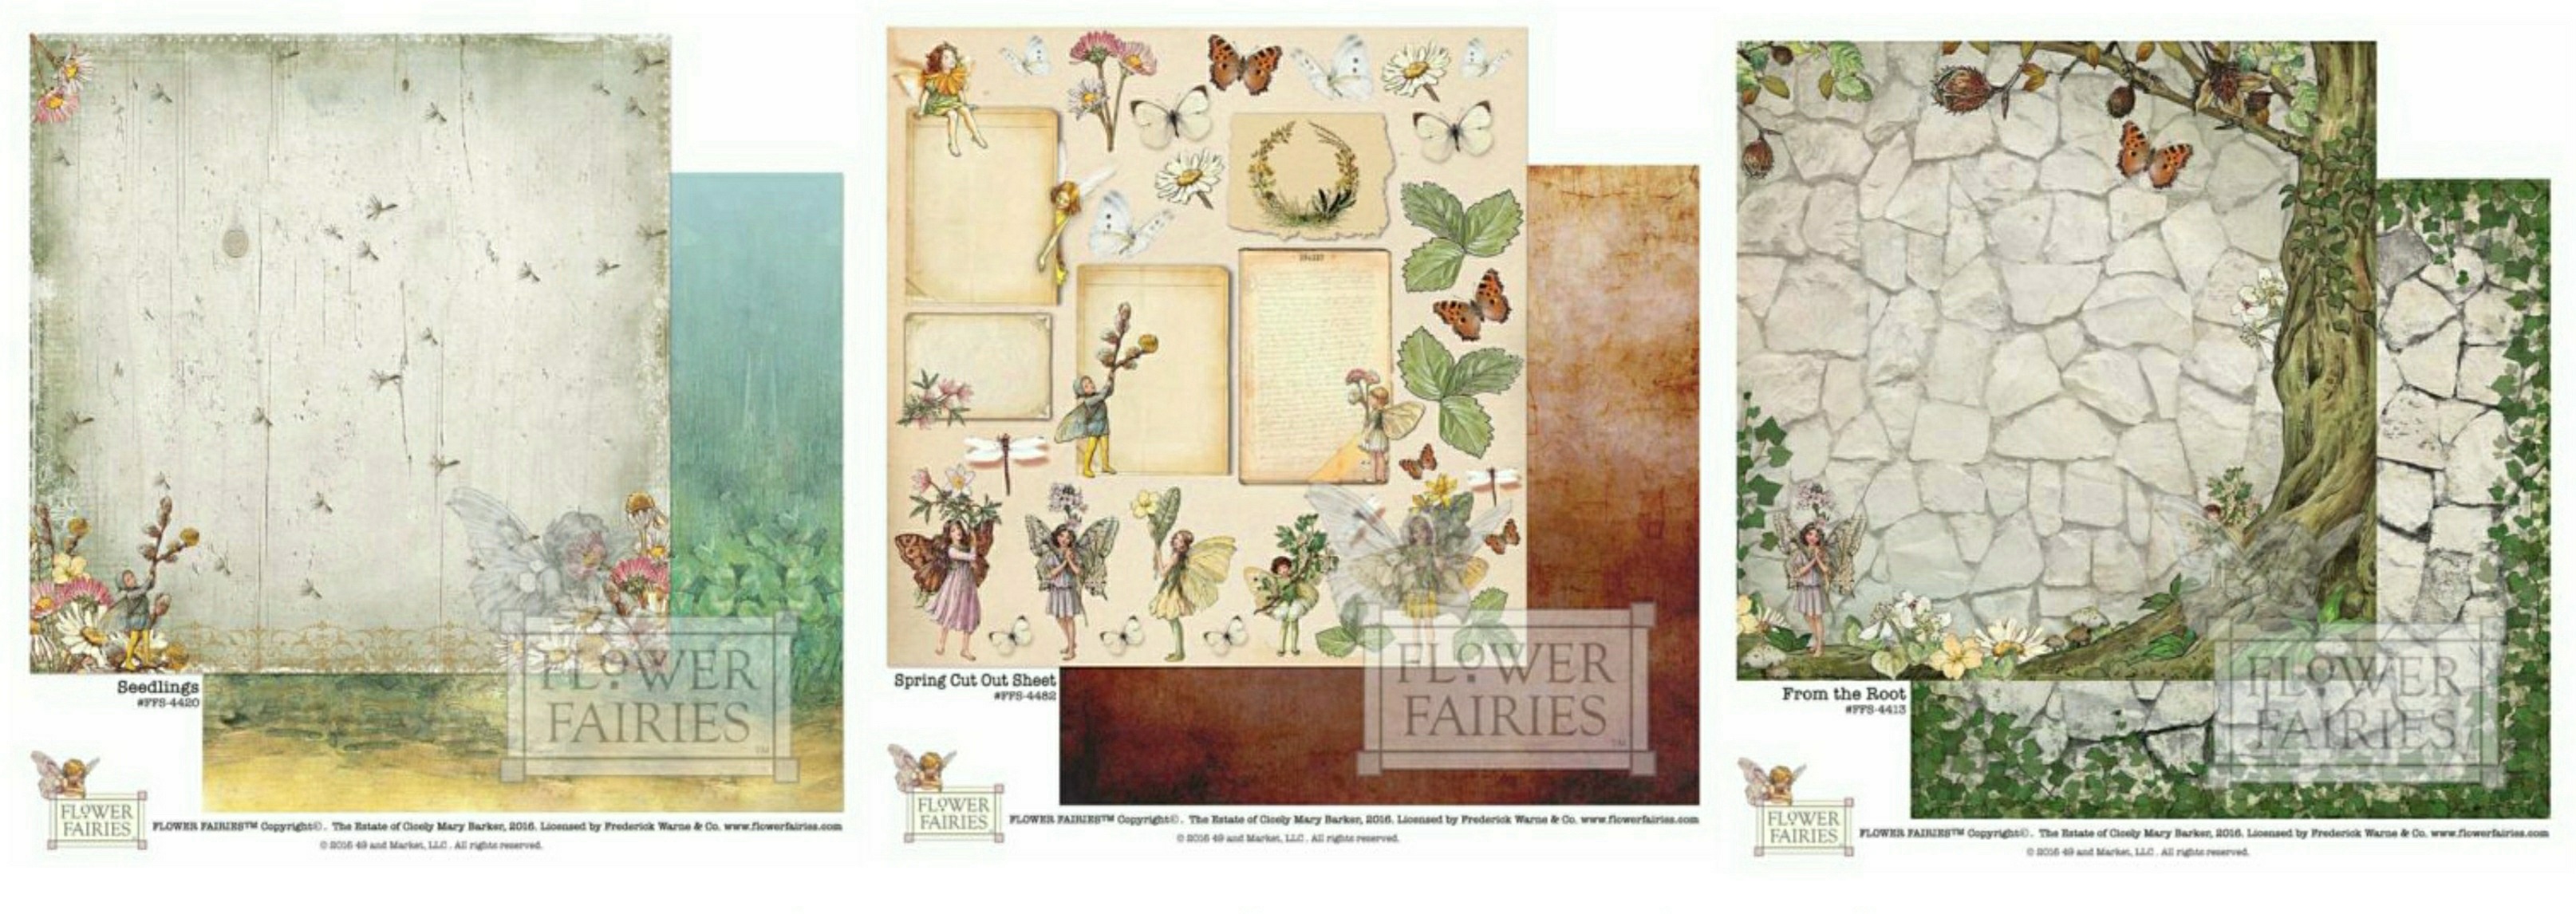
Hi All!  I'm so happy to be sharing with you today my first layout using Janene Meyerowitz's beautiful Flower Fairies of Spring collection! I was delighted to be asked to be a guest designer today using this amazing, whimsical collection! And I was so thrilled when I first got my hands on this lovely collection....loving the heavy weight of the paper, so nice for fussy cutting and mixed media products!

  product photo2
I was Immediately drawn to the backside of the paper called 'Seedlings'....such a pretty background design! It made me think of this photo I took of my oldest daughter Chloe, when she was a baby.  So I chose this paper as my main background.  Then I noticed the pretty Ivy design on the paper called 'From the Root' and thought it would make a lovely matting frame for my background paper.  The third paper I went with was the 'Spring Cut Out Sheet'....I cut out a bunch of the pretty images to use with foam pop adhesive dots to add these elements to my page design. 


Dusty Attic Product used in this project:
~ Decorative Scroll #1
~ Flower Buds
~ Lavender
~ Mini Captions #9
~ Dusty Attic Gloss Varnish


Above are the Shimmerz mixed media products I used in making up this page.  You can order Shimmerz Paints HERE.  NOTE: You can get your FREE/Bonus Shimmerz Paints product in the color of your choice if you mention my name in your next order! :)

So before I show you close-ups and a few tips on my page, I thought I would share a video tutorial I made up on how this page came together, so grab yourself a cup of your favorite beverage, take a little break and enjoy!


I hope you all enjoyed my little tutorial and feel inspired to create your own whimsical mixed media layout using Flower Fairies of Spring papers and embellishments!  I'm posting a few close-ups of the layout that you can peruse at your leisure....

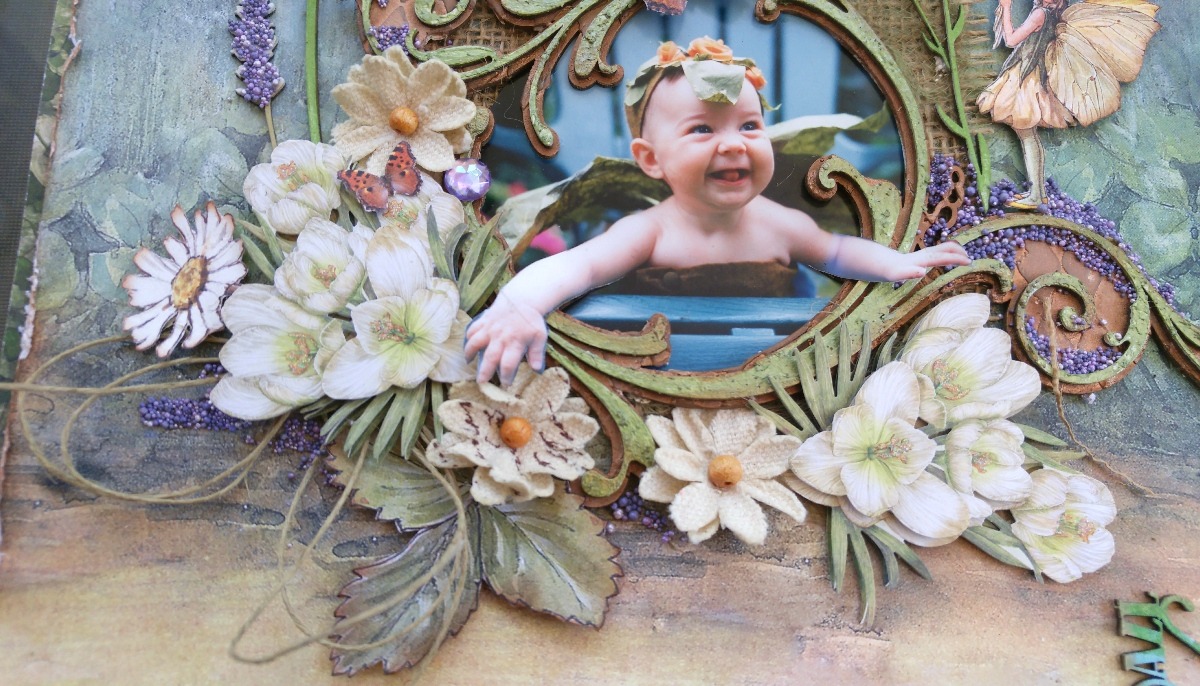
  All Smiles closeup1

I used a Dusty Attic 'Elegant Scrolls' Frame to encircle the photo of my daughter and used a variety of products to add texture to the frame.  I began with using a Tim Holtz Harlequin Stencil with homemade texture paste on the bottom layer of the stencil.  I then painted it with a wonderful metalic paint by Shimmerz called 'Penny 4 Your Thoughts Inklingz'...the top layer of the stencil got a coat of Shimmerz 'Artie-choked' Texturez.

  All Smiles closeup2

The smaller matching scroll got the same treatment in mixed media product as the larger frame.  I also spritzed some Cheesecloth with Shimmerz 'See Ya Latte' and 'Olive Branch' Spritzes and adhered it to the background paper.  I tucked a leaf cut out from the Spring Fairies cut-out sheet and a butterfly in the center of the design (from the cut out sheet as well).

  All Smiles closeup4

Janene has these fabulous new products in her store 'The Scrapbook Diaries' called 'Prills'....I'm totally obsessed with them!  Here I used the Lavender Ice Prills on the tips of my Dusty Attic 'Flower Buds' and 'Lavender' Chippies.  I just put nice big globs of Aleene's glue on them and poured the little colorful balls all over them.  I just love the effect they give!

  All Smiles closeup5

....And, once I started playing with these Prills, I couldn't stop!  Used them on the chipboard and around my photo area as well.  I really liked how the purple/lavender color went with the blue/green/sepia colors on the background paper. (sorry about the stray piece of burlap on there....was to lazy to retake the pic when I was posting...but still wanted to share the close-up so you could see the effect on the chipboard :P

  All Smiles closeup6

And seriously, how cute are those little flower fairy images!!  Not only are these sweet l'il images scattered tastefully over all the papers but you get a bunch of the adorable images on the Cut Out sheet! Love that!  ...I also added some burlap trim under my photo frame for added rustic texture, this wonderful stuff is available by the roll (in a nice workable small roll) at The Scrapbook Diaries....

  burlap-ribbon-natural-4-1m-rb-84383rustic-canvas-and-burlap-small-blooms-rb-84352
There are 3 different styles available, the one above, a coarser burlap and a cream color burlap.  I also used these adorable Burlap/Canvas blossoms by 49 and Market....such a sweet design, don't you think!


I hope you all enjoyed checking out my first (of many I'm sure!) pages I made using the gorgeous 'Flower Fairies of Spring' collection and hope I've inspired you play and get your 'whimsy' on! You can find most of the products I've used above at Janene's online store The Scrapbook Diaries! xo

Friday, April 15, 2016

A Special 2 Page Kit!! (plus an extra Dusty Attic Kit!) {The Scrapbook Diaries}


Hello friends!  I'm back after some surgery on my left arm....doing a lot better now! And I've got a special Double Page kit to share with you today that I made for The Scrapbook Diaries!   I had so many pretty papers and beautiful embellishments to use here, that I decided this one had to be a double kit....that's right, 2 page with 2 instructional videos.....and as always you get all the products I used to create these pages so you can make them exactly as I have or tweak it for your own style :)


Lots of lovely chipboard pieces in this one, including this beautiful title chippie.  I like to choose titles that will work for anyone's pages...just choose your family photo and add it in :)


I just fell in love with the blooms in this kit....such a lovely variety....and I just love the little berries, they add such a whimsical touch!


Lots of yummy Dusty Attic chipboard in this kit as well....my favorite zippers...and that Marrakesh Trellis is such a favorite for me as well!  I used up every bit of it on these two pages.


You also get a gorgeous TCW (The Crafters Workshop) stencil in this kit with my newest favorite mixed media product....Shimmerz 'Blushing Bride' Vibez spritz!  It is so pretty!  It is a beautiful rosey pink with hints of gold!

.....Now for the second layout.....


Again, I used a chipboard title that can work for anyone ordering the kit.  For this one I used the gorgeous paper collection designed by Frank Garcia called 'Tales of You and Me" for Prima Marketing....I'm so in love with this paper collection!  All the elements I adore in paper!


Here's a closeup of some of the lovely page elements included in this kit.  ...


I didn't capture it as well in my photo as I would've liked, but the roses in this kit are so glittery and beautiful!  Not knock you in your face glittery but that beautiful iridescent shimmer with a fine dusting on the blossoms....love it! (no pun intended LOL)


As always I did a full video tutorial for both kit pages and Janene Meyerowitz (owner of The Scrapbook Diaries) has done a beautiful Bonus page as well.  This kit is just packed full of pretty things to get your scrapping on..... you can order your kit today HERE!

But.....I also have another little something to share with you before you leave today!  .....


I was recently asked by Jennifer Hedger (owner of Dusty Attic Chipboard in Australia) to create a kit with a photo tutorial for their special retreat that they went on a few weeks ago.  Last time I did this the ladies on this side of the pond were wanting to get their hands on this kit as well!  So Janene at The Scrapbook Diaries worked with Jennifer Hedger to get all the chipboard specially cut for this kit and Janene put together the kit with all it's mixed media products, papers embellishments etc. so that you lovely ladies can get your hands on this kit as well!   She saved it to release with my double kit so that you can save on the shipping! Yay!


This kit includes Dusty Attic chipboard, blossoms, paints and mixed media products....fun embossing powder that adds a lovely texture and shine!


I'm just loving the fine lattice included in this kit....randomly cut and peeking out from behind torn paper....it's such a fun design element.


I show you step by step how I added the finishes to my chipboard pieces in the photo tutorial included in the kit...


Here is more of a close-up of one of the leafy chippies so you can see the effect I got with the mixed media products included in the kit.


I just love the mixed font titles that Dusty Attic has put out lately as well! They are so delicate and pretty!


So if you'd like a go at this kit as well, you can order your's today at The Scrapbook Diaries....this is a special order that Janene put together so it's first come first serve, you may want to get your's before they run out.  You can find this kit HERE.

Thanks so much for stopping by my blog today!  It's good to be scrapping again!  As always, I so appreciate your kind comments and feedback, you ladies make my day! xo


Wednesday, March 2, 2016

Cherish ~ New Kit & Video Tutorial {The Scrapbook Diaries}


Hello friends! I'm so happy to share with you all today the latest kit page I've made up for The Scrapbook Diaries, so much fun to scrap this pic of my sweet little great nieces! I always feel so fortunate to get to have such lovely products to play with in creating my scrapbook pages....and I feel even happier that all the products I use are available to everyone to create the same or similar pages through The Scrapbook Diaries Kits!


Janene Meyerowitz (Owner of The Scrapbook Diaries) always looks far and wide for the newest most exciting products on the market....yup, doesn't matter if the products need to be ordered from as far away as Poland or Australia, she brings them in so we can play!  Here you can see some of the lovely layered wood embellishments she brought in from a company called Scrapeniec in Poland....love the delicacy of these pieces!  


Included in this kit are these wonderful new Shimmerz Paints products, Strawberry Fields Creameez and Ruby Lost Her Slippers Inklingz!  Love these colors combined!


I'm a sucker for butterflies on scrapbook pages, this kit includes a beautiful two-sided cut-out strip of butterflies....the hard part was picking my favorites for this page!


Another fun cut-out strip in this kit is a lily floral design.  I love these, with just a little bit of fussy cutting and some foam adhesive tape, you get a really unique and pretty page embellishment!


As always, the kit comes with all the products included on my sample page....I'm crazy about those adorable little LemonCraft buttons!


And that vine!  One of my all time favorite Prima Marketing Vines.....Janene was able to get in a limited number of these vines, so if this is a kit you want, be sure to move fast on it as this particular kit is quite limited and will go fast!


Also included in this kit is the Organic Matter stencil I designed for The Crafters Workshop!  As always Janene offers the kit in Basic and Complete kits so that if you happen to already have certain items in your stash you can save a little money by taking the Basic kit.

And of course, this kit also comes with unlimited access to a private online video tutorial to show you how this page was made so that you can follow along and create the same page for yourself or you can tweak it to suit your own style! She also provides you with enough materials to create a bonus page (be sure to check out the bonus page Janene created with this kit! It's so beautiful!).  I know you will have a lot of fun with this one! You can order your kit at The Scrapbook Diaries today!  Fair warning, this one is quite limited so act quickly if you want it! :)

Thanks so much for stopping by my blog today, I always appreciate the kind comments and feedback I get from my friends! Happy Scrapping!

Wednesday, January 13, 2016

Wishing for Spring {Dusty Attic, Shimmerz Paints and Maja Design}


So I really can't complain too much about the weather, it's been a fairly mild winter here in Canada (Ontario, at least) so far....but the past few days have been so cold and snowy.  It doesn't take long for me to long for Spring!  So today I thought I would scrap something that makes me happy....beautiful flowers.

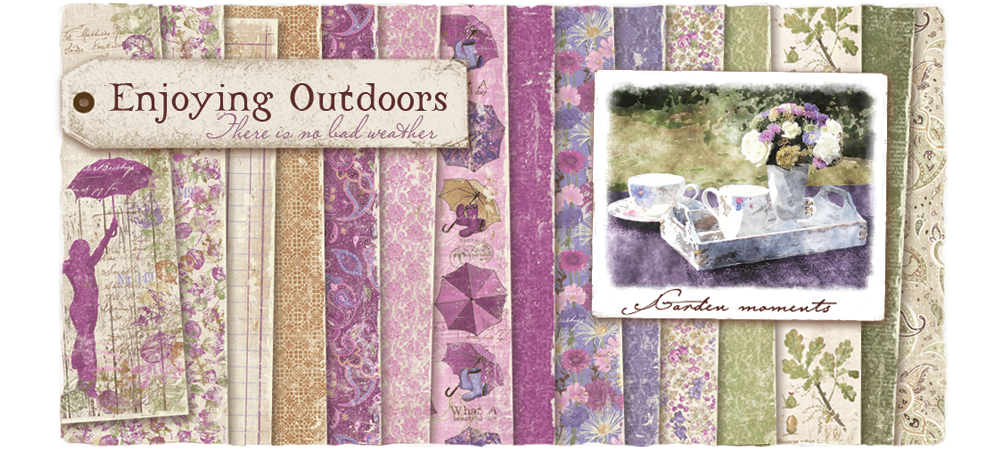
  Enjoying-Outdoors-KL

I used a number of papers from the beautiful 'Enjoying Outdoors' collection (Beautiful Trees-bs, Woodlands, Flourishing-bs)....also a bit of Vintage Autumn Basics (XVI) - Clocks, and Walking In the Forest (Die Cut Sheet- butterfly).

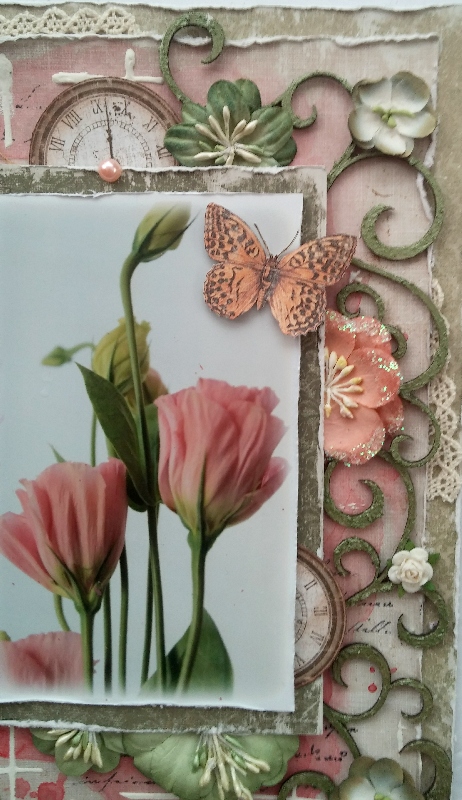
  Always closeup2I found these cute flowers that I thought were a good match for the blossoms in the photo....they are Prima Marketing flowers, but I couldn't find a name on the packaging (I think they might be from the FairyBelle collection?).


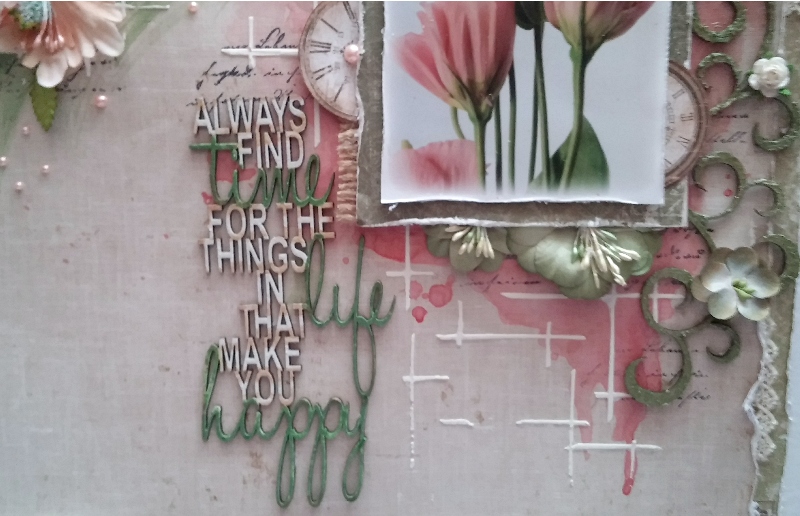
I did a little painting with some Shimmerz Paints on the background. I used 'Naughty or Nice' Inklingz behind the photo area and then used a combination of 'Sage It Isn't So' Creameez and 'Greener Pastures' Inklings, splashing out from the side underneath the floral embellishments.  I gave the Dusty attic chipboard scrolls a coating of  'Artie Choked' Textures.

  Always closeup4

You can see in this photo, the pretty textures the green texture paste gives to the Dusty Attic chipboard Scrolls (also a new set of scrolls recently released by Dusty Attic!).  I also tucked a few clocks that I cut out from the Vintage Autumn Basics XVI paper around the photo area along with some Dusty Attic green blossoms (called Grassy Knoll).  And as a finishing touch I added a butterfly that I cut out of the Die Cut sheet from the Walking In the Forest collection as an embellishment on the photo.


I'm super excited about the new stencils Dusty Attic has been coming out with lately.....just a couple of weeks ago I got a few of them in the mail....I used the Cross Hatch stencil behind the photo area with  some home made texture paste to add a little interest there.

  Always closeup5

I added a bit of texture using a new Dusty Attic stencil called 'Cross Hatch' with some home-made texture paste. I also added a new chipboard title from Dusty Attic, using the Shimmerz 'Greener Pastures' paint to color the scripted words in the title.

I hope you enjoyed today's post and that it brought you a little hint of Spring on this cold winter day! It's fun to be scrapping again after a little break over the holidays....I've got another page coming up in a few days!  Thanks so much for stopping by today! xo


LinkWithin

Related Posts with Thumbnails