Wednesday, October 21, 2015

Some Fun Fall Drama {Maja Design & Dusty Attic}


Happy hump day everyone!  It's Wednesday and that means I have a Maja Design project to share with you!  I've had this photo of my two girls hamming it up on a walk we went on, waiting to be scrapped for over a year now, it was time to do it!  It's autumn and I just had to do a little scrapping with the beautiful Maja Design Walking in the Forest collection!
 

I just love the lovely denims and flannel print designs in this collection.  I chose the following papers to work with for this page: Walking In the Forest (Fresh Air-bs, Flannel shirt-bs, Flannel shirt (front side), Autumn In The Air, Birch).
 

I used a variety of Dusty Attic chipboard to decorate this page.  I got the idea to use the postage stamp chipboard design from the Walking in the Forest Die-cut sheet of paper.  The Dusty Attic Clock Frame got a rusty treatment using Dusty Attic Rusting powder sprayed with a combination of 75% white vinegar and 25% water.  You wait about 1/2 hour for the rusting to happen.  The blue scroll is another Dusty Attic chippie called Elegant Scroll #13.  The l'il mushroom design was cut from the 'Autumn in the Air' paper and attached with foam pop dots.  The white butterfly is from Prima.  The Clock faces were cut from a paper called XVI from the Vintage Autumn Basics.
 

The blossoms I used for this page are a combination of Prima blooms (large cream flower), some Recollection (Michaels Craft store brand) blossoms, and some Dusty Attic blossoms (small blue).


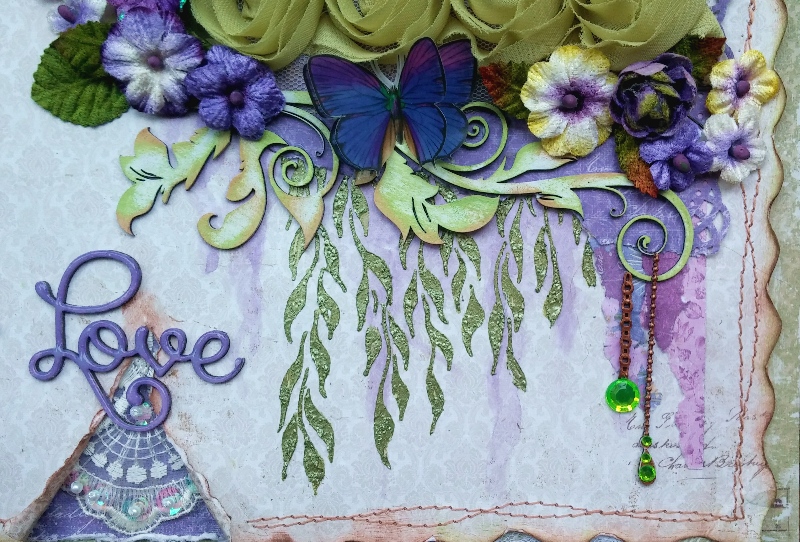
I layered a few of the Walking In the Forest papers behind the photo, creating a few ribbon banners peeking out of the bottom. I added some foliage stamping in 2 colors around the focal points on the page.  The stamp is a K & Company set called Lotus by Amy Butler.  The inks I used were Prima Branch Bark chalk ink and Denim Mixed Media chalk ink by ColorBox.  The title is by Heidi Swapp (had this one in my stash for years, and finally got to using it!).  Directly behind the photo I used a little Scattered Straw Distress ink by Tim Holtz, applied with the TH tool.

I hope you enjoyed checking out my latest Maja Design and Dusty Attic project!  Thanks so much for stopping by my blog today, as always I love to hear your comments and feedback! xo

Monday, October 19, 2015

Mixed Media Reverse Nature Canvas & Video Tutorial


Hi all! I know it's been a while since I posted a project, so I'm happy to share with you today a reverse style canvas I made on a 4"x 6" canvas using a TCW (The Crafter's Workshop) Mini-Brick Stencil, Shimmerz Paints and some NEW Dusty Attic chipboard!


Shimmerz Products used on this project:

~ Glorious Day Vibez
~ Truffle Spritz
~ Palm Reader Vibez
~ Don't Be Suede Coloringz
~ Green Olive Shimmerz
~ Greener Pastures Creameez
~ Boogie Boardin' Blue Creameez
~ Penny 4 Your Thoughts Inklingz
~ I Onxly Love You Inklingz (Jewel)
~ Olive U Truly Inklingz
~ Berry Hot Creameez


Dusty Attic Products used on this project:

~ Indian Arrow
~ Rushes #2
~ NEW Dusty Attic Texture Paste


TCW Stencil used in this project:

~ Mini Bricks (6x6 inch stencil)

So to make things easier I did up a video tutorial on how this project was made.  So grab yourself a lil break and enjoy! xo


Hope you enjoyed watching.....here are a few close-ups you can view at your leisure....


I just love all the new chipboard pieces Jennifer Hedger has added to the Dusty Attic Store!  This piece is called Indian Arrow....so many fun things you can do with this one!  I did a little quick painting with Shimmerz Creameez & Inklings, then added some twine and Bo Bunny adhesive pearls for a unique look.


For the butterfly, I printed off a butterfly image on an acetate sheet and cut out two sizes, gluing them together.  (I had the image on my old computer, so I no longer have the image to share....but you can find many printable butterfly images on Pinterest).  The metal embellishments are the key and keyhole embellishments from Graphic 45.  I used the TCW mini-brick 6x6 stencil with the NEW Dusty Attic Texture paste to get my background design.


I used a combination of Shimmerz Glorious Day Vibez, Truffle Spritz and Green Olive Shimmerz Paint for the background brick texture colors. NOTE: You can get your FREE/Bonus Shimmerz Paint product in the color of your choice with your next Shimmerz Paints order just by mentioning my name "Gabrielle" in the Instructions to Merchant/seller part of your order.  Shimmerz Store. xo

Hope you enjoyed today's post! thanks so much for stopping by, your comments and feedback are always appreciated and make my day!  (For anyone looking for DA chipboard, Janene at The Scrapbook Diaries has a large selection, including their new texture paste! :)


Wednesday, October 7, 2015

Love & Lilacs


Hi all! I'm here with you today to share my newest layout using the new Maja Design paper collection called Enjoying the Outdoors!  Love the gorgeous colors and designs in this collection!


I used 'Woodlands', 'Having Tea In the Sun' 'Garden Moments', 'Late Summer Flowers' and a variety of color papers from the 6x6 paper pads for my page.


These are the exciting NEW Dusty Attic chipboard pieces I used on this project:
~ Mini Captions #7
~ Ornate Pendant #3
~ Pearl Pendants
~ Elegant Swirl #11
~ Corner Flourish #3


I used Dusty Attic 'Corner Flourish #3' under my photo with a stencil I designed for The Crafter's Workshop called 'Moving Vines' using a texture paste called 'Arti-choked' by Shimmerz Paints.
 

I also used an elegant new chipboard piece by Dusty Attic called 'Ornate Pendant #3' and 'Pearl Pendants' as a decorative element for the side of my page.  I used a metalic 3D paint by Scribbles to get the metal look on the pendants.
 

I tore a small 'peek-a-boo' section in the bottom of the 'Having Tea in the Sun' paper and added a bit of lace behind it.  The Love title is a new Mini Captions title by Dusty Attic that I painted with Purple Rain Vintage Creameez by Shimmerz Paints.  Once it was dry I added a Glossy Accents.

Many of you ask me where you can get some of these lovely products I get to work with....The Scrapbook Diaries carries loads of Dusty Attic Chipboard, the new Maja Design 'Enjoying the Outdoors' collection, and my Crafter's Workshop Stencil Designs.  You can order Shimmerz Paints products used in this project directly from their website (be sure to mention my name for a FREE/Bonus Shimmerz Paints product in your next order!) ....just click on the links above to take you there :)

Thanks so much for stopping by my blog today, and thank you for all the kind comments and feedback, they make my day! xo

Friday, September 25, 2015

NEW Beachy Page Kit {The Scrapbook Diaries}


After this lovely summer, lots of us have tons of beachy, summery photo's to scrap!  Here is the newest kit page I made up for The Scrapbook Diaries.  It includes all the papers, embellishments and mixed media products I used to make up this page!  PLUS, as always you get unlimited access to a private Video Tutorial I created to help you make up your own page!


I should note that I used a White Sand texture paste on this page design,....I liked the effect at first until I realized that there is no white pigment in the texture paste, it went clear as it dried.  So I ended up dry brushing with some white Gesso.  So I recommended that Janene leave out the sandy texture paste and put in a link to my homemade texture paste instead TEXTURE PASTE RECIPE.  I think the white texture paste will give a nicer effect to the page.


I also used some fun lil Prima bronz micro beads for this kit...also included in the kit.  At The Scrapbook Diaries they like to introduce you to some fun new products....it's always nice to give something new a try, isn't it?


Also included in the kit are these finely detailed wood chippies, lots of cute nautical knots and anchors, lots of fun things to design with!


I used a new Shimmerz Paints color 'Blue Lagoon' for this one (also included in the kit).

You can jump in on this kit over at The Scrapbook Diaries (kit also includes enough materials to make up a bonus page, that Janene Meyerowitz designed as a companion piece, and it is absolutely GORGEOUS!!!!).  You can find the kit at this link HERE, pick up your's while quantities last!

Thanks so much for stopping by my blog today! I always look forward to your comments and feedback, they are much appreciated! xo xo


Wednesday, September 23, 2015

Making Retro Style Cards with Maja Design's Summer Crush!


Hi All! I'm so happy to share with you all today a couple of cards I made using the adorable summer collection 'Summer Crush' by Maja Design!  I just love the 'Snapshots' paper, so many fun little vignettes to serve as centerpieces to a cute retro style card!


Maja Design paper is just made for layering.  I start by choosing a favorite patterned paper like the polka-dot 'Flirty' paper.  I distress the edges with a Tim Holtz Edge Distressor, then just start layering on more and more patterned papers.  Tuck in a little burlap, some floral embellishments and a little wood-cut trellis (Scrapiniec), and you're done!


For my second card I again used the polka-dot pattern, this time in the blue and used the cute l'il blue guitar picture as my center piece.  Perfect for a fun little card to cheer up a friend!  Again, I just did lots of layering and tucked in a little burlap, embellished with a butterfly and added a little twine. In a short amount of time I had 2 fun cards ready to go!

Maja Design products used in these projects:
Summer Crush 6x6 paper pad,
Summer Crush 12x12 paper (Flirty, He Gives Her flowers, Snapshots, Long Summer Nights, Falling In Love-bs)

Thanks so much for stopping my blog today, hope you all get a chance to play this week and get creative with Maja Design's Summer Crush collection! As always I appreciate all the sweet and kindhearted feedback I get from you all! xo


Monday, September 21, 2015

Video Tutorial: Making Home Decor Wall Art {TCW Stencils & Shimmerz Paints}


Hi dear friends!  I'm happy to share with you all today a project I made a little while back using two of my new stencil designs for The Crafter's Workshop!  For this project I used the 12"x 12" size of the Moving Vines Stencil, as well as the 6" x 6" size of the Organic Matter stencil. 


I'm working on a 12" x 24" canvas....I needed something a little bigger to accommodate the vase I wanted to use for this project.  


I wanted to go with some fresh summery colors so I chose, Olive Branch Spritz, Bamboo Leaf Spritz and Glorious Day Vibez from Shimmerz Paints.   Here is a quick little video tutorial I created, a little step by step on how this canvas was made, Enjoy!....


Hope you enjoyed my little video tutorial!  Here are a few closeups of the canvas....


This is one of those times where a 12" x 12" photo is just perfect for a project!  I used Golden's molding paste with a credit card to get a nice even application.


I used the 6x6 Organic Matter stencil to add patches of texture to the background design.  I sprayed on the Shimmerz Paints sprays, darker to the outside, lighter to the middle. I want to note that this design was inspired by a canvas I saw by Vicki Chrisman, she kindly gave me permission to imitate her beautiful design.

Thanks so much for stopping by my blog today and letting me share my newest creation with you all, hope you all have a creative fun week! xo


Thursday, September 10, 2015

Mixed Media Video Tutorial {Shimmerz & Dusty Attic}


Hello friends, I know it's been a while since I last posted!  It's been a busy summer, we just finished putting in new floors in our kitchen, bathroom and mud-room....now we are doing a little painting. But with the kids back to school, I will have time to get more projects going!  Today I have a mixed media page and Video Tutorial to share with you using some lovely Dusty Attic chipboard, some Shimmerz Paints and Maja Design Papers from the Nyhavn collection.


I used the Dusty Attic September 2015 Inspiration board to choose my colors for the page.  NOTE: there is still plenty of time to play along in this months Inspiration board challenge, just be sure to post your project in the right side column of the Dusty Attic blog....there is a $100.00 Gift Certificate to the DA online store up for grabs!


These are the Shimmerz Paints products I used on the background of my page as well as on the Dusty Attic chipboard pieces.  NOTE: Remember to mention my name 'Gabrielle' in your 'Instructions to Merchant/seller' part of your order to get your FREE/Bonus Shimmerz Paints product in the color of your choice!

These are the Dusty Attic products I used to create this page design.  I created a short(ish) video tutorial to show how this page was made.  So, grab a beverage, take a little break and enjoy!....


Hope you enjoyed my little tutorial! Mixed media pages are a lot of fun to make and (other than drying time) go fairly quickly.  Here are a few close-ups you can view at your leisure.


I love all the new wonderful title chippies available from Dusty Attic.  For this one I simply stamped it with some black ink and applied it to the page.  The blooms I used here were a very inexpensive layered sticker set I bought at my local dollar store (I thought the colors were a good match to the inspiration board :)


Here you can see the lovely texture I got on the Elegant Swirls #3 chippie by using some Shimmerz Gritty Graphite Textures on it....I feel like it gives it a kind of cool iron look.  The cute lil bridge was part a super generous gift pack sent to me by a dear friend in Hawaii....thanks so much Kimberly!


Underneath the photo and in the corner of my page design I used one of the stencils I designed for The Crafter's Workshop called 'Moving Vines'.  For this project I used the 6x6 size.  I also added a bit of stamping using a text stamp from Bo Bunny (It is Written Stamp) and a brick textures stamp I designed for The Scrapbook Diaries.  You can find both my stamp and my stencil at The Scrapbook Diaries (USA) HERE. ...and some great news for Canadians! I just heard from Karen Ellis at The Art House Studio in Cambridge, Ontario (Canada), she has all my stencils in her online shop, so hopefully this makes ordering easier for Canadians, you can find her shop HERE.


Thanks so much for stopping by my blog today, as always I so appreciate all the kind and lovely comments and feedback, you ladies truly make my day! xo


Wednesday, August 19, 2015

VIDEO TUTORIAL: Mixed Media Art Journal Cover Using My NEW TCW Stencils and Dusty Attic Chipboard!

Mixed Media journal cover by Gabrielle Pollacco using Dusty Attic Chipboard and The Crafter's Workshop Stencils, Organic Matter

So I've made August my "spend time with family month", just wanting to take advantage of the time the kids have off school and make the most of it!  But I have taken a few moments out of our fun time to do a little video tutorial of an art journal cover that I made up as a sample using stencils I recently designed for The Crafter's Workshop!


I created both a positive and negative stencil design for this stencil that I named "Organic Matter". For this project I used the smaller 6x6 inch stencil (for the back) and the 12x12 inch mask style stencil for the front of the book cover. (You can find all my stencils online at The Scrapbook Diaries, I just heard that Janene has all the stencils in house now! and has already begun sending out all the pre-orders!! ....you can also use the TCW store finder for a TCW dealer near you).


Dusty Attic Products used on this project:
~ Dusty Attic Journal
~ Skeleton Clock Frames
~ Geometric Corners
~ Nuts and Bolts
~ Rulers
~ Cogs #2
~ Jumbo Cogs
~ Dusty In Color Paint: Hot Chocolate, Raisin, Sunburnt Orange
~ Dusty Attic Rusting Powder

When I was designing my stencils I have to say that I already had all these wonderful Dusty Attic chipboard designs in mind to use with my stencils.  I just love the industrial look of these chipboard pieces and thought they would work well with my Organic Matter stencils.

As I was creating this cover design I decided to flip on my camera and shoot a video tutorial to show how I used the stencils and also to show how I added the rusty finish to my Dusty Attic chipboard pieces.  So if you have time, give yourself and little break, sit back and enjoy!....


I used a whole lotta mixed media products to make this project, to find the list just click on the youtube link (bottom right corner of the screen above....when it's playing).....you can find the full list in the Youtube description area underneath my youtube video (click the down arrow beside the title to open up the description area).


I always like to keep the back of my art journal book covers free of a lot of 3D elements as the back seems to take a lot of wear and tear.  So I stuck to just adding some texture with my 6x6 'Organic Matter' stencil.  I added some stamping and used the same mixed media colors and sprays I used on the front of the journal cover.


Here is a view of the front and back of the journal cover.  I like that you can open up the spin of the journal cover so that you can remove the front and back to work on them.  Then you can reattach when the painting is done. NOTE: this is more of a notebook journal.....if you are looking to have an art journal where you can paint on the papers you will want to order a art journal that has watercolor or manila papers inside them.


I used Dusty Attic's Rusting Powder on all of my chipboard pieces for this project. I so much love the effect of the rusting powder.  All I did was paint the pieces with some of my Dusty Attic paints and while wet, sprinkled on the rusting powder.  I then sprayed the pieces with a solution of 75% white vinegar and 25% water.  I gave it about 20 mins to a half hour to dry/rust.  I then lightly brushed with some Sunburnt Orange DA paint to add to the corroded look. (see video above for more details)


I used Golden Molding Paste (but really any texture paste will do the trick) with my TCW Organic Matter Mask Stencil (12x12 size) to create the veined look on my background design.  After applying all my background spritzes and inks, I hit the relief areas of the stencil with some Luminarte H20's in Egyptian Gold,  and Pearlex Mica Powders in Aztec Gold and Turquoise (see video for application).


This journal cover was so much fun to create!  I hope I've inspired you all to get out your DA chipboard (you can find a large selection of DA chipboard at The Scrapbook Diaries), TCW stencils and mixed media products and get creating your very own mixed media project!  Thanks for stopping by my blog today, I always appreciate all the kind comments and feedback and love to hear what you all think of the new products I've designed!


LinkWithin

Related Posts with Thumbnails