Showing posts with label Maja Design. Show all posts

Saturday, August 6, 2016

Love in Summertime {Maja Design and Scrapbook Diaries Kit!} PLUS A GIVEAWAY!!!


Hi Everyone!  I'm back with another video tutorial and Kit for you all!  Maja Design asked me to be their summer guest designer using this gorgeous new collection called 'Summertime'!  As soon as Janene (The Scrapbook Diaries) and I saw this collection, we knew we had to make this into a Kit! So we pulled together lots of the pretty papers along with stamps, gorgeous chippies and wood embellishments and fun mixed media products and as always a video tutorial to show how it all comes together!
  ....Has your summer been a good one so far?  Ours has been busy and lots of fun!  And I have some big news to share (in case you missed it in my last post)....my oldest daughter got engaged a few weeks ago! It's still hard to absorb that my little girl is so grown up now.  But we are all so happy, he's an awesome guy and they are so very happy together!  Every photo I have of them, you just see they glow with joy, so I thought I would use one of these pics to scrap with this lovely summery paper!

  Summertime-L

I used a variety the Summertime collection papers for my layout...'Light Scarlet' as my matting paper, 'It's Always the Best' as the main background design, 'Flowers Everywhere-bs' for the heart design, 'Smell the Roses' for the matting for the heart and 'Light Scarlet-bs' for the gingham inserts.  I thought I would share a video tutorial with you all on how this page was put together, so get yourself your favorite summer drink (my favorite is strawberry lemonade), take a load off, relax and enjoy!...


I hope you enjoyed my tutorial and hope this inspires you to play with this beautiful collection for your own summertime photos.(see below for a GIVEAWAY!)... Here are some close-ups and details of this page that you can enjoy at your leisure.

  closeup1

Since this is a love story, I thought I would use lots of heart images throughout the layout.  I used the 'Circle Stitch Stamp Set' I designed for The Scrapbook Diaries, using the stitched heart stamp on a variety of the Summertime patterned papers and added Prima Mechanicals (hearts) to the centers to create fun and unique little embellishments for the page.

closeup2The flowers are also from 49 and Market, the roses are a floral stem that I cut up and used in various places on the layout, and I used canvas blooms from their Rustic collection to tuck in around the photo area.  For my mixed media product I used two crayons by Faber Castell called Iced Rose and Iced Currant (see video for various ways I used this paint crayon).

  closeup5

The cogs chippie is from ScrapFX, and again the metal heart is by Prima.  (this whole page design, including chipboard, mixed media products, stamp and papers can all be bought as a kit from The Scrapbook Diaries).

  closeup3

Another product I've had a lot of fun with lately is those little colorful pebbles called Prills, here I used Tutu Pink Prills to accent the wooden floral accents from Scrapeniec and to accent my heart designs.

  closeup6

I just love to layer all the pretty paper designs in this collection.  For me, the gingham design on the backside of 'Light Scarlet' paper just speaks of summer.  Here I tucked it in a tear I made in the background paper "Is Always the Best'. Tucking in a little lace and burlap, I think adds a nice rustic look.


I really enjoyed working with these lovely papers and I think you will too! You can also order the same kit in the blue papers from this collection (this gorgeous page was designed by the awesome Janene Meyerowitz using the video tutorial!) You can order your kit from The Scrapbook Diaries HERE For Pink kit!  HERE For Blue Kit! Pretty much all the product you see me using is included in this fun summery kit.

WOULD YOU LIKE A CHANCE TO WIN THIS BEAUTIFUL SUMMERTIME PAPER COLLECTION?? Just leave a comment below (and if you have an Instagram account come follow me, I spend a lot of time there lately! my Instagram name is Gabrielleshutterbug), I will choose a winner on August 31st, it's that easy!


Before I close for today, I have one more project to share with you!  Recently my dear friend Jennifer Hedger (owner of Dusty Attic) held a retreat in Bali and asked that I create a kit for the ladies on this trip!  This is the layout I designed....she was kind enough to make up a special chipboard sheet of all the chipboard I used on this kit and made it available to everyone in North America through The Scrapbook Diaries!  Yep! another kit you can order through The Scrapbook Diaries!  I would have posted this seperately but Janene always thinking ahead, asked that I share it at same time as my Maja Design kit so that everyone that would like both can save on shipping!  


I show you how I made these layered acrylic butterflies using my stamp set (also included in this kit)


This kit is just jam packed with awesome stamps, stencils, chipboard, embellishments and premium papers!   NOTE: this kit comes with a written PHOTO tutorial (as this is more conducive to live classes).  If you would like to order this kit you can get it HERE.

I know! A lot to absorb today, LOL!  Be sure to leave a comment for a chance to win the Gorgeous Maja Design Summertime collection! (You have until August 31st)

Happy Summer Scrappin'!


Monday, May 16, 2016

Maja Design Vintage Romance Layout & Video Tutorial! {Dusty Attic Chipboard}

Hello everyone, Gabrielle here with you today!  Yup, I'm back for a little guest spot!  When I received the gorgeous Vintage Romance collection in the mail a couple weeks ago, I felt compelled to make up a layout & video tutorial with these stunning papers!

  Vintage-Romance-P
I used 'Happily Ever After', 'Together Forever' and 'Words of Love' for my page design.  I was going for a fabricky (is that a word? LOL) look on this layout, so I added a little machine stitching on the background design, this is optional, I think it can look equally as nice if you leave that off (if you are not a sewer).


As always, no project is complete for me without a nice smattering of Dusty Attic products.  For this page I used the following:
~ Wildflower #3
~ Chicken Wire Panel (small)
~ Word Pack #10
~ Vintage Frame #4
~ Dusty Attic 'Flower Power' Stencil
~ Dusty Attic Glaze Varnish

So grab your favorite beverage, take a little break and enjoy!....


I hope you enjoyed my little video tutorial, here are a few closeups for you to check out at your leisure....

Closeup1

I have this close-up turned on it's side just so you can get a more close-up and personal look at it.  I simply followed the pattern in the paper to create my button hole design...makes it easy to space out the design.

  Closeup6

The next step was to add a little color just directly behind the photo area using some Shimmerz spray called 'See Ya Latte' Spritz....then I applied some home-made texture paste through a Dusty Attic stencil called Flower Power.  I was going for a kind of Bohemian-chic look and I thought this daisy design would work well with it.  I also matted my photo with the backside of the 'Words of Love' paper, I do love browns with blues!


To continue the fabric idea of my page I also included a pretty strip of lace that I got from Tresor's de Luxe (my favorite source for beautiful lace!), which I adhered with Tombow liquid adhesive.  I prefer this glue as it allows you to readjust your placement if need be without making a big mess on the paper (let the glue sit for a few minutes to set up before you apply your embellishment to the page.

  Closeup3

I had a little fun with my embellishments on this one....I tried a new product (at least to me) called Prills, they are these little balls that come in different colors. Here I using the color called A-maized. I just applied a little glue to the tops of the blossoms of the Wild-Flowers #4 chippie by Dusty Attic and poured the little pebbles onto it.....I really love the effect!

  Closeup2

I finished my design by adding some layered floral and butterfly stickers by K&Company in a few strategic areas of my photo area.  Added a small shabby-chic bench embellishment by Prima and a few adhesive pearls on the lace panel.  Done! I hope you enjoyed my tutorial today and hope you feel inspired to try your hand with the gorgeous new Vintage Romance collection and Dusty Attic chippies and stencils. If you are looking for a great online source for Dusty Attic and Maja Design products, you can find both at The Scrapbook Diaries.

I'm always delighted to read your comments and feedback, they simply make my day, thank-you! xo

Wednesday, March 23, 2016

Saying Farewell ~ All Smiles {Maja Design & Dusty Attic}


Hello friends, I'm happy today to share with you all a very special project that is dear to my heart.  As many of you know I have been with the Maja Design team for over 4 years now.  Today will be my last post for this wonderful team.  It was very hard for me to come to this decision as I have very much enjoyed creating with these beautiful papers.  But as I have a lot on my plate as of late, I felt it was time to make a few changes.  I decided to end my journey as I began.....the very first project I did for Maja Design was using their signature blue's and neutrals....so today I finish my journey using these classic colors.

  Life-by-the-Sea-P

As always I used a variety of collections in one layout (5 in all), but I mainly chose papers from the Life by the Sea collection.  I drew my inspiration from the navy and white stripe top my oldest daughter is wearing in the photo above of her and our dog.  These are the papers I used on this project:

Maja Design Papers used in this project:
~ Life by the Sea (Seaside Cottage, Bottle Message),
~ Vintage Summer Basics (1945-bs),
~ Vintage Autumn Basics (XXIII-bs, XVI).


Dusty Attic Chipboard used in this project:
~ Chains
~ French Flourish
~ Lattice (small)
~ Vintage Frames #4
~ Word Strips
~ Mini Captions #9
~ Mini Tabs #2
~ Clear Gloss Varnish
~ Dusty Attic Blossoms (Blue Bonnet)

  All Smiles closeup1

I chose the fresh and pretty 'Seaside Cottage' strip paper as my matting paper....and the softly scripted 'Bottle Message' paper as my background.  I decided on my photo and embellishment placement and then softly tinted the surrounding area with some Colorbox Mixed Media Inx in a Patina color.

  All Smiles closeup2

Before adhering my background paper to the matting paper, I added a little accent by tearing the two papers and curling back the edges to reveal the pretty check paper from the Vintage Autumn Basics collection with a little peek of lace as well. I added a small zipper pull from Prima Marketing to finish the look.  I also sandwiched a strip of burlap between the two papers before I finally adhered the two pieces together.  As an added finishing touch I added two 'hinge' designs by cutting a Dusty Attic 'French Flourish' chipboard design in half and glued them to the top and bottom of the right side.

  All Smiles closeup3

I double matted my photo with papers from Vintage Autumn Basics and Vintage Summer Basics, sandwiching the Dusty Attic 'Vintage Frame #4' between the two layers.  Then I added some butterflies (just some images I printed off from the internet), blossoms and clock images that I fussy cut from the Vintage Autumn Basics XVI paper, and applied with pop dots, adding a border with Platinum Stickles (glitter glue).

  All Smiles closeup4

I also added some randomly cut sections of Dusty Attic chipboard Lattice.....and as a final touch used some Dusty Attic Clear Gloss Varnish to attach some seed beads in around the lattice (Prima - Licorice seed beads).  To add another bit of curvy design to the page, I slightly bent a strip of Dusty Attic Chain under the photo and attached it with a 'screw' brad.

I hope you enjoyed checking out my project as much as I enjoyed creating it!  It has been my absolute pleasure being on this wonderful design team and want to thank Marie Janson for her kind generosity and support all these years, as well as Camilla Lillieskold, our awesome design team coordinator and Jennifer Snyder, our social media coordinator for all their hard work on our behalf. Suffice it to say I will be using all the lovely product I still have in my stash for years to come! xo
  

Wednesday, February 24, 2016

Window Easel Framed Card {Maja Design - Vintage Baby}


Hi all!  I'm excited to share with you today this uniquely shaped baby card I recently made.  I tend to be a bit frugal with scrap supplies, I save everything!  Those plastic/transparent pieces that many of your embellishments come on (blooms etc.), I don't throw them out, just in case I can use them later.  I recently found a fun use for them....making easel cards with a peek-a-boo window.  The Maja Design 'Vintage Baby Collection' had all the perfect elements to create the card I envisioned.

  Vintage-Baby-P

I used a variety of papers from the Vintage Baby collection (Die Cuts, Die Cuts-bs, Ephemera, Expecting, Our Little Miracle and Flowers for Mom), I also did a little fussy cutting from Vintage Spring Basics (5th of May) and Coffee In the Arbour (Butterflies are Free).


The bottom part of the card has an area for you to write in your own personal thoughts.  I added some fussy cut blossoms attached with foam adhesive dots so that the window part of the card has something to prop against.

  Baby card photo1

Here is a picture of the card with it's folded shut.  To make the card I cut out the framed baby design from the Vintage Baby Ephemera paper, also cutting out the area behind the baby inside the frame with an exacto-knife. I then laid the card cut out on the brown gingham paper (backside of the Die Cuts paper) and cut a piece slightly larger in wide to the frame piece...and kept the length of the strip the full 12 inches.  I then cut a second piece of the gingham paper to frame the baby frame piece, making sure there is about a 1/4 inch edge.  I then made a fold crease in the long strip at the 6" mark and at the 3" mark.  I cut out the center of the upper part of the 6" rectangle and also out of the matting piece I cut for behind the baby frame.

  Baby card photo5

I then put the card together by attaching the gingham matting paper to the upper 3" of the long card strip and then sandwiching the transparent plastic piece between the matting and the actual baby frame piece.  Now you have a cute peek-a-boo window on your easel card.  The last steps are just adding a few decorations.  I cut out a second baby image from another piece of the Ephemera paper and added it with foam pop dots, I thought it gave the card that extra pop.  I also fussy cut some flowers from the Vintage Spring Basics paper and butterflies from the Coffee In the Garden collection and added them as decorations to my card front.  A few seed beads for my flower centers and bingo, your unique baby card is done!  The cool thing?  Maja also has a beautiful baby boy framed image in this collection so you can make the card for either sex.

  Baby card photo3

It's hard to show in a photo the effect of the see through window so I thought I'd post an extra pic from the other angle, but believe me, in real life the effect is quite striking.  I had a lot of fun creating this special baby card and think you'd enjoy it too!

Don't know where to find Maja Design papers in North America?  An awesome source is The Scrapbook Diaries.  

I based this card on this months Moodboard challenge at Maja Design, I chose to work with the pinks and browns....here is a pic of the Moodboard for February....


You can win a wonderful Maja Design paper collection if you play along using this months board as your inspiration for your project using Maja Design papers.  The winner is announced on the last Monday of every month.....This month that would be Monday February 29th....so you still have time to play and possibly win a lovely Maja prize! You can find the challenge rule HERE.

Thanks so much for stopping by my blog today and for the kind comments and feedback, your words always make my day! xo


Wednesday, January 13, 2016

Wishing for Spring {Dusty Attic, Shimmerz Paints and Maja Design}


So I really can't complain too much about the weather, it's been a fairly mild winter here in Canada (Ontario, at least) so far....but the past few days have been so cold and snowy.  It doesn't take long for me to long for Spring!  So today I thought I would scrap something that makes me happy....beautiful flowers.

  Enjoying-Outdoors-KL

I used a number of papers from the beautiful 'Enjoying Outdoors' collection (Beautiful Trees-bs, Woodlands, Flourishing-bs)....also a bit of Vintage Autumn Basics (XVI) - Clocks, and Walking In the Forest (Die Cut Sheet- butterfly).

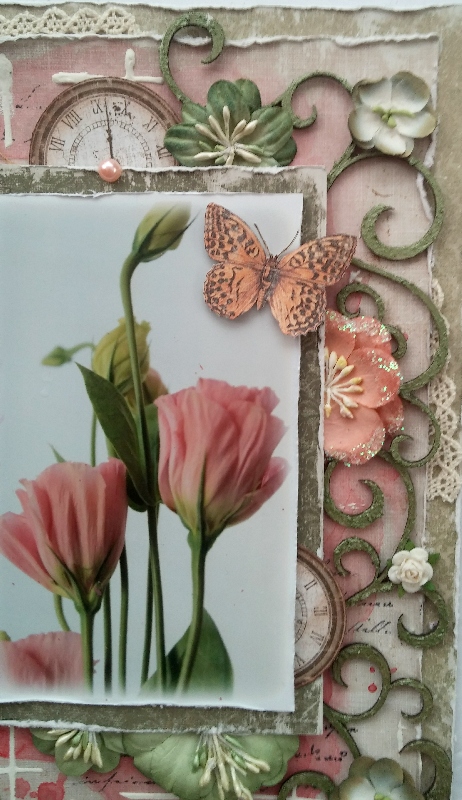
  Always closeup2I found these cute flowers that I thought were a good match for the blossoms in the photo....they are Prima Marketing flowers, but I couldn't find a name on the packaging (I think they might be from the FairyBelle collection?).


I did a little painting with some Shimmerz Paints on the background. I used 'Naughty or Nice' Inklingz behind the photo area and then used a combination of 'Sage It Isn't So' Creameez and 'Greener Pastures' Inklings, splashing out from the side underneath the floral embellishments.  I gave the Dusty attic chipboard scrolls a coating of  'Artie Choked' Textures.

  Always closeup4

You can see in this photo, the pretty textures the green texture paste gives to the Dusty Attic chipboard Scrolls (also a new set of scrolls recently released by Dusty Attic!).  I also tucked a few clocks that I cut out from the Vintage Autumn Basics XVI paper around the photo area along with some Dusty Attic green blossoms (called Grassy Knoll).  And as a finishing touch I added a butterfly that I cut out of the Die Cut sheet from the Walking In the Forest collection as an embellishment on the photo.


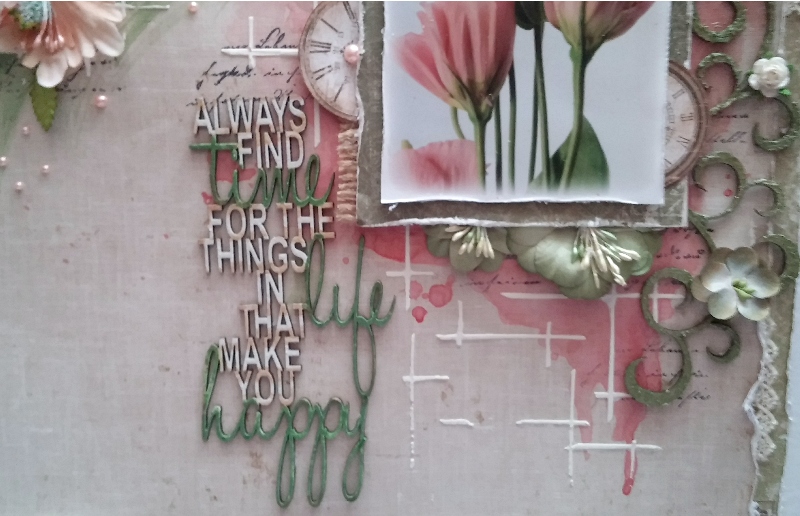
I'm super excited about the new stencils Dusty Attic has been coming out with lately.....just a couple of weeks ago I got a few of them in the mail....I used the Cross Hatch stencil behind the photo area with  some home made texture paste to add a little interest there.

  Always closeup5

I added a bit of texture using a new Dusty Attic stencil called 'Cross Hatch' with some home-made texture paste. I also added a new chipboard title from Dusty Attic, using the Shimmerz 'Greener Pastures' paint to color the scripted words in the title.

I hope you enjoyed today's post and that it brought you a little hint of Spring on this cold winter day! It's fun to be scrapping again after a little break over the holidays....I've got another page coming up in a few days!  Thanks so much for stopping by today! xo


Wednesday, December 16, 2015

Breathe {Maja Design and Dusty Attic}


Hi everyone!  I'm happy to share with you today a layout I made using the cheerful sunny, Maja Design "Walking in the Forest" collection, as well as some clock images cut from the Vintage Autumn Basics paper collection.
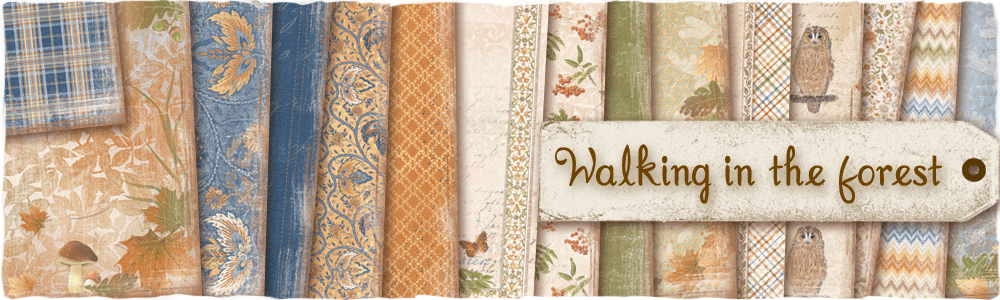
  Walking-in-the-forest-P

I used the following papers:  Walking in the Forest (Autumn Poem, Flannel Shirt-bs, Cozy Scarf-bs), Vintage Autumn Basics (XVI)....love this paper for it's lovely clock accents!

  Breath_GabriellePollacco_Maja_close1

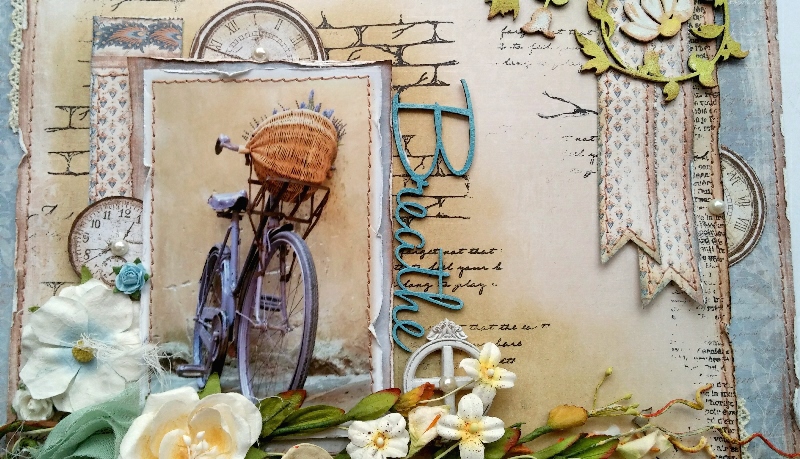
I used the Autumn Poem paper as my background matting paper and then cut the backside of the 'Flannel Shirt' paper to leave about an inch around the outside of the paper.  I inked the background with some Tim Holtz 'Antique Linen' Distress ink around the photo area using a sponge applicator.  I then did a little stamping with a couple of stamps I designed for The Scrapbook Diaries (brick stamp from my textures set and some script from my Labels stamp set).

  Breath_GabriellePollacco_Maja_close2

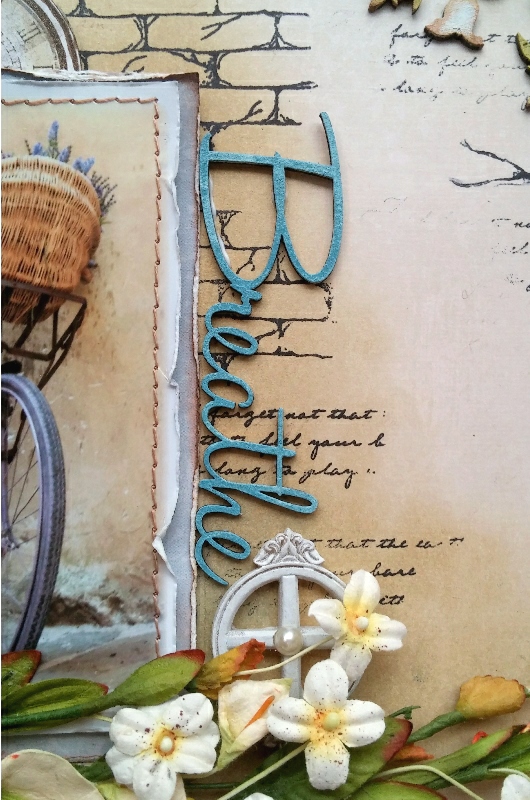
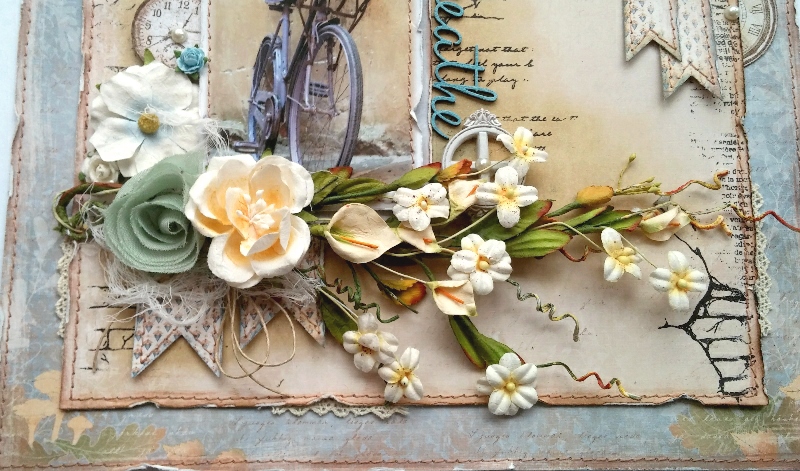
The title is from a Dusty Attic word pack #10.  I gave all my chipboard a coat of white Gesso (I like to do this so that when I ink them, the colors show up brighter).  I then inked the chipboard with a Denim Distress Ink.
  Breath_GabriellePollacco_Maja_close3

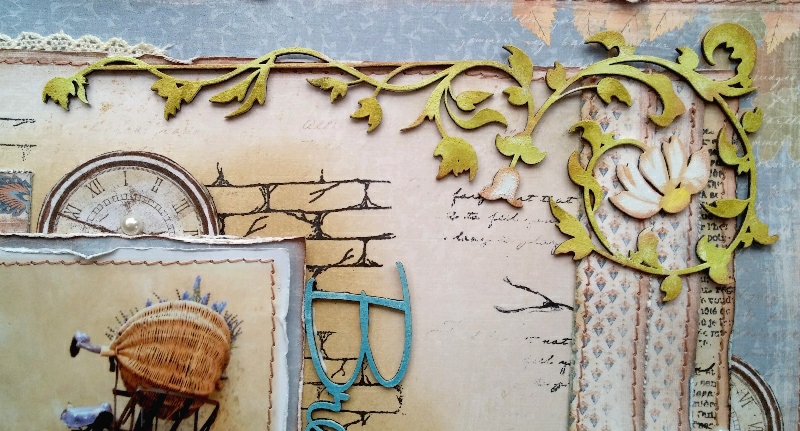
I used the Dusty Attic 'Leafy Scroll' chipboard design for my corner accent.  Again I painted it white with Gesso and then just randomly inked the leaves with Ingvild Bolme 'Rock Moss' chalk ink and edging with some Ingvild Bolme 'Branch Bark' chalk ink.

  Breath_GabriellePollacco_Maja_close4

I cut banner strips from the backside of the Cozy Scarf paper and layered a few under the corner vine as well as under the photo area. Do you ever have a page where you thoroughly enjoy working on it?This is one of those layouts for me....the colors make me happy and every piece just seemed to work.

You can find Maja Design Papers and Dusty Attic Chipboard and my Stamp Designs at The Scrapbook Diaries.  (For those of you in Australia/New Zealand you can find my stamps at Embellish It!) ....And some good news for those of you in the UK!  There is a shop called The Mad Scrapper owned by Janine O'Roarke who is arranging to carry my stamps in her store, I will let you all know when she has them in stock! :)

Thanks so much for stopping by my blog today, I so enjoy reading your sweet comments and feedback! xo

LinkWithin

Related Posts with Thumbnails