Friday, February 14, 2014

Mixed Media Style Page (Websters Pages ~ Sprinkled with Love}

 
I have this fun photo of my two little great nieces Jade and Keira, I think they are both so adorable!  I thought I would do a mixed media style page for this one.  I was inspired by the designs and colors in the Websters Pages collection called 'Sprinkled with love'.  It's actually a pretty quick style of page to create.  I just did a bunch of spritzing and painting/coloring on a blank piece of white cardstock. (I used a Reeves watercolor crayon for the pink color by just rubbing some of the crayon on my pallete and adding water,then just splashing it onto the page....I also used a Lindy's mist in 'Cape Cod Coral' for the peachy tones)

 
Once I finished adding my color splashes to the page I did a whole bunch of random stamping (I used a few Websters Pages stamps: 'Dream Big' (butterflies), 'The Little Things' stamp set, as well as some Bo Bunny and Prima stamps (script, film strip and stitches).  I also used some Websters Pages washi tape to create some random patterns on the misted areas.  Then I layered some papers from the Websters Pages 'Sprinkled with Love' collection under the photo, tucking in a few embellishments (heart paper clips are also from Websters Pages) here and there.  The cute chipboard frame is a new design from Dusty Attic Designs "String of Hearts Frame Set".  I painted this one white, then tinted the hearts with the same mediums I used to color the background design.  Then I gave the hearts a coat of glitter (Stardust Stickles) and a coat of Gloss medium.

 
I finished the design with a title using my favourite Websters Pages alpha stickers (I can't get enough of these!) and a cameo and metal frame accent from Websters pages as well.
 
Thanks for stoppy by today and having a peek at my blog!  I hope you all have a wonderful scrappy weekend! xo
Wednesday, February 12, 2014

"Play" {Dusty Attic and Maja Design}


Hi everyone! It's me Gabrielle here with you today to share my latest project using some fun new chippies from Dusty Attic and some Vintage Spring Basics collection mixed in with a little bit of Vintage Summer and Autumn Basics from Maja Design. I began by first using a Martha Stewart edge/corner punch on the edges of a neutral paper from the Vintage Summer Basics collection (1899). I then did a little inking with some Donna Salazar Distress Ink (Denim) and used a Heidi Swapp stencil and homemade texture paste over the inked areas.


The photo is one of my great nieces that my nephew's wife Danielle was kind enough to share with me. I wanted to keep the design light and airy and playful like the photo of Jade and at the same time play up the blues in the photo.


To make the floral design I used some super cute Dusty Attic chipboard (Spider Crysanthemum and Flower Buds), painted white and tinted with some blue and green chalk inks (Versa Magic Inks). I punched tiny blooms using a floral punch (Martha Stewart Hydrangea punch) on some cardstock and the left over strips of paper from the background (tinted blue at the edges, ). The butterfly is from Tattered Angels, Nature Glimmer Glass (I'm trying to use up bits of old stash with each layout I create).


I just love the little strips at the bottoms of the paper collections (not even sure what it says, LOL) but I love the pretty design element they add to a page!   I just adore the new cute l'il heart arrows, they make fun accents for a page.  For the one I used above, I simply painted it with white gesso, inked it with some blue Distress ink (Denim) and brown chalk ink.  I finished the design by adding some Dusty Attic Gloss Medium to the heart to give it a glassy look.


For some reason I really love the way burlap looks with the blues in this collection. In keeping with the neutral accents, I chose a Prima flower in a natural fabric and added some smaller blooms in blue from Petaloo (Darjeeling collection...Love these blooms, I think they are a perfect match for the blues in the Maja collections). And I also used some more clock cut-outs from the Vintage Autumn Basics (I just love this paper for embellishing my layouts, the clocks seem to add a nice touch to any layout whether masculine or feminine).
Dusty Attic Products used for this project:
~ Spider Crysanthemum
~ Flower Buds
~ Heart Arrows #2
~ Hinges
~ Dusty In Color Gloss Varnish
~ Dusty In Bloom (Latte)

Maja Design products used for this project:
Patterned Paper: Vintage Spring Basics (4th of April, 4rth of April-bs, 5th of April), Vintage Summer Basics (1899), Vintage Autumn Basics (XVI)

Again, if you are looking for Dusty Attic or Maja Design Products, I have a listing in my side panel of my blog with links to online stores.  I can tell you that some great sources for these products are The Scrapbook Diaries (USA), Moments of Tranquility (USA), Vicky Alberto's Etsy Shop (Canada).  Thanks so much for stopping by today and checkin' out my blog, your kind comments and feedback just make my day! xo

Friday, February 7, 2014

Mixing Collections with Bo Bunny!


Todays assignment for the Bo Bunny team was to create a layout mixing and matching 2 or more collections.  I found this photo of my youngest daughter and me on a walk from a few years ago.  I wanted to scrap it in soft neutral colors so I chose the tan and pale aqua colors from the Woodland Winter The Avenues collections.  For the background, I did a little inking with some soft aqua chalk ink by Versa Mark ( Sea Breeze from the Spring collection).  Then I used a Prima flourish stencil with some home made texture paste (my home-made texture paste recipe is found in the right column of my blog under tutorials).
 
 
I chose the blooms from the "Natural Earth" collection of Bo Bunny blooms to keep to the nature theme of the page.  I also used some of the fun die cuts from the Woodland Winter collection (Noteworthy) to stay in keeping with the theme of my page.  I always love using the die cut pieces from the Noteworthy packages.....for those of you who don't like fussy cutting, these are the best!  Isn't that deer and owl cute?
 
 
Because my photo is from a few years ago, I wanted to incorporate the clocks from The Avenues collection to show the passing of time and also to reinforce how much time spent with family means to me.
 
 
I used a fun new chipboard piece from Dusty Attic to frame my photo called String of Hearts Frame Set.  This design comes in a set of 3 sizes....I just love them!  I simply painted the frame white with Gesso and then used some chalk ink to tint the hearts.  Then I went over the hearts with some glitter glues (Stickles: Gold and Waterfall).
 
Bo Bunny Supplies:
Patterned Paper: Journal/Woodland Winter; Antique, Clocks, Home, Stripe/The Avenues
Dimensional Stickers: Woodland Winter
Combo Stickers: The Avenues
Brads: The Avenues
Noteworthy: Woodland Winter
Blossoms: Natural Earth Bouquet, Natural Earth Dahlia, Natural Earth Zinnia
Kraft Wood Clocks/hands
 
Thanks everyone for stopping by today and having a peek at my newest project.  If you are looking for Dusty Attic chipboard, I have a listing of companies that carry Dusty Attic in the right side panel of my blog.  Have a great weekend! xo xo
 

Tuesday, February 4, 2014

Some Exciting News about My Video Tutorials!! {Scrapbook Diaries}

 
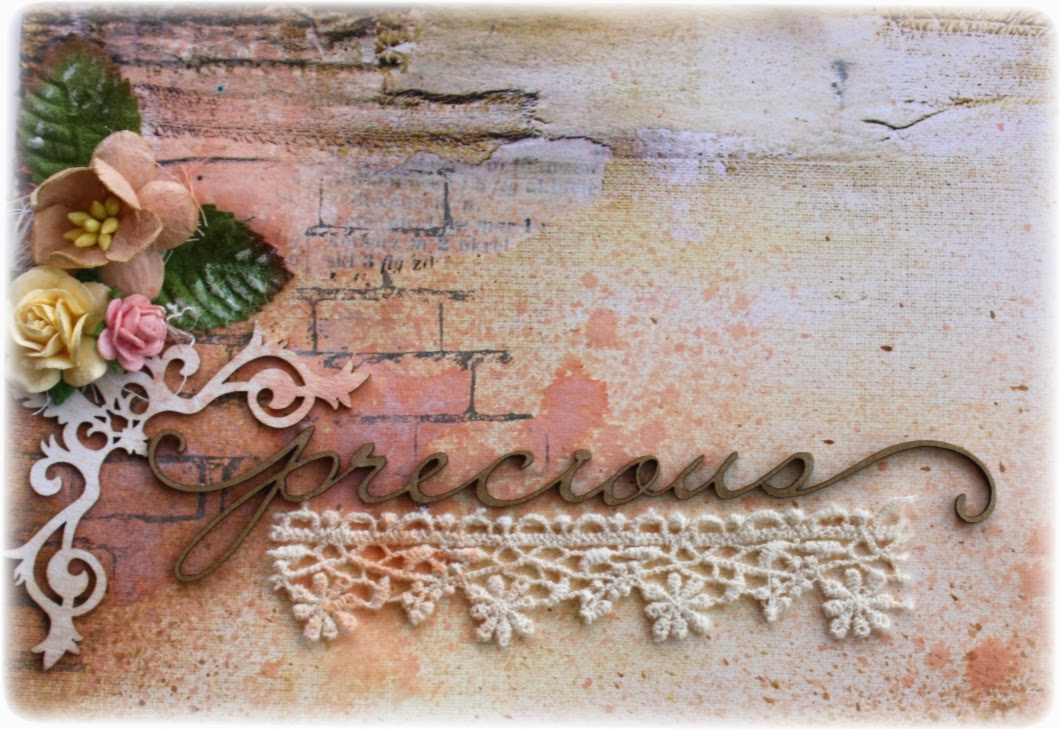
First off I'm so excited to share with you all my latest layout and video tutorial created for The Scrapbook Diaries (BUT I ALSO HAVE SOME HAPPY NEWS TO SHARE WITH YOU ALL REGARDING MY PAST VIDEO TUTORIALS FOR THE SCRAPBOOK DIARIES)!  This layout was fun to make and full of really fun items to use on a page!....pretty resins, mists, my favorite brick stamp, loads of Prima blooms and more!  I also LOVE the Lindy's Mists in this one!  If you are a little timid in trying out mists on your pages, you will totally love these mists, the are soft and subtle, easy colors to work with!   And while I will admit my last video was a little more challenging, this one  is a layout that I believe can be recreated by crafters of all skill levels.  As always, The Scrapbook Diaries has created a kit that is packed with all the items you will need to create this page plus a bonus page, as well as giving you full, unlimited access to the video tutorial showing how to create this page (with purchase of the kit).

 
Here is a close-up of some of the gorgeous Prima blooms included in this lovely kit, as well as the unique and beautiful chipboard, resin frame, lace, stamps etc. included in the kit.  As always the kit also includes the amazing mixed media products (mists/sprays) I used for this page as well!  (Here are a few more close-ups)...


Janene, the owner of The Scrapbook Diaries tells me that my kits have been selling out fast, so if you missed out on the last few kits, you might want to hop onto this one quickly!  You can find the kit and video information HERE.  The kit is offered as a Basic Kit or as a Complete kit (this allows you to have some flexibility in your purchase price.....sometimes you may have the extra mixed media items in your stash and just want the basic kit to complete the page design).

I've also got some other exciting news for you all!  The 4 other kits (shown below) that I created for The Scrapbook Diaries have completely sold out, but after talking to Janene, we felt that it's a shame to leave the videos created for the kits to sit idle as they have a lot of technique in them that we feel can be enjoyed by more of an audience.  So Janene has set it up that the video tutorials are now available for a small fee for unlimited viewing to anyone that purchases them for online viewing.  (We decided to put them up for a small fee to be fair to the customers that paid for the full kit and video).  Here are the VIDEO TUTORIALS that are now available.....

 
Video Tutorial Link for 'Love' can be found~~~~ HERE


Video Tutorial Link for 'Happiness' can be found ~~~~ HERE


Video Tutorial for 'Love Beyond Measure' can be found ~~~~ HERE


Video Tutorial for 'Memories' can be found ~~~~ HERE
 
As you can imagine I put a lot of work into these layouts and video tutorials, so I am so pleased that more of you will now be able to access these videos.  The one time small fee will give you unlimited access to the the videos, once your purchase has gone through, you will recieve a code that will give you access to the video.
 
Thanks so much for stopping in today, and to all those lovely ladies who are so sweet to frequent my blog and leave all the lovely comments and feedback, I just want to say a big thank-you, your kindness is so appreciated!
 

Saturday, February 1, 2014

Maja Design's February Mood Board Challenge!

 
It's that time again! I know I mentioned that the new Maja Moodboard is posted the first Tuesday of every month but I have to correct that, since the beginning of the new year it is now the firs SATURDAY of the month.  That being said here is the gorgeous Moodboard for February!...
 
 
 I love that the moodboard for February is not your typical  pink/red/white color combination (although I do love to scrap pink)...this mood board has such lovely shades of violet/purple/plums with some beautiful neutrals.  The moodboard is based on colors in the 'Ska vi ta en Fika?' collection.


I used mostly papers from the above collectin but added a little bit in from the Vintage Spring Basics collection as well (striped background for the card) and a little bit of Vintage Autumn Basics (clocks).

 
The roses I used on this card are from an old package of Prima flowers I had in my stash, mixed with small white roses from Dusty Attic Designs.  The vine flourish design was cut from Maja papers using the Cheery Lynn Fanciful Flourish die cut.

 
I created a shabby-chic frame design for my card title with a Dusty Attic Design frame and some white pearl 3D paint (I used Scribbles brand found in the T-shirt section of Michaels Craft Shop).
 
 
Here is an even closer view of the frame.  I usually like to machine stitch on my cards but I ran out of the heavy duty upholstery thread I ususally use for stitching on my cards and layouts, so I had to cheat and draw on the stitch design with a brown pen.
 
Maja Design papers used on this project:
~ Ska vi ta en Fika (Favoriter, Blommor på bordet, Våffla m björnbärssylt-bs, Söders höjder - bs)
~ Vintage Spring Basics (8th of April-bs)
~ Vintage Autumn Basics (XVI) - clocks
~ Life in the Country (Sowing Seeds-bs)
 
I hope you get a chance to play along with this months moodboard challenge at Maja Design,there is a beautiful Maja Design collection (of your choice) up for grabs as the prize each month!  You can find the challenge information HERE.  You can also see more inspiration from our talented design team there, to get your creativity going! Thanks so much for stopping by today and for all the lovely comments, you guys are the best! xo xo


Wednesday, January 29, 2014

A Special Anniversary Card {Maja Design & Cheery Lynn Designs}

 
So today is my day to share a Maja Design project with everyone and it is also my last day as guest designer over at Cheery Lynn Designs (dies)...so I thought I would combine these products and make a special card.  My Mom and Dad's 55th anniversary is coming up in a few weeks so I thought I'd make up a special card for them.  Ever since I was a little girl, my parents always treasured the cards the most from us kids, especially if they were handmade.
 
 
I thought I would use the colors from the Maja Design Mood board this month (this mood board challenge is already finished but I wanted to be sure to do a project because I so loved the board this month....the next mood board challenge will be posted on the first Tuesday of the month - February 4rth ).
 

I used a bunch of pretty papers from Maja Design Vintage Frost Basics collection with some of my favorite CL dies to make this card.  For this card I went with the lovely burgundy/cream/pink papers in this beautiful new collection.


Can you tell I'm fascinated with the lattice die?  I can't seem to get enough of that one!  For this layout I mounted it behind a circle I cutout using 2 cups to trace out my circles.  For the flourishy leaf design I just had to use my favourite flourish die (I'll tell you a secret....I thought I had lost this die and was so upset, it's seriously my all-time favourite leaf/flourish die, I was ready to order myself another!....then I found it about a week ago, it was in the case for my Revolution machine (I finally remembered I put it there because I pretty much always use that die when I pull out my machine :)

I also used a couple of the lace border and lace doily designs to accent the circle design as well as the edge of the corrugated cardstock I used.  And I just love to use those lace corner designs to finish off my cards.

 
For the flowers I used the beautiful Gardenia strip die.  I just love the pretty rosy design this die gives.  The petals were cut from white cardstock and I just used some Victorian Velvet distress ink by Tim Holtz....I just randomly tinted parts of the petals using a soft make-up sponge, leaving some parts white.  I wanted a small 3rd flower for this floral cluster so I used a few of the smallest Sweet Williams die cuts to make a little rose.
 
Cheery Lynn Products used for this project:
 
Maja Design Products used for this project:
 
 
Thanks so much for stopping by my blog today!  You can find the Cheery Lynn products at many of your local scrap stores or check the links I provided in the list above.  Maja design products are becoming more and more available to the North American market, some online retailers are The Scrapbook Diaries and Moments of Tranquility.  You can also find stores in your area if you check the storefinder at the Maja Design website, I know they have been busy updating their list since the CHA. :)


Saturday, January 25, 2014

Vintage Style Fabric/Paper Journal Cover {Featuring Bo Bunny Blooms and Tresors de Luxe Lace}


I've been wanting to create a soft vintage style journal cover for ages now!  To create my book design above I chose blooms in the pink and natural colors from the gorgeous Bo Bunny blooms and combined them with gorgeous lace from Tressors de Luxe.  I thought the subtle colors would work well for this style book.  I wanted to have the cover have a nice fabric feel to it so I also incorporated the new pleated canvas strips as well from the  Bo Bunny Kraft collections.  Here is a view of the book opened so you can see front and back.

 
I kept the back very simple with just a little stitching, because the back of it needs to sit flat.  Here are a few close-ups of the cover.  


For the creamy, earth tone, large bloom I used a touch of pink paint to give the flower a two-toned look.  After gluing down the blooms, I brushed all the blooms lightly with white to give them a more aged look.
 
 
I used Bo Bunny Vintage dot (Decaf) paper to make my heart design.  I added some machine stitching to give the paper a fabric look.


I added some pearl strands, ribbons and lace to the spine to finish the book design.
 
Bo Bunny Supplies:
Blossoms: Natural Earth Bouquet, Blush Bouquet, Natural Earth Dahlia, Natural Earth Daisy, Natural Earth Zinnia
Essentials: Kraft Canvas Pleated Lace
Double Dot Cardstock: Decaf in Vintage Dot
 
I hope you enjoyed my project today!  This project is a lot of fun to make, you don't have to be exacting in your design, just be free and easy, gluing and stitching down pretty things!  You can find the gorgeous lace trims I used on this page at Lucy's amazing etsy shop 'Tresors de Luxe' and you can check your local scrapbook stores for beautiful Bo Bunny Blooms (BTW, Bo Bunny is featuring projects all week long using their gorgeous blooms at their blog, so don't miss out having a peek at all the lovely projects!!) xo

Wednesday, January 22, 2014

Saying Thanks in a Whimsical Way {Cheery Lynn Designs Guest}

 
If you've been following my blog this month, you are probably aware that I am the guest designer over at Cheery Lynn Designs (die cuts) this month and am on my 3rd week to share projects made with their gorgeous dies.  I don't know about you but I find I am always in need of thank-you cards, I like to take the time to send a card to show my appreciation to someone.
 
 
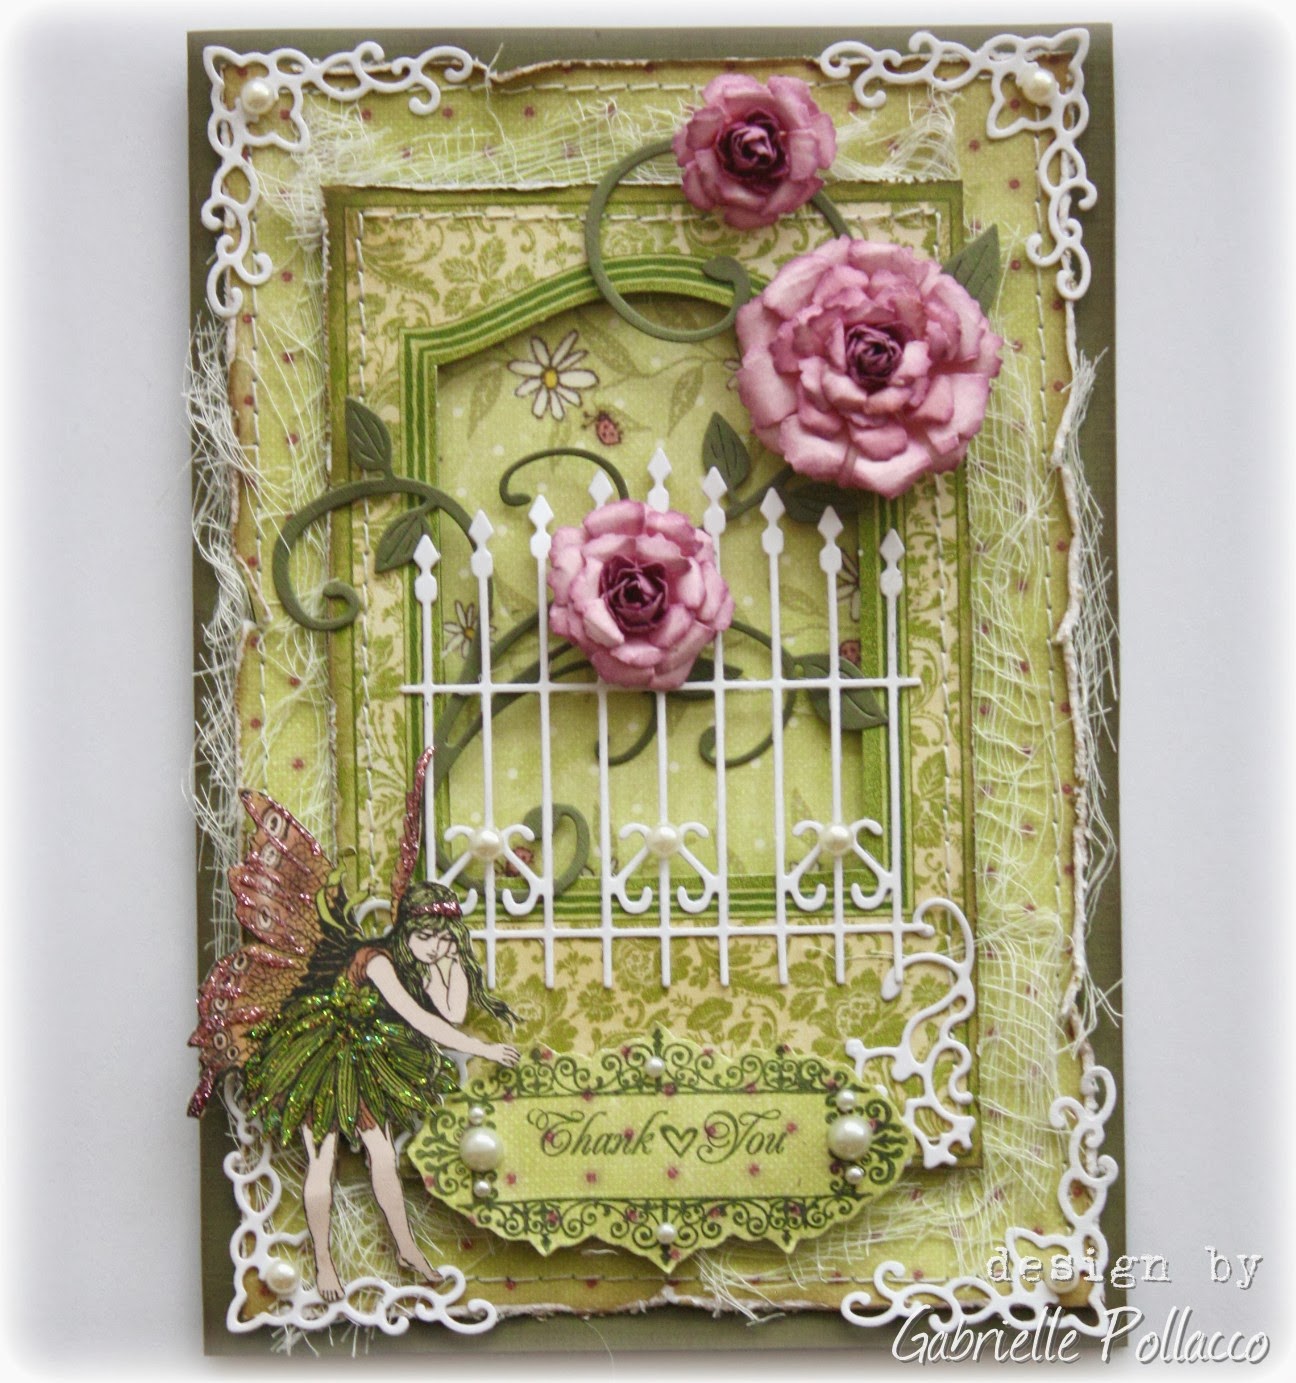
 I was in a whimsical mood this week and wanted to get some extra use out of that cute lattice piece I got in my last CL order so I thought I'd use it like a window design on a fantasy style card featuring fairies and flowers.
 
 
For my flowers I just layered a couple of the Sweet Williams floral dies, inked the edges with a little chalk ink and glued some flower stamens to the centers.  I wanted to continue the light filligree look so I used the leaves from the Flourish Leaf strip in white and the Lace Corner Deco in white.  I used papers from Graphic 45 (The papers are some left-overs that I still had in my stash from one of my favorite local scrapstores 'Forever Scrapbooking' in Burlington Ontario....the store is no longer there but the beautiful and sweet ladies that ran the store have a new venture called 'A Scrapbook Story', where they share their ideas through themed kits, you can find them HERE), Prima and Bo Bunny.  I gave the whole thing a more tattered look by tucking in bits of muslin (cheese-cloth) here and there.
 
Cheery Lynn Products used for this project:
 
 
The funny thing is, once I get started playing with my pretty Cheery Lynn dies, I more often than not find that I can't just stop at one card!  I get a few ideas going at once and therefore ended up with an extra card this week! :)
 
 
For this card I wanted to play up the delicate gate die!  I just love the super fine design on the Ornamental gate and I thought it again played well with the Graphic 45 window design in their patterned paper. 
 
 
I used adhesive foam dots to create pocket design behing the gate, I find the shadow this creates gives a nice 3D look to the card.  I also used another one of the Lace Corner designs I used in the top card for this one.
 
 
I used one of my all time favorite CL dies, the Fanciful Flourish as a 'stem' for my floral arrangement and again used the Sweet Williams Strip for my handmade flowers but in this case I curled the petals to create more of a rose look tothe blooms.
 
Cheery Lynn products used for this project:
 
I hope you enjoyed my projects today and hope that I've inspired you to get out your Cheery Lynn dies to play today!  I look forward to sharing another project with you all next week!  P.S.....I was asked by a number of you where to find Cheery Lynn dies in my last couple of posts....You can order them directly from Cheery Lynn Designs, I've linked the dies I used to their shop (above) for your convenience.  xo

LinkWithin

Related Posts with Thumbnails