Wednesday, January 15, 2014

Little Wishes {Cheery Lynn & Maja Designs}

 
Today I thought I would share a layout I made using two of my favourite design products: Cheery Lynn Dies and Maja Design papers!   I had a lot of fun using the Clock w/Angel Wings die last week in a steampunk design.  But I thought it would be cool to show how versatile this die is for other designs as well.  In my l/o above I changed up the look of the clock a little by adding some flower accents to the middle of the clock design, playing up a more feminine design for the page.
 
I wanted to go with soft butter yellows and spring greens for this page so I went with a few different papers from Maja Design.  I actually combined 5 different collections for this one (they all work so well together! :)
 
Maja Design Papers used in this project:
~ Vintage Spring Basics (1st of March-bs, 6th of May)
~ Life in the Country (Kitchen Garden-bs)
~ Ska vi ta en Fika? (Smulpaj m äpplen-bs)
~ Vintage Autumn Basics (XVI-clocks, XVII-flowers)
~ Vintage Summer Basics (1932)
 
 
I used the Sweet Williams die to make the the cream color flowers in the center of the clock.  I created a flower bud for the center using a couple of the smallest cuts from this flower die and then layered a few of the next sizes up (giving them a little water misting and a wrinkle) for the other layers.
 
I made a heart embellishment for the page using the Celtic heart die on white cardstock and then with a pencil marked out the heart design on some patterned paper from Maja Design to create an underlayer for the heart.

 
I often like to create a counter balance on my page design, for this page I put a lattice design in the top left corner.  I used the Lattice 2 die and gave it a random angle cut to appear like broken lattice.  I then finished the design with more of the Sweet Williams blooms and using portions of the Ivy Corner Flourish dies.
 
 
TIP:  I wanted to attach my lattice so that it stands away from the page a bit, but felt that adhesive foam dots can be a little tricky to apply to finer cuts and might be a little to thick.  So I used some 3D paint like Perfect Pearls to the back of the die cut piece.  When dry, I added some adhesive to the dried perfect pearls and stuck it to my page.  This gave my lattice just enough 3D effect that I was going for.
 
 
Cheery Lynn Dies used for this project:
 
I hope you enjoyed my project for today!  A few of you have asked about where to purchase some of the products I've used on my projects.  I've provided links to all the dies I used from Cheery Lynn Designs, just click on the name of the die (above) and it will take you to their website.  Maja Design also has a storefinder at their website so that people can find retailers in their area.  Good news is that Maja Design had a booth at the Winter CHA this year so hopefully we will be seeing more and more retailers carrying their gorgeous products in the North American market!  In the meantime I can suggest you try out The Scrapbook Diaries as a great source for Maja Design papers, Janene has a nice selection of their papers! xo
 
NOTE:  A little Update!  I just got news from Natasha Naranjo Aguirre, her online store 'Moments of Tranquility' has a full selection of Vintage Autumn and Vintage Summer Basics by Maja Design in her store! Here is a link Moments Of Tranquility.
 

Friday, January 10, 2014

Enjoy {New Dusty Attic Chipboard!}

 
I don't know if I meantioned this yet, but Dusty Attic recently announced the new 2014 Design Team and I'm thrilled to have been asked to stay on another year (I just love me my DA chippies!).   So here is my first project for the year using their gorgeous new chippies!   I've always been a fan of the natural elements that Dusty Attic has designed (grasses, wild flowers, branches etc.) and I was so delighted to see the new Reeds #2 (here in Canada we call them Bullrushes). I love the way they kind of 'hug' the photo.
 
 
For my Reeds chippies I painted them with a coat of Gesso first (I find this helps the paint and ink colors show up better).  I then gave the rushes a light coat of Dusty In Color paint (Pesto) and used a brown ink pad to tint the top of the stalks the dark brown.  I had a brown ink pen that I used to add a few brownish details to the grasses.  Here are a couple more detail shots of the page....
 
 
I used Tim Holtz tissue tape and some Prima, Bo Bunny and Tim Holtz stamps to add a little design in the right side of my page to counter balance the central design.  And then smudged on some Donna Salazar Distress Inks over the design.

 
This is a close-up of the beach elements I used on this page. 
Dusty Attic Supplies used in this project:
~  Reeds #2
~ Dusty In Color "Pesto"
~ Dusty Attic Mini Roses 'Caramel'
 
I hope you enjoyed my project today, I look forward to sharing many more fun idea's using Dusty Attic's gorgeous chippies over the course of the year! xo
 

Wednesday, January 8, 2014

VIDEO TUTORIAL: Steampunk Journal Cover {Cheery Lynn Designs}

 
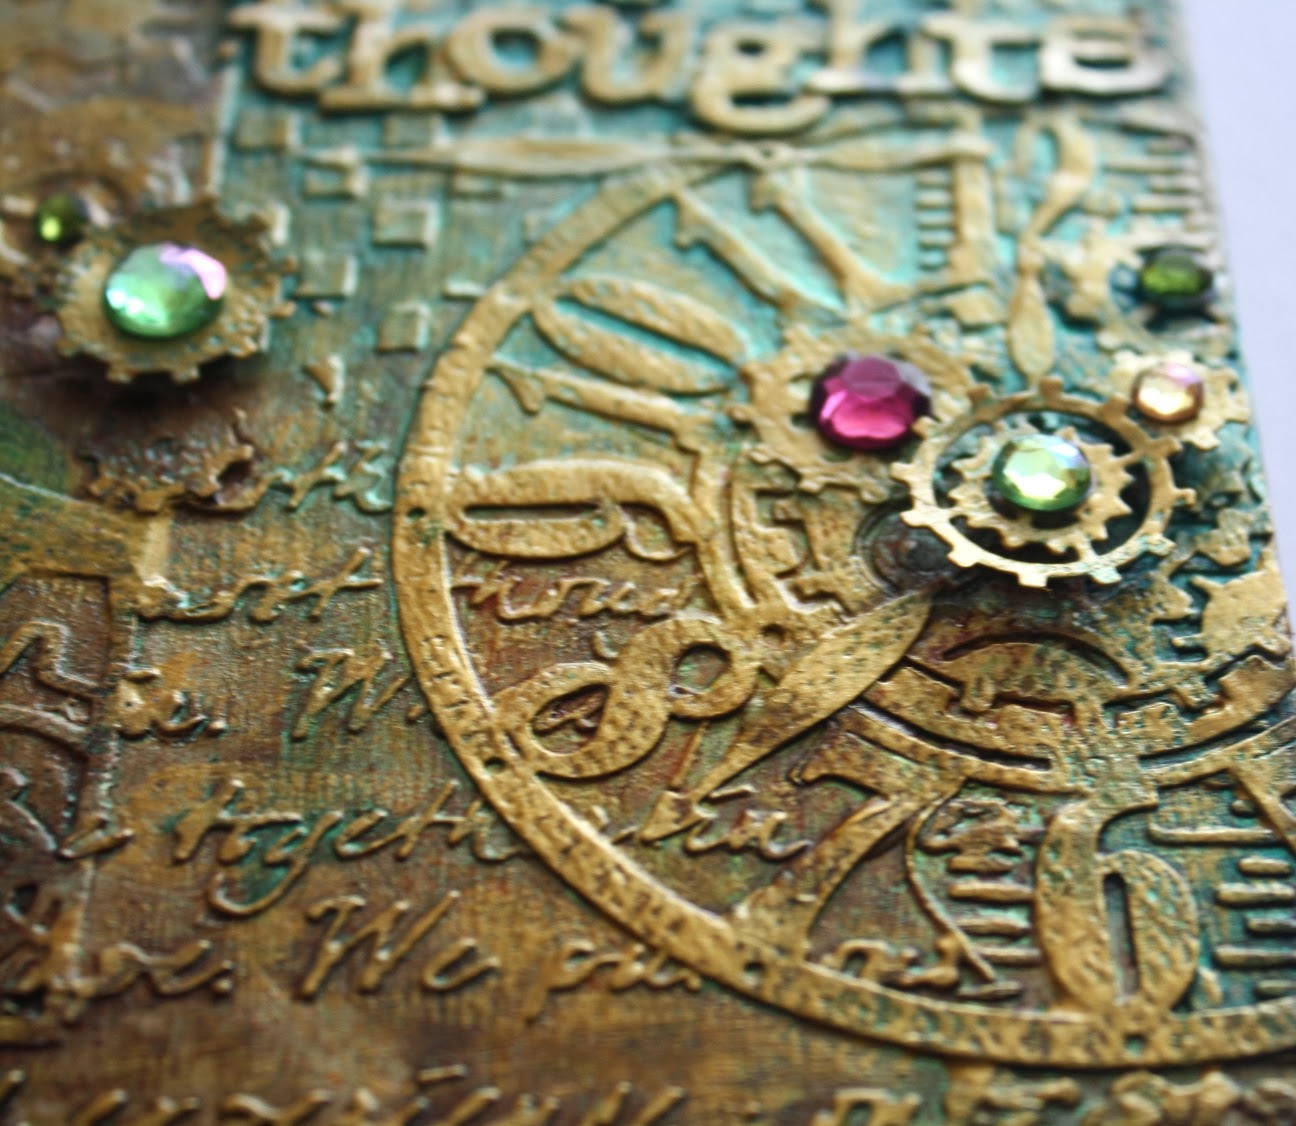
Hi everyone!  I was recently asked back by Cheery Lynn Designs to do another month of guest work for them, so here is my first project this month using their gorgeous dies!   I've been admiring the beautiful new steampunk designs Cheery Lynn came out with recently so I'd been itching to try a mixed media style journal cover using a few of the new die cuts.   I was thinking to make a 'diary' style journal, something that would be handled more as opposed to an 'art journal', so I wanted to get a nice embossed look to the cover and not go too 3D with the embellishing.  So using the Cheery Lynn steampunk die cuts seemed like the perfect solution to getting that subtle embossed design for my cover.
 
I thought I would record my process as I created the cover so that you all could watch the process, I always think a visual is sometimes a lot easier to follow than writing down the instructions, right?  So grab yourself a cup of coffee (or tea) and take out a few minutes to watch the process :) 


I hope you enjoyed my video tutorial!  Here are a few close-up photos of the cover design as well as a photo of the back of the cover....


Cheery Lynn Design Products used for this project:
*mists and other products used for this project can be found listed in the descriptions at my youtube channel.
 
I hope you enjoyed my project as much as I enjoyed making it!  I'm looking forward to sharing more fun Cheery Lynn Design projects with you in the upcoming weeks! xo
 

Wednesday, January 1, 2014

A Quick Card {With Maja Design}

 
Hi everyone!  We just got back from a little mini-vacay visiting my brother and his family at his lake house, so nice to spend a week just relaxing and having fun with family!  But I realized I have a post I needed to get done for Maja, speedy-fast!  So I thought, what better time of year to show that not all projects done with Maja goodies need to be overly detailed or time consuming.  This card came together quick and easy.

I used a scrap of pink paper I had left over from another project from the Sofiero collection as my background, lightly inked and distressed the edges and tore a little 'V" having some of the rose paper peeking out from behind (I simply used a cut off strip from the title part of the paper for this).  I then cut out 2 little 'postcard' designs from one fo the Vintage Spring Basics papers and added a clock from a Vintage Autumn Basics paper as an embellishment.  Here are the papers I used for this card....


I used these Maja Design products:  Sofiero-Enjoying the Fragrance-bs, Vintage Autumn Basics-XVI, Vintage Summer Basics-Memories.

TIP:  I like to save the little strips you cut off from the bottoms of the pages to use on cards, they have great little phrases and designs!

So, how long did this card take me?  15 minutes!!  Yep, even during the holidays you can get a little scrapping on if you can just cut out a tiny bit of time for yourself!  Thanks for stopping by today and I just want to say I've so enjoyed being on the Maja Design team for this past year and look forward to sharing lots of new and fun ideas with you all over the next year! xo xo

Wednesday, December 18, 2013

Memories {Maja Design & Scrapbook Diaries Kit/Video Tutorial}

 
Hi everyone!  I've got another layout today that I made using Maja Design papers for The Scrapbook Diaries.  I did another paper gather technique for this one and as always you can have unlimited viewing of the video tutorial with the purchase of this lovely kit from Scrapbook Diaries.

 
I did some fussy cutting from one of my favorite papers from Maja Design 'Vintage Autumn Basics', the floral paper labelled 'No. II', I also cut out a number of the clocks from the paper labelled 'XVI'.  I did an underlayer of gathered paper using the 'Heritage' paper from the same collection.  And finished the design using some of the lovely new 'Mini Hinges' from Dusty Attic.

 
Here is a close up look at some of the fussy cutting and the gathered paper design that I have peeking out of a tear in the paper. 

 
A close-up view of some of the embellishments included in this page kit.  In video I show how I used the Tattered Angels Mist and package of Bo Bunny stamps (included in the kit) to create the background desing on this page.
 
 
I created a quick template that you can save to your computer, for cutting out the heart design I used on this page.  Just right click on the photo above and 'save picture as' to your computer.  When you go to print, print on a standard 8.5 x 11 inch paper.
 
NOTE:  This is a slightly more advanced page design but I feel with the video tutorial you won't have a problem creating the design....but if you would like to keep it more simple you can put the patterned paper in as a single flat layer as well and still have a lovely page design.
 
If you would like to try creating this page and purchase the materials I used to create this layout you can check out The Scrapbook Diaries,  Janene's kits are always an amazing value and have so many wonderful and unique papers, embellishments and mixed media items.  You also get unlimited access to the video tutorial I created to go with this page design.  You can find out more info and  purchase this kit from The Scrapbook Diaries HERE.
 
Hope you enjoyed my project today and feel inspired to get your scrap on! xo
 

Saturday, December 14, 2013

Happy Memories {Dusty Attic and Websters Pages}

 
I found this old photo of our dear Mocha (she passed a few years ago), she was a super sweet dog, fiercely protective but did not have a lot of tolerance for children's shinanigans (did I actually use that word? lol!) ....If there were too many kiddies running around like at this summer resort, she would quickly tuck herself under your legs to hide (not the best of things when wearing a skirt!!)  Well, I tried to come up with a good title for this one but my husband finally came up with 'Leg Warmers' which I thought was a good fit :)

 
To make this page I used some papers from Websters Pages 'Postcards from Paris II' and 'A Christmas Story' collection.  I embellished with some new goodies from Dusty Attic designs.  Above you can see the Cyclone Wire fence chippies (I like to cut them up in little bits to use on my pages).
 
 
Another new chipboard design that Dusty Attic just put out is the 'Chevrons' in a variety of sizes.  For mine I first gave them a coat of Gesso, then added a coat of 'Oceania' Dusty in Color Paint and used a white Gel Pen (Signo Unibal) to put some dots on the design.  I finished it by adding a nice thick coat of Dusty Attic Gloss medium.

 
Here is another view of the chippies and floral embellishments.  I first gave the base of the page my own unique background design by starting with a basic soft brocade paper.  I then added some inking on the borders with some Tim Holtz Broken China Distress Ink applied with a make-up sponge.  I used a Crafters Workshop 6x6 Circle Grid Stencil/Mask and black ink applied with sponge in corners and edges fading in as I go...I dabbed a little of the Broken China with the black ink.  I used a make-up sponge to apply the Broken China ink around the area of my photo/embellishments as well.

 
I also used another couple of stencils on this page with texture paste.  The 6x6 Crafters Workshop 'Ledger' stencil and the Tim Holtz "Measured" stencil (under the photo area).  One of my favourite chippies from Dusty Attic has always been the Vintage Hinges, well now I'm so excited because they have come out with the 'Mini Hinges' as well!  I love them!  Although I used them for a layout here, I can totally see me using them in cards, ATC's and OTP's (of the page projects!).  I dabbed on some copper 3D T-shirt paint and some more of the 'Oceania' Dusty in Color paint to get the above effect.
 
 
I hope you enjoyed my project today.  If you are looking for Dusty Attic products you can check out their website HERE, you can find retailers for Dusty Attic in  North America listed in my right side panel of my blog (I believe Janene from The Scrapbook Diaries has the mini hinges in right now :).  And you can find Websters Pages collections HERE.  Thanks so much for stopping by!  xo
 

Saturday, December 7, 2013

Getting Messy with NEW Bo Bunny {Pincushion Collection}


I just love this photo of my DH Steve and our youngest daughter Meagan (taken a few years ago)....she's always been Daddy's girl, always seen skipping along beside him, ....and yes! the little bouquet of rag-weed (Goldenrod) in her hand was picked for her Daddy! lol!  
 
I thought I'd have a little fun with this page and get messy!  I really love the fun Toile designs in this new Bo Bunny collection so I used the one above as the base of my page.  I wanted the design to be a little less busy in the center of the page where I would be adhering my photo and embellishments so first I gave the page as soft wash (dry brushing) with some white Gesso....fading out the gesso as I move out to the edges.
 
 
I then started layering on some colors sprays in coordinating colors and layered on some stamp designs with a variety of stamps (I've listed the Bo Bunny Stamps I've used below).
 
 
I made the rose using one of the floral papers in the Pincushion collection with a flower die cut. And the li'l dried floral cluster is another one of Lucy's cute little embellishments from her Etsy shop called Tresor's de Luxe!   When my page was done, I did a little dry brushing with some aqua paint, dabbing here and there to bring in an extra color value.
 
Bo Bunny Supplies:
Patterned Paper: Toile (both sides), Tailored, Sew Fun/Pincushion
6x6 Paper Pad: Pincushion
Buttons: Pincushion
Trinkets: Serenity
Flowers: Harvest Orange Bouquet
Lace: Natural Earth Lace
Jewel Flourishes: Licorice Jewels
Stamps: Bo Bunny Gabrielle, Enchanted, Powder Mountain, (Vine design stamp is Somewhere In Time from my local dollar store), Tim Holtz 'Heartfelt' Stamps.
Mists: Tattered Angels (Cinnamon)
Mask/Stencil: Heidi Swapp
Floral Die:  Spellbinders 'Spiral Blossom #1'
Dried Floral Cluster:  Tresors de Luxe
 
Thanks so much for stopping by again today, as always I'm so grateful for the kind feedback and comments! xo xo

Wednesday, December 4, 2013

VIDEO TUTORIAL: Scrapping Softly {Monochromatic Page}

 
So I took this sweet li'l photo of my youungest daughter Meagan and her cousin a few years back, I just love the sweet soft look of the picture.  I thought I would make a monochromatic style layout to compliment the photo.  I used a variety of Maja Design papers (listed below) along with some new Dusty Attic chipboard (Lavender) and gorgeous lace trims, bloom and vintage button from Tresors de Luxe.  And I thought it might be nice to do another video step by step to share how this page was put together.  I usually do my videos at a fairly quick speed but this time I thought I'd slow it down a little to hopefully make it a little more comfortable to absorb.  Grab yourself a cup of coffee/or tea and Enjoy!


 Here again are a few close-ups of the page....


Supplies:
Patterned Paper: Maja Design - Vintage Spring Basics (7th of April, 6th of May), Vintage Summer Basics (1904, 1932), Vintage Autumn Basics (XVI), Sofiero (The Elegant Wine House). Note: you can find Maja Design papers online at The Scrapbook Diaries. http://www.thescrapbookdiaries.com/product-category/collections/
Flowers and Lace:  All lace trim, large fabric flower and vintage button are from Tresors de Luxe Estsy shop http://www.etsy.com/shop/TresorsdeLuxe
Ink: Versa Mark 'Spring Pastel Collection' Chalk Ink
Stamps: Bo Bunny (Distress Textures Stamps, Midnight Frost Stamps (script), Prairie Chic stamps), Title stamp:  My Little Yellow Bicycle
Trinkets: Key-K and Company, Envelope-Prima Marketing
Stencil/Mask: Crafters Workshop (I got mine from The Art House Studios online store http://www.thearthousestudio.ca/#home
Chipboard: Dusty Attic (Lavender)
Washi Tape: Tim Holtz
Martha Stewart Leaf Punch
Green Adhesive Gems:  Recollections
You can find my home-made texture paste recipe at my blog http://gabriellepollacco.blogspot.ca/2013/06/a-tranquil-moment-with-new-websters.html
 
I hope you all enjoyed my project and video tutorial, if you have any questions, don't be shy to ask!  Thanks so much for stopping by today! xo

Tuesday, December 3, 2013

Gathered Paper VIDEO TUTORIAL {Card Making ~ Watch the Process}

 
Bo Bunny's new 'Pincushion' collection is now out in the stores and ready to play with!  I love the cute sewing and stitchery designs in this collection.  So I thought it would be fun to do a gathered paper technique that is reminiscent of gathered fabric. 

 
The last few times when I've done a gathered paper technique, I got a whole bunch of messages asking if I would show some of these techniques in a video.  So I thought I would do a Video Tutorial showing all the steps in creating this card from start to finish.

 
I will list all products used in creating the card directly below the video tutorial. (Note: I used 2 die cuts to make this card: Spellbinders Spiral Blossom #1 and Cheery Lynn Designs 'Fanciful Flourish', which I premade/cut before filming the video).  Hope you enjoy! 


Supplies:
Patterned Paper: Polka Dot Pattern, Tailored/Pincushion
Cardstock: Tutu, Clover/Double Dot
6x6 Paper Pad: Pincushion (green plaid)
Buttons: Pincushion
Noteworthy: Pincushion
Stamps: You're Invited, Distress Textures, Powder Mountain (script)
Dies:  Cheery Lynn Designs "Fanciful Flourish", Spellbinders Spiral Blossom #1
Other: Hemp twine, Stamping Ink, Tim Holtz Edge Distress Tool, Fiskars Shell Punch

 
For my second card I thought I would play up the pretty black & whites in this collection (Pincushion) and mix it with one focus color, in this case I used an aqua. 
 
Supplies:
Patterned Paper: Pincushion, Sew Fun/Pincusion
Cardstock: Ocean Double Dot
Stickers: Pincusion Combo Stickers
Flowers: Bouquet/Denim Blue, Zinnia/Denim Blue
 
I hope you enjoyed my 2 projects and that my video tutorial has been helpful!  Thanks so much for sweet comments and kind feedback I've been getting, I appreciate and read them all! xo

LinkWithin

Related Posts with Thumbnails