Tuesday, May 29, 2012

A Fun Little Bo Bunny Card (Plus a Template)!

Today's assignment at the Bo Bunny blog was to create a project using an embossing technique.  Well, let's just say this past week has been crazy hectic and a comedy of errors!  We had a beautiful family wedding over the weekend that caused me to put off this assignment till Sunday.  Sunday comes and I find we've got huge plumbing problems.  Long story short, my heat embossing tool gets ruined with water and now my plans for my embossed project is out the window!  Okay, 'Plan B' .....I think to myself, I saw this link on Pinterest for this cute folded paper dress design.  I'll do up the dress design on a card and use my Score Pal to do some 'dry embossing' on the edges of my card. Easy peasy right? ....Off I go to Pinterest, only to find that the template connected to the pin I had saved had been removed!  **Sigh** .....Well, I'm not ready to give up, finally I decided I would draw up my own template for the dress (it took a little fussing and measuring but I got it done!  I've posted my hand drawn template here for those of you who want to give this folde dress design a try.  (Below) Just right click on the picture of the template and 'Save Picture As' to your computer.  Then print out on the back of a 6x6 piece of patterned paper (I used the 6x6 paper pad from the Bo Bunny "Little Miss" collection for my dress, the back of it is plain white paper so you can print out on the back and cut it out) 
Above is a close-up view of the embossed edges I put on my card using the Score Pal. 
This is a picture of the template I made up for the Folded Paper Dress.  (Right click on the photo and 'Save Picture As' to your computer....set your printer to print on a 6x6 paper....it's better to use one sided patterned paper like you find in the Bo Bunny 6x6 paper pads so that you can better see the design when you print it out on the back of the paper.  Cut out and fold on the markings.).  I gave two different dress-top designs.  The one with the straight bottom edge is the one I used on my card....this one is good if you are using a ribbon in the center of the dress....the other is good if you are doing a corset style top...how cute would this be with a little lace up? huh?)

TIP:  I have one more little tip for you! Okay, I'm all thumbs when it comes to tying bows, especially small ones!  But I found a fun and easy way to tie a perfect bow on Pinterest.....USING A FORK!!  Here is the link TYING A BOW WITH A FORK  .....I used a velvet type ribbon so mine is a little bulky but I think you'd get even better results using a ribbon that is a little finer and has the design on both sides as opposed to the one-sided velvet ribbon I used. 

Thanks again for stopping by and for all the lovely feedback, I just love hearing from you all! xx 

Friday, May 25, 2012

My First Magazine Cover!! Scrap365!!

So I get my copy of the June issue of Scrap365 in the mail a couple of days ago, and I was so excited to see that the layout I contributed made the cover!!  Normally I can't show my layouts for the mag on my blog but I got permission to share the cover image with you all!

If you haven't seen this magazine yet you've got to check it out!!  If you are looking for a magazine that is just PACKED with inspiring projects, this is the one for you.  Personally, for me what makes a good magazine is one that has a LOT of layouts and plenty of tips and tutorials.  This one has it all!  I am not a new scrapper so it takes some pretty new ideas to capture my attention.  So far every issue I've received has really impressed me with great ideas, new ways to use products, beautiful project ideas and staying on top of the newest trends.  In this article I show a step by step on how to make beautiful embellishments for your scrap pages from Polymer Clay.

Here is a link to the Scrap365 Magazine Website, if you'd like to check it out for yourself!  There is also a beautiful sketch available monthly for the readers to try out.

Hope everyone has an awesome weekend! xx 

Wednesday, May 23, 2012

A Showcase of My Work at Bo Bunny Blog!!

I'm honored that Bo Bunny is doing a Designer Showcase on my work today at the Bo Bunny Blogspot!  I thought for my project for this day I would do something with the NEW "Little Miss" collection!  I just love every collection that Bo Bunny puts out but as soon as I got a peek a 'Little Miss' I knew I found a paper collection I would want to use over and over!  I adore the vintage images and the beautiful colors in this collection....and with 2 girls to scrap it's just the perfect collection for me!  Here are a few close-ups of the above layout. 
I have a weakness for birdcage images, so I have to say the "Maree" paper has got to be one of my favourites fromt his collection!  I cut out the bird cage images and attached them with pop dots.  I 'hung' them from a couple of Dusty Attic Mini Branches. 
I made the blooms from some scrap fabric, some crepe paper (I tinted the center with some chalk ink) and some Bo Bunny Jewels) 
Another favourite for me is the Trinkets and the Brads in these collections....Bo Bunny even takes the humble brad to new heights!  Here's a detailed list of the product I used for this page:
Supplies:
Patterned Papers: Little Miss (Jaquoya front & reverse side, Maree, Alice)
6x6 Paper Pad: Little Miss
Brads: Little Miss
Jewels: Little Miss
Chipboard: Little Miss
Combo Stickers: Little Miss
Thanks again for stopping by and for all the sweet comments, I just love your feedback!  (NOTE:  I mentioned in a couple of my posts that I would be sharing pic's of my scraproom at end of month but due to some scheduling changes on my design teams I'm going to have to put it off for another week :)  But if you would like a tiny peek, come have a look at today's Bo Bunny Blogpost :)

Wednesday, May 16, 2012

Ready for another peek at a "Girl Land" Project?

As soon as I got my Websters Pages "Girl Land" goodies in the mail, I just had to dive in head first, the prolbem was deciding which style to go with first!  The first page I made is the one you saw on Monday on the bloghop (can't resist me some pink!! lol!)  But I have to say I've been so drawn to the vintage images on another of the papers in the collection.  I ended up choosing the tag with the violet posies on one of the patterned papers and building the above page around it.  Here are a few close-up shots of my page... 

I snuck a little piece of one of my favorite Dusty Attic pieces on this page, the Chicken Wire Panel.  I just added a touch of Platinum Stickles to the chipboard to bling it up a bit. 
I really love the patterned paper that has all the cute doilies on it as well, I cut one out and mounted it on some pop dots and added one of the WP Perfect Accents (Cameo's) from the 'In Love' collection to the center.  I used some Tombow liquid adhesive to attach a strand of pearls around the cameo.  (pearls, cameo's, they just go together don't they!!) 
How to Make the Violet Posies:
As a page embellishment, I wanted to imitate the cute bouquet of violets I cut out on from the tag on one of the WP Girl Land papers.  I created the above bouquet by first choosing three colors of card stock in a dark, medium and light plum color.  I then used the Martha Stewart Hydrangea punch (pictured below) on all three pieces of cardstock.  I used mostly the larger of the three punch images (you can use the smaller bits for other parts of the page or put aside for a card).   I then used a Colorbox White chalk ink on the edges of the petals, and ran the edge of the inkpad along the center of each petal making it look like a crease.  I then turned each of the petals up a little giving it a slight curl.  (A stylus works well to curl the petals up).  Then adhere to your page working the darkest on the outside to the lightest on the inside.  Add a few punched green cardstock leaves on the outer edges to finish it off (again, I used a small Martha Stewart leaf punch for this).  I added a dab of lavender liquid pearls to the center of each bloom....done!
Have I put this collection aside yet?  Nope!  I'm working on another page to share with you all near the end of the month when I will be sharing a little peek at my scraproom!  Thanks again for popping by and for the sweet comments you all leave, your feedback is always appreciated!  (Oh, and BTW...a couple of you have asked...do my girls still dress up with the floral headbands etc.? Not so much anymore, the above pic was taken a couple summers back.  My oldest daughter (recently turned 14) for sure not, the youngest one (Meagan, in the photo above, will sometimes still dress up (she's 10)...at the moment we made her an Egyptian crown out of foil and paper mache with jewels, for a project she is doing at school about ancient civilizations.  I'll have to get a pick when she dresses up for this and scrap it! :)

Monday, May 14, 2012

Webster's Pages "Girl Land" Blog Hop!!

Welcome to the Webster's Pages "Girl Land" Blog Hop!  If this is the first place you have started then just follow the links as below 'til you finish the whole loop.  Otherwise you should have been hopping along and come to me from Kay's blog.

Today is an exciting day!  It's shipping day at Webster's Pages and the NEW gorgeous "Girl Land" Collection is available for ordering!  So if you are loving what you are seeing as you are hoppng along and know that you've just 'got to have' this beautiful collection, you can let your local scrapstore know that you'd love for them to order in this collection or you can go directly to the Websters Pages Website and order some for yourself!  The new collection has such beautiful papers, ranging from 'fresh & pretty' to 'vintage chic'!  And there are some exciting new additions to this collection, new quote/phrase stickers, calendar cards, designer journaling cards and ever so cool NEW mini-stamps!
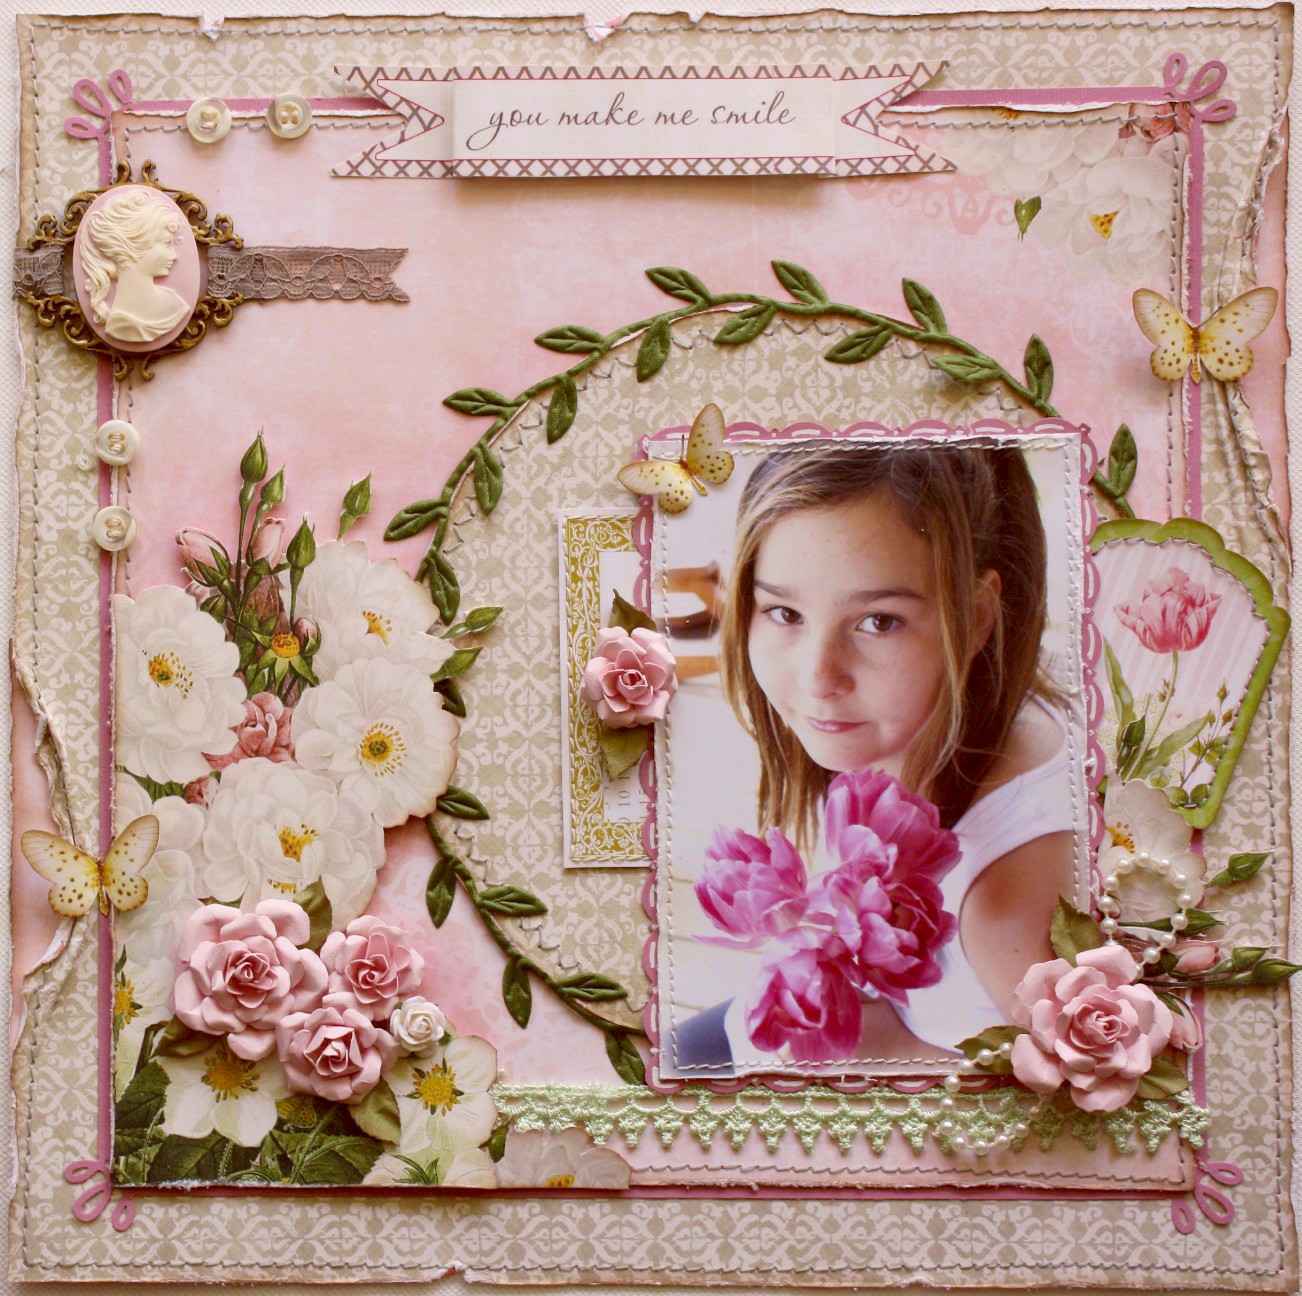
Here is a layout I just finished making last week with the new collection!  I love scrapping pink, so of course I was drawn to the pinks, creams and taupes.  I always love the beautiful botanicals that Brandin incorporates into her papers so I just had to do a bit of fussy cutting with these. 
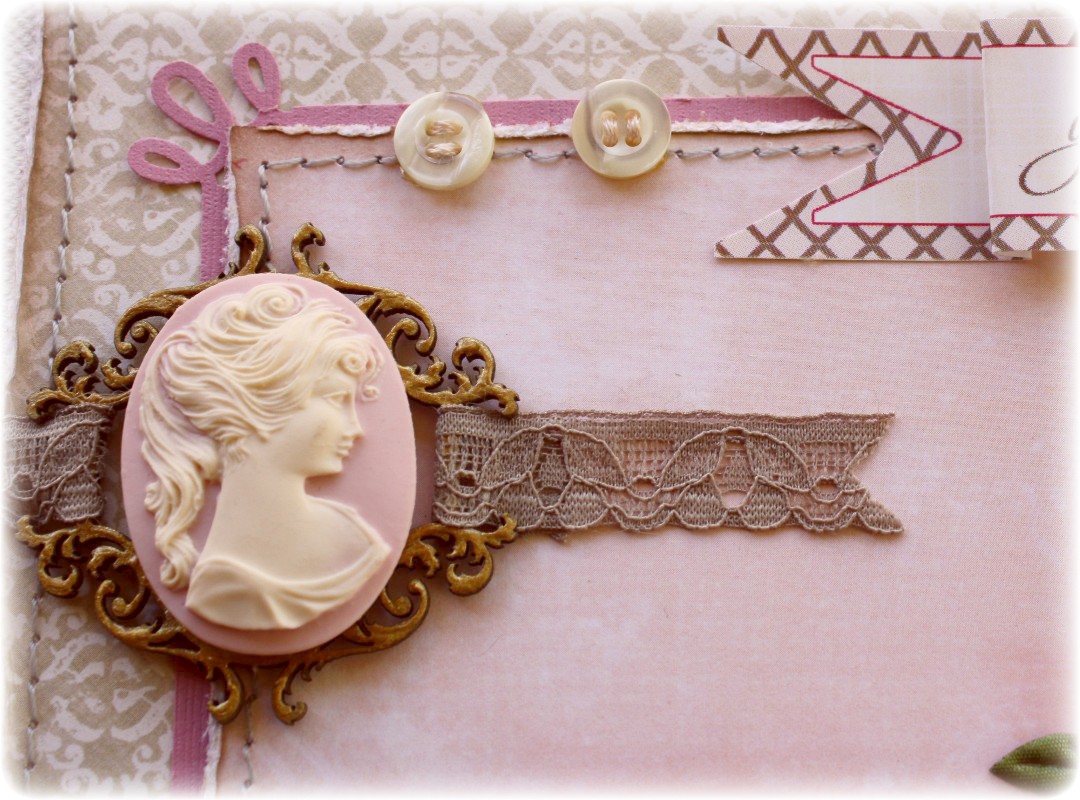
Here are a few close-up shots of my layout.  The blooms I made by hand from pale pink cardstock.  You can find a tutorial I posted a while back on how to make these HERE.
Now, here's the fun part!  Would you like to win some beautiful Webster's Pages Girl Land goodies?  Here's how it works!  There will be a total of 7 amazing prizes hidden along this hop at different blogs (including a full Girl Land collection pack!).  Simply leave a comment at each blog in order to increase your chances of winning,! The winner's will be announced at the Webster's Pages blog on Friday May 18th!

The next person's blog you will be hoping to from here is the beautiful and talented Larissa, I know she's going to wow you with her project!

Happy Hopping!! xo

Friday, May 11, 2012

Something a Little Different for me....Bo Bunny's Field Trip Friday!

So my assignment for today on the Bo Bunny design team was "Field Trip Friday".....the idea is to do a project that is unusual or different for you as a scrapper.  For me, a hard-core 12x12 layout scrapper, doing an OTP (off the Page) project would fall under that catagory.  I've done very few off the page or home decore projects, but since I've been revamping my scraproom a bit I thought I would decorate some wooden letters that I bought at Michaels recently as a decorative element for the top of the new shelves I put in the scraproom.  Sorry about the bad lighting in the top photo, I still haven't found a good way to take inside photos (flash gives too much shadow and no flash and it's too dark).  Below I took a pic of the letters on a canvas piece so you can see the details a little better.

I used a combination of the new Bo Bunny "Little Miss' collection papers and embellishments (Trinkets, chipboard, jewels and blooms!!! Yes! Bo Bunny Blooms! Yippee!), and some Et Cetera patterned paper. 


Want to see the rest of my scraproom?  I'll be posting a little peek at my scraproom on the 30th of this month :) 

Monday, May 7, 2012

**NEW!!!** Websters Pages 'Girl Land' Collection & Chat Tonight!!**

Hi everyone!  I've got some exciting news to share with you all from Websters Pages!  Brandin is coming out with her beautiful feminine mid-season collection called 'Girl Land'!!  Yep, a collection that celebrates all the things we love about being a girl!  Here is just a teensy tiny peek at the collection (and believe me, there is soooo much pretty stuff to see still! ....FYI!  Shhhh! I just got the collection in my hands a couple hours ago and this collection is GORGEOUS!!!  I was almost going to forgo the chat just so I can start playing already! LOL!....but they don't call me Gabi for nothing! lol!) 

Tonight at 9:00 EST there will be a LIVE CHAT at the Websters Pages Ning site where you will be able to chat with Brandin and the rest of the design team girls as well as with other fans of Websters Pages.  Brandin will be revealing her new collection in full and giving away amazing prizes as well!!  So if you are able come join us!  The chat is always lively and lots of fun!  Hope to see you all there!! xx

Friday, May 4, 2012

Scrap That! Kit Club & The Color Room Special Edition Palette!!

Here is my 3rd layout that I made for the Scrap That May Anniversary kit.  As I mentioned in my post a couple of days ago, this kit had a really fun crafting item in it....some polymer clay.  Since I've already shared a clay tile tutorial here at my blog, as well as an embellishment tutorial (see right side of blog) I thought I would do something a little bit different.  I decided to use the piece of clay to make a bloom embellishment. (see below).  The kit also came with a Special Edition Palette and Sketch from our favourite color site 'The Color Room!!"  Here below is the palette as well as the sketch....and of course my l/o above was my take on this Palette & Sketch. 
Here are a few close-ups of my page.   I found the perfect quote for my page on Pinterest!  Have I said how much I love that site....I'm sooo addicted! (you can check out my pins by clicking the Pinterest badge on the right side of this blog)  The journaling on my page reads...
"If I could give you
one thing in life,
I would give you
the ability
to see yourself
through my eyes,
only then would you
realize how
special you are
to me." 

And here is a little picture tutorial on the Gardenia bloom I made for this page from Polymer Clay... 
Step 1: Soften clay by kneading it in the palm of your hand for a few seconds. Make 3 small stamen's for the center of your blooms.
Step: 2: Put the 3 stamen pieces together and set aside.

Step 3: Divide the rest of your ball of clay into 6 pieces

Step 4: Take one of your clay balls and create a triangular petal. The shape does not have to be perfect, a rough, uneven edge is just fine (even preferred!). (Make 6 of these)
Step 5: Pinch the bottom of the triangle to create a little pleat and lightly ruffle the top edge of the petal.

Step 6: Attach 3 of the six petals evenly around the stamen you made. Then attach the other 3 behind the other three offsetting them from the other petals.
Step 7: You will be left with a clump of extra clay behind the bloom you made. Clip this off with a pair of scissors. (Note: you can use the left over bit of clay to make 3 leaves for behind your bloom, or you can use the leaves included in the kit for behind your flower)
 
Now You will bake your clay piece in a 270 degree Fahrenheit oven for 15 minutes. (I like to use a disposable foil tray to bake my Polymer clay since clay is toxic and should not be used on appliances you normally cook/bake with. 
Step 8: When you pull your clay piece from the oven it may still feel slightly flexible but it will harden as it cools. Now you can paint your piece to your liking....or you can do as I did here and use some Perfect Pearls or Pearlex (mica powder) to tint up your piece. Just take a paint brush and start from the center of your bloom, dust the pearl powder outwards so that it fades out. I used a pink color for the petals and a yellow/inca gold for the stamens. I used regular green acrylic craft paint for the leaves. (Give your piece a light spray of sealant to protect the finish.....or you can do as I did and use a light spritz of hair spray to protect the piece).
 
Now you can use your finished piece on your layout or home decor project. Here is a close-up of the piece on my layout. 
Hope you give this a try! Note: You can use any type of Polymer clay for this project, Sculpey, Fimo or even your craft store name brand, I've tried them all and they work equally well.  For more idea's from the Scrap That design team and a place to share your own creations be sure to check out Scrap That's Polymer Clay Challenge this month! HERE  ...Thanks for stopping by!!

Thursday, May 3, 2012

Websters Pages 'Palm Beach' & Scrapbook Adhesives Swap!

So I had a little fun working with the newest Palm Beach collection from Websters Pages this past weekend!  I wanted to do a more 'mixed media' style page and try out some fun ideas!  For my page above, I used WP Palm Beach Patterned papers.  I used a simple background paper from the collection and did a little watered down painting with some green and pink acrylic paint as a base.  I then cut out some petal designs from another of the Palm beach patterned papers and glued them to the page using this cool adhesive sheet I got from Scrapbook Adhesives.  I needed my petals to stick down right to the edges because I was planning on painting over the edges with some Gesso.  Here is a quick little step by step on how to use this adhesive.... 
You just peel back one side of the adhesive sheet and stick it to the back of the patterned paper you are using.  I drew out the design I needed for my page (petal), and then cut it out. 
Then I just peeled back the other protective sheet to reveal the adhesive underneath.  I stuck it to my project and continued with the painting, doodling and stitching. (see close-up of finished design in the photo below... 
Okay, I'm going to share with you a fun little thing I've recently found to play with on my scrap pages!  A white out pen!!  It works great as something to doodle with on a mixed media style page!  For my flower pattern I glued down the petals, used my finger to add some swipes of Gesso on the edges of the petals, added a couple of quick strokes of green paint for stems and then just used a black gel pen to add doodles to define the design more (just basically do a little scribbling! No need to be an artist, the messier the better, I even doodled little words in my scribbles!) I then used the white-out pen (this is literally a correction fluid meant for office use, made by Bic) to add extra doodles and to add my little quote/phrase (I found this quote on Pinterest....love that site!).  Here is a pic of the white out Pen I used...
 
I also used the newest cameo's from the Palm Beach collection called Perfect Accents on this page....aren't they cute??  I love this one! I mounted it on one of Dusty Attic's Cameo Sliders laser cut chipboard pieces....they are the perfect size for WP's cameo's!  I just added a little gold 3D paint to the cameo slider to give it some shimmer.

Websters Pages is doing a swap with Scrapbook Adhesives this week so be sure to check out all the fun project the girls from the Websters Pages DT and the Scrapbook Adhesives DT have been making! Thanks so much for stopping by today! 

LinkWithin

Related Posts with Thumbnails